Car Water Leaks: The Hidden Impact of Broken Welds from Accidents

Car Water Leaks: The Hidden Impact of Broken Welds from Accidents

Car Water Leaks: The Hidden Impact of Broken Welds from Accidents

Water inside your car is never a good sign — but one of the sneakiest, most overlooked causes is broken welds from a collision. Even a minor fender bender can compromise the structural welds holding your vehicle together, opening invisible pathways for water to sneak in and do real damage. From mold growth to electrical failures, the consequences can be costly, and they can develop silently for weeks or months before you ever notice.

Below, we break down exactly how broken welds cause leaks, where to look for them, the warning signs you can't afford to ignore, and what to do if your vehicle has already been compromised. It's one of the trickier entries on the list of common vehicle water leaks — precisely because it hides behind a repair that already looks finished.

100s
Factory welds bond your car into one watertight structure
24–48
Hours of trapped moisture before mold begins to grow
MISSED
Weld damage body shops routinely overlook after a repair

What Are Automotive Welds — and Why Do They Matter?

Your car is held together by hundreds of factory welds — precise, engineered joints that bond the body panels, frame, pillars, roof, floor, and firewall into a single watertight structure. They aren't just about strength; they create a seamless barrier between your cabin and the outside world. As the American Welding Society notes, automotive welding is one of the most demanding applications in manufacturing, requiring exacting tolerances to maintain both structural integrity and environmental sealing. When those welds are intact, water runs off your car the way it's supposed to. When they're not, you've got a leak waiting to happen.

How Accidents Break Welds — and Why It Causes Leaks

In a collision — even at relatively low speeds — energy travels through the body and can stress or fracture welds far from the actual point of impact. Body shops focus heavily on the cosmetic work (panels, paint, bumpers), but weld integrity at structural seams doesn't always get the same scrutiny. Here's how that translates into leaks:

Gaps and micro-cracks at seam joints: Even a hairline weld crack lets water seep through under pressure — heavy rain, a car wash, or highway driving through standing water. These gaps are nearly invisible but can channel surprising amounts of moisture.

Deformation that breaks the seal geometry: When the body flexes in a crash, panels and pillars can shift out of alignment, distorting the channels that weather stripping seats against.

Damaged or misaligned weather stripping: Broken welds around doors, window surrounds, and the trunk let the metal flex away from position, leaving the rubber without solid backing to compress against. Water bypasses the seal entirely.

REALITY: no amount of new rubber trim will fully solve a leak while the underlying weld is still distorted. New weather stripping can't seal against bent geometry — the structural issue has to be corrected first, or the leak comes right back. The NHTSA sets the structural-integrity standards that show just how critical these joints are.

The Most Common Leak Locations After a Collision

Weld failures tend to appear in predictable places. Knowing where to look helps you catch a problem early.

ROOF & PILLARS (A, B & C)

All three pillars connect to the roofline through structural welds. Damage lets water track down a pillar and drip into the cabin — usually showing at the headliner, the base of the windshield, or the floor near the front seats. Vehicles with sunroofs are especially vulnerable, since the drain channels run through the same structural zones, and a shifted A-pillar can mimic a leaking windshield.

DOOR FRAMES & WINDOW SURROUNDS

Compromised welds around a door opening let the frame flex just enough for water to slip past the seal. You'll often find it pooling on floor mats, in door-pocket storage, or running along the sill beneath the carpet.

TRUNK & REAR QUARTER PANELS

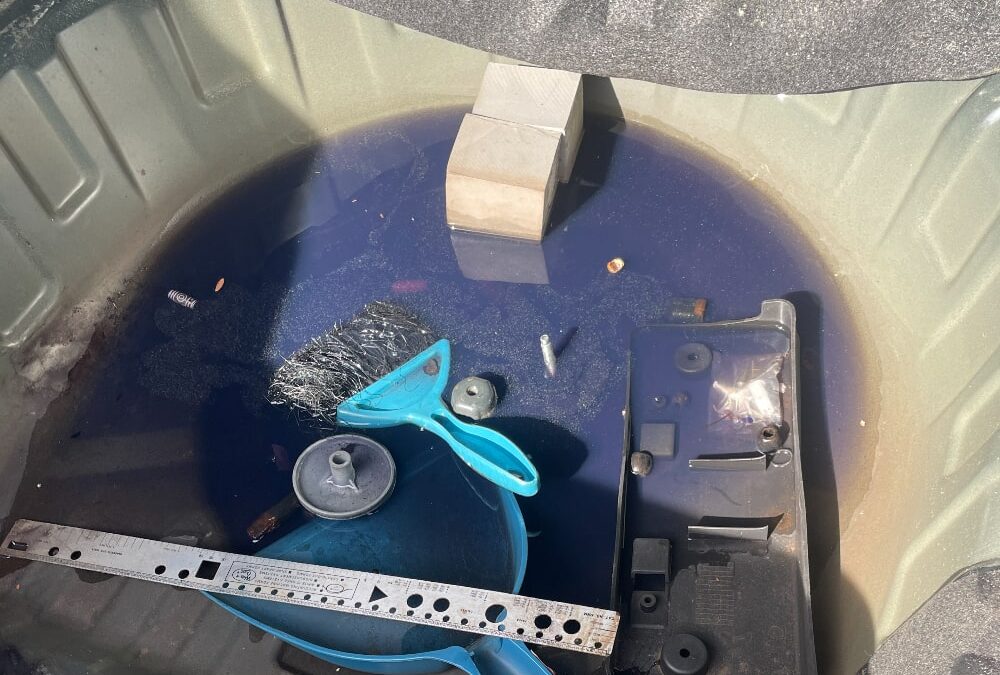
Rear-end collisions frequently damage welds in the trunk floor and rear quarter panels. Water pools under the trunk liner, soaking the spare-tire well and the foam padding underneath — a perfect mold incubator you may not discover until the smell becomes unbearable. It can also overlap with trunk vent leaks, which behave similarly.

⚠️ FIREWALL & FLOOR PANELS

This is the most dangerous spot for a weld-related leak. The firewall separates the engine bay from the cabin, and broken welds or cracked seam sealer along this zone can let water — and fumes — reach critical wiring harnesses and electronic control modules. Intrusion here has been linked to everything from phantom electrical faults to complete system failures, the kind of damage that turns a fixable problem into a very expensive one.

Warning Signs to Watch For

These are the red flags that warrant immediate investigation — especially if your vehicle has any accident history:

Musty or moldy odor

The number-one sign of hidden moisture — mold can colonize wet carpet within 24–48 hours.

Damp mats or carpet

Wet carpet after rain with the windows closed means a leak somewhere.

Rust stains at seams

Rust-colored streaks along trim or joints mark where water has been running through metal.

Windows that won't defog

Persistent condensation your HVAC can't clear signals trapped interior moisture.

Electrical gremlins

Flickering lights, balky sensors, or intermittent power windows can mean water at the wiring.

Visible drips or puddles

Water appearing after rain or a car wash is the clearest tell of all.

If you're seeing several of these and your vehicle has prior accident history, don't wait. The longer moisture sits inside the structure, the costlier the damage — and the greater the risk of mold reaching the HVAC system, where it circulates through the cabin every time you run the air. Here's why car mold deserves to be taken seriously.

What to Do If You Suspect a Weld-Related Leak

1
Get a structural inspection, not just a cosmetic one. Many general mechanics aren't equipped to evaluate weld integrity. Look for a body shop with frame and structural-repair certification that uses a body-measuring system to check alignment against OEM specs.
2
Insist on proper weld repairs. If weld damage is found, it needs a certified welder using manufacturer-approved techniques. Patch welds or smearing seam sealer over the problem are temporary fixes that fail again — often worse than the original break.
3
Replace damaged seals and weather stripping. Once the structure is corrected, any rubber that was compressed against a deformed weld zone won't seal against the restored geometry — it needs to be replaced.
4
Address the mold before it spreads. If water has been sitting inside — even briefly — remediation belongs in the repair plan, not as an afterthought. Mold doesn't stay where the water entered, and surface cleaning won't reach what's embedded in padding and foam. Real remediation means removing contaminated materials, chlorine-dioxide gas treatment (not ozone, which degrades your seals), and treating the HVAC — which is exactly why you can't just spray the smell away.
5
Monitor after repairs. Check after the first few heavy rains — run your hand along repaired seams, lift the mats, and check the trunk liner. Catching any recurrence early stops the cycle before it restarts.

A quick note on who does what: the structural weld repair itself is a job for a certified body shop — that part isn't our lane. But confirming whether water is actually getting in, tracing it to its source, and remediating the mold that follows is squarely our world. We've found leaks that dealers couldn't, and our car mold removal FAQ covers how the remediation side works.

The Bottom Line: Don't Ignore Post-Accident Water Leaks

A leak from broken welds isn't just a nuisance — it's a slow-motion problem that can turn a repairable structural issue into a mold-infested, electrically compromised vehicle that costs far more down the road. The key is connecting the dots between accident history and water intrusion before the damage compounds. If you're dealing with a musty smell, wet floors, or a car that's been in any kind of collision, get a professional to evaluate both the structural and the biological side of the damage — because where there's water, mold is never far behind.

Post-Accident Leak Turning Into a Mold Problem?

As the country's only specialists dedicated entirely to vehicle mold remediation, we trace the moisture, remove the contamination, purge the ventilation system, and verify the air you breathe — backed by a 90-day warranty and 100% mobile service across GA, SC, NC, TN, FL, and AL.

Get Your Free Assessment

Sources: American Welding Society · NHTSA · EPA Mold Cleanup Guide

Understanding and Fixing Trunk Vent Leaks

Understanding and Fixing Trunk Vent Leaks

Understanding and Fixing Trunk Vent Leaks (Before Mold Takes Over)

If you've ever popped open your trunk after a rainstorm and felt that sinking feeling — literally — you're not alone. A trunk vent leak is one of the most common and most underestimated sources of water intrusion in vehicles. Left unchecked, that hidden moisture becomes a breeding ground for mold, mildew, and rust that can quietly destroy your interior and tank your resale value.

This guide covers everything you need to know: what trunk vents are, why they leak, how to track down the exact source, and what to do when the damage is already done. Whether you're a hands-on DIYer or just trying to understand what your mechanic is telling you, this breakdown is for you — and it's one of several common ways water sneaks into a vehicle.

1-WAY
Trunk vents are one-way valves most drivers don't know exist
24–48
Hours of trapped moisture before mold begins to grow
$20
Sealant fix that can prevent a full mold-remediation bill

What Are Trunk Vents — and Why Do They Matter?

Most drivers have no idea their car even has trunk vents. These small, one-way valves are typically tucked behind the trunk's interior side panels, and their job is surprisingly important: they let cabin air escape so pressure can equalize when you open and close your doors. Without them, doors feel stiff, interior seals wear faster, and you get strange whistles and pops.

Think of it as a check valve for your trunk

Each vent has a rubber flap or foam gasket designed to let air out while keeping water, dust, and debris from getting in. When it works, you never notice it. When the flap fails, that one-way air valve quietly becomes a one-way water hole — and that's when things get wet.

Signs You Have a Trunk Vent Leak

Because the vents hide behind panels, the leak itself is usually invisible — but the symptoms aren't, once you know what to look for:

Water pooling in the trunk

Standing water or damp carpet after rain or a wash is the most obvious red flag.

Musty smell, trunk or cabin

Often the first sign moisture has sat long enough to start growing mold.

Rust on the trunk floor

Corrosion means water has been sitting long enough to break down metal — a structural concern.

Wet or moldy stored items

A damp emergency kit, jumper cables, or spare-tire cover point straight to intrusion.

⚠️ The smell doesn't stay in the trunk

Once mold takes hold back there, its odor and spores ride your HVAC system into the cabin, so a “trunk problem” quietly becomes the air you breathe up front. That's a real concern for anyone with allergies, asthma, or respiratory sensitivities — here's why car mold should be taken seriously.

Common Causes of Trunk Vent Leaks

Not all trunk vent leaks are the same, and finding the root cause saves time and money:

Aging or cracked rubber flaps: The most frequent culprit. Vent rubber degrades with heat and UV — Georgia summers are brutal on it — and once it stiffens, it can't seal.

Improper installation or factory defects: A vent that wasn't seated correctly at the factory, or after a repair, leaves edge gaps that channel water straight in.

Clogged drainage channels: When trunk drain holes pack with leaves and debris, water backs up and forces its way toward the path of least resistance — often the vent seals.

Collision damage: Even a minor rear-end impact can shift body panels a millimeter or two and break the seal. It often overlaps with broken welds from accidents, which body shops routinely miss.

How to Find and Fix a Trunk Vent Leak

1
Pull the panels and inspect. Trunk panels usually pop off with plastic trim clips. With them out, use a flashlight to check each vent for cracked rubber, crumbling foam, and gaps between the housing and the body.
2
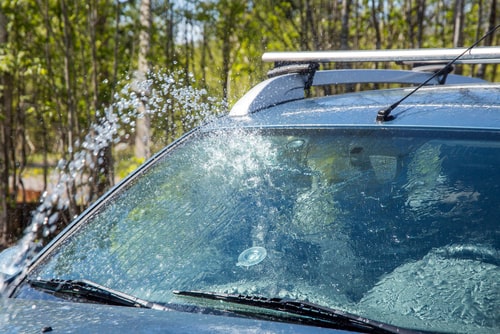
Do a water test. Have someone spray a hose around the vent area while you watch from inside. Move slowly in small sections so you can pinpoint the exact entry point, and mark it before you stop.
3
Repair or replace the vent. If it's just loose or the gasket is compressed, reseat it and secure it with a marine-grade waterproof adhesive rated for automotive rubber. If the flap is cracked, torn, or missing, replace the whole vent with a make- and model-compatible part.
4
Seal the perimeter. Run a bead of silicone-based automotive sealant around the outside edge of the housing as a secondary barrier. Avoid butyl tape alone in high heat — it can soften and fail in summer temperatures.
5
Clear the drains. Before buttoning up, blow out the trunk's drainage channels with compressed air or a small flexible brush so future moisture has a proper exit route.
6
Test, then reinstall. Run one more water test before replacing the panels. Once you're confident the fix held, reseat all the trim clips fully — a panel slightly out of position can stress the new seal.

When DIY Isn't Enough: Mold Has Already Set In

REALITY: finding and fixing the leak doesn't undo the damage already done. If water sat for more than a day or two — especially under carpet padding or in closed plastic channels — mold has almost certainly started, and household cleaners won't reach spores embedded in padding, foam, or trunk-liner seams.

Real auto mold remediation goes past surface cleaning: removing contaminated porous materials, HEPA work, and chlorine-dioxide gas treatment — which we use instead of ozone (ozone degrades rubber, and the last thing you want in a story about failed rubber seals is a treatment that attacks the good ones). In many cases the soaked padding has to be removed and replaced, since it holds mold even after the surface looks clean. It all follows the ANSI/IICRC S520 standard — and it's exactly why you can't just spray the smell away. If a musty odor lingers after drying, or you can see growth, that's the point where calling a professional isn't optional.

Preventing Trunk Vent Leaks Going Forward

Prevention is always cheaper than remediation. A few habits go a long way:

  • Inspect vents during oil changes. You don't have to pull panels every time — just press gently near the vent location to feel for give or listen for rattling.
  • Keep drainage channels clear. Leaf debris packs into drains fast, especially in fall. A quick compressed-air blow-out twice a year keeps them flowing.
  • Avoid high-pressure washing near the vents. Pressure washers force water through seals that handle rain just fine — keep the wand moving and off the trunk corners and tail-light edges.
  • Act fast at the first sign of moisture. Mold can establish in 24 to 48 hours, so the sooner you address a wet trunk, the lower the odds of turning a $20 sealant fix into a full remediation job.

Bottom Line

A trunk vent leak is easy to overlook but hard to fully undo once mold takes hold. The good news: most leaks are fixable with the right diagnosis and a few basic materials — as long as you catch them early. If you're already dealing with odor, visible mold, or water damage beyond surface dampness, don't wait. The longer moisture sits, the deeper the problem goes. Our car mold removal FAQ is a good next stop if you're weighing DIY against a pro.

Wet Trunk Already Smelling Musty? Let's Stop the Mold.

As the country's only specialists dedicated entirely to vehicle mold remediation, we trace the moisture, remove what can't be saved, purge the ventilation system, and verify the air you breathe — backed by a 90-day warranty and 100% mobile service across GA, SC, NC, TN, FL, and AL.

Get Your Free Assessment

Source: EPA Mold Course, Chapter 1
Car Door Vapor Barrier Water Leaks

Car Door Vapor Barrier Water Leaks

Car Door Vapor Barrier Water Leaks: What's Really Causing Your Wet Carpet

You've noticed it before — that soggy, musty smell every time you get into your car. Maybe you've run your hand along the carpet and felt it: wet. Not a little damp, actually wet. You've checked the sunroof, inspected the windshield seals, maybe even looked under the car. But the culprit could be something far more overlooked: your car door vapor barrier.

If water is leaking inside your car door, you're not alone — it's one of the most common and most misdiagnosed sources of interior water damage. Here's exactly what a vapor barrier does, why they fail, how to tell if yours is the problem, and what happens to your car if you ignore it.

LAST
The vapor barrier is your interior's last line of defense against door water
24–48
Hours of trapped moisture before mold begins to grow
$500
What a $50 barrier fix becomes once mold sets in

What Is a Car Door Vapor Barrier?

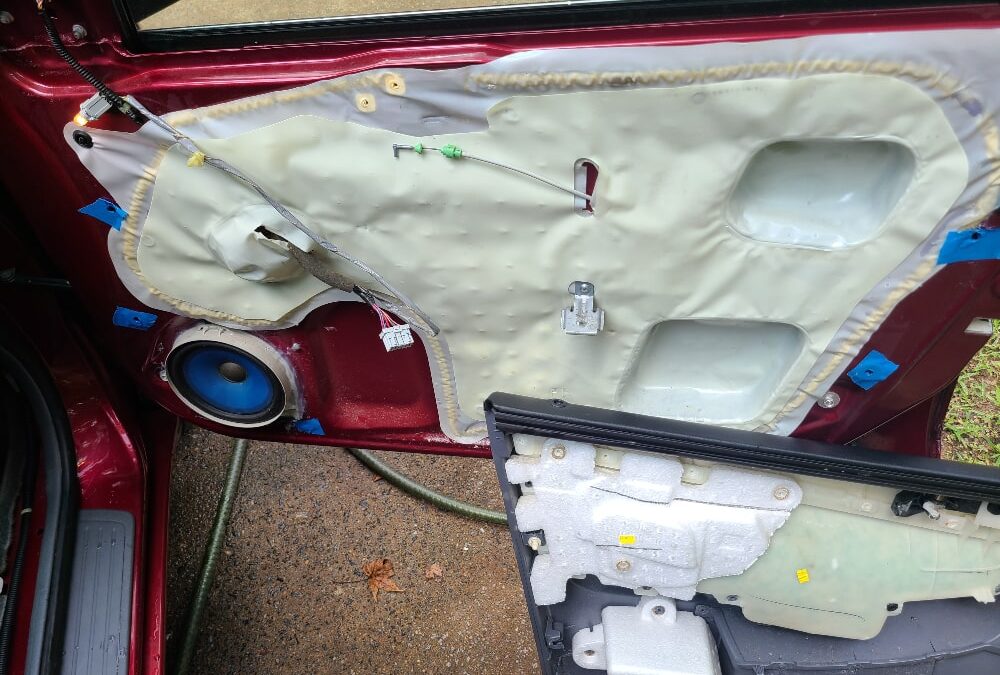
Every modern vehicle has a thin plastic sheet — sometimes called a door panel moisture barrier, door membrane, or car door plastic sheeting — sandwiched between the interior door panel and the metal door frame. This lightweight layer of polyethylene does one critical job: it keeps the water that gets into your door cavity from crossing over into your car's interior.

REALITY: water is supposed to get into your door. Rain, car-wash spray, and road splash all enter the cavity through gaps around the window channel — that's normal, and drain holes at the bottom let it flow back out. The vapor barrier is the last line of defense that makes sure that water drains down and out instead of soaking your carpet. When it fails, water gets a direct path inside every time it rains.

Why Car Door Vapor Barriers Fail

Vapor barriers are usually thin plastic bonded to the door frame with butyl rubber adhesive — that sticky black mastic. Over time, a few things break that seal:

Age and heat cycling: The adhesive dries out and loses its grip. Georgia's 90°F-plus summers are brutal on it — after years of heat, the seal cracks, peels, and pulls away from the frame.

Door panel removal: Any time a window regulator, lock actuator, or speaker is replaced, the panel comes off — and the barrier often gets torn, perforated, or re-stuck improperly. A single missed edge is all it takes.

Physical damage: Punctures from sharp objects, aftermarket speaker installs, and even aggressive cleaning can hole the membrane without anyone noticing.

Factory defects: Certain years of Ford, Chevrolet, and Honda models have shipped with barriers that don't fully seal the edges from the factory.

How to Tell If Your Door Vapor Barrier Is Leaking

Diagnosing a door leak isn't always straightforward, but these are the most reliable signs:

Wet front-side carpet

On one or both front floors, especially after rain or a car wash.

Water in the door panel

Pooling in the door pocket or along the bottom of the panel.

Musty odor after rain

A moldy smell that gets stronger after wet weather.

Saturated door foam

Damp panel foam or staining along the door sill when you press on it.

The DIY confirmation test

Remove the interior door panel, carefully peel back the vapor barrier, and look for watermarks, rust, or residue inside the door cavity. Then run a garden hose over the outside of the door while someone watches from inside — you'll see exactly where the water crosses through.

The Real Danger: Car Mold from Door Leaks

A leaking barrier doesn't just leave your carpet wet — it creates the perfect environment for mold. Carpet, foam, and the jute padding underneath are highly absorbent: once they get wet, they stay wet, and the dark, warm, humid space inside a door or under carpet is exactly where mold thrives. The EPA puts the colonization window at 24 to 48 hours — and a Georgia summer can shorten it. The species we most often find in vehicles from door leaks:

CLADOSPORIUM

The fuzzy black or green growth you'll often spot creeping along carpet edges and door-sill seams — a leading allergy and asthma trigger.

ASPERGILLUS

Frequently hides in HVAC systems and under seats, where it can distribute spores through the whole cabin every time the fan runs.

⚠️ STACHYBOTRYS (BLACK MOLD)

Rare in vehicles, but possible after long-term, untreated moisture — and in a class of its own. This is the toxin-producing black mold that makes prompt, professional remediation non-negotiable once it's confirmed.

Beyond the health concerns, mold destroys carpet, eats through foam padding, and permanently stains door panels. By the time you can smell it, you may already be looking at a real remediation job — here's why car mold should be taken seriously.

How to Fix a Leaking Car Door Vapor Barrier

Replacing a vapor barrier is a manageable repair — it just takes patience and the right materials (a replacement barrier or cut-to-fit sheeting, butyl rope caulk, and plastic pry tools). The core of the repair is resealing the perimeter of the plastic sheet with a fresh, continuous butyl bead.

1
Remove the door panel using plastic trim tools — never metal, which cracks clips.
2
Peel back the old barrier, noting where the original adhesive bead ran along the door edge.
3
Clean off all old butyl and inspect the cavity for standing water, rust, or mold growth.
4
Address any mold first. If it's present, treat it before resealing — more on that below.
5
Apply a continuous butyl bead around the perimeter, then press the new barrier in firmly, working from the center outward to eliminate air pockets.
6
Reinstall the panel and re-test with the hose. For a visual walkthrough, ChrisFix on YouTube has excellent door-panel tutorials.

Already Have Mold? Don't Just Dry It Out

REALITY: drying the carpet and spraying air freshener doesn't kill mold — it just dries the surface while the root structure stays alive in the padding and subfloor. That's exactly why you can't spray the smell away.

Proper auto mold remediation means removing and inspecting the affected carpet and padding, replacing what's contaminated, treating porous surfaces, and using chlorine-dioxide gas — which we use instead of ozone because ozone degrades the very rubber and seals your door depends on — plus a ventilation-system purge and verification, all aligned to the ANSI/IICRC S520 standard. And critically, the moisture source gets sealed before anything is reinstalled.

This is the whole reason Car Mold Guys exists — and a door vapor barrier is squarely in our lane: we find the leak, repair the barrier, and remediate the mold, backed by a 90-day warranty and 100% mobile service across GA, SC, NC, TN, FL, and AL. We've seen what a two-inch gap can do over a full rainy season. Our car mold removal FAQ covers the rest.

Don't Wait — Water Damage Compounds Fast

A small tear might seem minor, but every rainstorm makes it worse: water saturates deeper into the padding, rust forms on the door frame, and mold spreads from carpet to seats to HVAC. What starts as a $50 repair becomes a $500 remediation job. The moment you notice wet carpet, a damp door panel, or a musty smell after rain, act on it — pull the panel, inspect the barrier, and fix the seal. If mold is already in the picture, call a professional who knows the difference between surface mildew and a colony growing beneath your floor mat. Your interior is worth protecting, and your lungs even more so.

Wet Carpet and a Musty Door? We Find It, Fix It, and Clear the Mold.

As the country's only specialists dedicated entirely to vehicle mold remediation, we trace the leak, reseal the barrier, remove the contamination, purge the ventilation system, and verify the air you breathe — backed by a 90-day warranty and 100% mobile service across GA, SC, NC, TN, FL, and AL.

Get Your Free Assessment

Sources: EPA Mold Course · ChrisFix (DIY tutorials)

Best Practices for Drying Out a Wet Car

Best Practices for Drying Out a Wet Car

How to Dry Out a Wet Car Interior — Before Mold Takes Over

Few things are worse than sliding into your car and feeling that telltale squish under your feet. Whether a window was left open during a Georgia downpour, a drink got knocked over, or you've got a slow leak you didn't catch in time, a wet interior is more than uncomfortable. Left alone, trapped moisture becomes a breeding ground for mold and mildew that ruins upholstery, rots carpet padding, and fills your car with an odor no air freshener can fix.

The good news: if you act fast and follow the right steps — surface and substrate — you can dry it out completely and protect it from long-term damage. Here's how to do it right.

24–48
Hours before mold colonizes a wet interior
9
Steps to dry a car properly — surface to substrate
PADDING
The hidden layer that stays wet and breeds relapse mold

Why Speed Is Everything

Mold spores are everywhere, including inside your vehicle. Give them moisture, warmth, and an organic surface like carpet or foam, and the EPA says mold can begin colonizing in as little as 24 to 48 hours — a frighteningly short window during a humid Southern summer, when your car's interior turns into a greenhouse. The moment you find water, the clock starts. Don't wait for the weekend, and don't just throw a towel down and forget it. Work the steps below, in order.

What You'll Need

Gather first: high-quality microfiber towels, a wet/dry shop vacuum, one or two fans (box fans or air movers), a small electric dehumidifier, silica-gel or desiccant packs, plastic trim tools, an automotive upholstery shampoo, and — ideally — a sunny day or a garage you can work in.

The Step-by-Step Drying Process

1
Remove the standing water immediately. Towel up puddles on seats and panels, then use a wet/dry shop vac on carpet — it pulls water from deep in the fibers, not just the surface. Make multiple slow passes near seat tracks and under the front seats. Pro tip: water wicks back up, so come back 20–30 minutes later and vacuum again.
2
Pull back the carpet — the step most people skip. Water penetrates through the carpet into the dense jute or foam padding beneath, which holds moisture like a sponge. The carpet can feel dry on top while the padding stays soaked for days. Remove the mats, peel the carpet back at the sills, vacuum the padding, and let it air-dry fully before reinstalling.

REALITY: skipping the padding is the single most common reason a car develops mold and a musty smell weeks after the owner thought it was “dried out.” The IICRC — the body behind the water-damage standards — is clear that moisture has to be addressed at the substrate level, not just the surface. It's exactly why our own drying work always starts by pulling the trim and carpet back to reach the padding.

3
Remove all wet items. Floor mats, seat covers, gym bags, trunk liners — anything wet comes out to dry flat in the sun or a warm, ventilated space. Putting damp items back into a car you just dried defeats the whole effort.
4
Maximize airflow. Open all four doors and the trunk for cross-ventilation, and place fans at opposite ends to push dry air in and pull moist air out. No good weather? Move it to a garage and run the fans anyway — moving air beats still air every time.
5
Add a dehumidifier or desiccant. Once the bulk is out, a small electric dehumidifier run inside overnight pulls a surprising amount of residual moisture. Silica-gel packs or DampRid under the seats help with final-stage drying and ongoing prevention.
6
Use heat to accelerate evaporation. A car in direct sun dries faster — pair it with cracked windows to vent humid air. Old detailer's trick: run the heater and A/C together, so the A/C dehumidifies the air before the heater warms and circulates it.
7
Shampoo the affected fabric. Once dry to the touch, clean any soaked carpet or upholstery with an automotive shampoo, then extract it with the wet/dry vac. This removes the organic residue from dirty water — residue that mold would happily feed on even after the moisture is gone.
8
Inspect for mold and odor. After 24–48 hours, use your nose first — a musty, sour smell signals active growth before you can see it. For small spots, a 1:1 hydrogen-peroxide-and-water solution works; chlorine-dioxide odor eliminators help neutralize lingering MVOC smells. But if the smell persists, you can't just spray it away — the source is deeper.
9
Find the source and fix it. Drying a car that keeps getting wet is a losing battle. Track down the cause — a clogged sunroof drain, a failed door vapor barrier, a clogged A/C condensate drain, a leaking windshield, or one of the other usual culprits — and fix it before it undoes all your work.

When to Call a Professional

⚠️ Car mold is a health issue, not just an odor

Mold exposure can trigger respiratory problems and allergic reactions — a real concern in a sealed cabin that recirculates air onto everyone inside. It doesn't go away on its own, and air fresheners only mask it. Here's why car mold should be taken seriously.

If you've worked the steps and still have a persistent smell, visible growth, or water you can't trace, stop throwing air fresheners at it. A real remediation goes after mold at the substrate level: removing contaminated padding, chlorine-dioxide gas treatment — which we use instead of ozone because ozone degrades your rubber seals — a ventilation-system purge, and post-remediation verification, all aligned to the ANSI/IICRC S520 standard.

This is exactly what Car Mold Guys does. Rapid wet-car drying is a standalone service of ours as well as part of full remediation — backed by a 90-day warranty and 100% mobile across GA, SC, NC, TN, FL, and AL. When in doubt, call before mold gets a foothold; it's always easier and cheaper to remediate early. Our car mold removal FAQ is a good next read.

Final Thoughts

Drying out a wet car is absolutely a DIY job — if you act fast and go beyond the surface. Get under the carpet, maximize airflow, and follow through with cleaning, not just drying. Skip any of those and you'll likely be chasing a mystery smell a few weeks later. When in doubt, bring in the pros before mold takes hold.

Soaked Interior You Can't Get Ahead Of? We Dry It Right.

As the country's only specialists dedicated entirely to vehicle mold remediation, we extract the water, dry the padding at the substrate level, remediate any mold, and verify the air you breathe — backed by a 90-day warranty and 100% mobile service across GA, SC, NC, TN, FL, and AL.

Get Your Free Assessment

Sources: EPA Mold Course · IICRC Water-Damage Standards

MERV vs. HEPA: How Air Filters Work

MERV vs. HEPA: How Air Filters Work

MERV vs. HEPA: How Air Filters Actually Work

When it comes to air filters, the difference between MERV and HEPA trips up a lot of people — and choosing wrong can mean either wasted money or an underperforming system. Both trap airborne particles like dust, pollen, and mold spores, but they're rated differently, used differently, and suited to different situations. Here's a clear breakdown of how each works, when to use which, and — since clean air matters just as much inside your vehicle — what it all means for the cabin filter you breathe through every drive.

99.97%
Particles a true HEPA filter captures at 0.3 microns
1–16
The MERV scale, from basic to near-HEPA filtration
MERV 13
The EPA-recommended baseline for home air quality

What Is a MERV Rating?

MERV stands for Minimum Efficiency Reporting Value, a standardized rating developed by ASHRAE. The scale runs from 1 to 16 and measures how effectively a filter captures particles from 0.3 to 10 microns. Think of it like SPF for sunscreen — the higher the number, the more protection:

MERV 1–4: Entry-level. Catches lint, dust mites, and pollen — window AC units and basic furnace filters.

MERV 5–8: Mid-range. Captures mold spores, pet dander, and finer dust — a solid choice for most homes.

MERV 9–12: Higher efficiency. Blocks lead dust, auto emissions, and fine particulates — good for mild allergy sufferers.

MERV 13–16: Near-HEPA. Traps bacteria, smoke, and some viruses — hospitals, commercial buildings, high-demand homes.

For most homes, a MERV 8 to MERV 13 filter strikes the right balance between air quality and HVAC compatibility. The EPA recommends MERV 13 as a strong baseline that improves indoor air without overburdening most residential systems.

What Is a HEPA Filter?

HEPA stands for High-Efficiency Particulate Air. Unlike MERV, which is a rating scale, HEPA is a strict performance standard: to qualify, a filter must capture at least 99.97% of all airborne particles 0.3 microns or larger — pollen, mold spores, dust-mite debris, pet dander, bacteria, and even some viruses. Originally developed during the Manhattan Project to contain radioactive particles, HEPA is now the gold standard for critical filtration, found in hospital operating rooms, pharmaceutical cleanrooms, high-end air purifiers, allergy vacuums, and aircraft cabin systems.

MERV vs. HEPA: The Core Differences

These aren't competing products you swap into the same slot — they work in different contexts. On efficiency, a MERV 16 filter captures roughly 95% of particles in the 0.3–1.0 micron range; true HEPA captures 99.97%. That gap matters most for immunocompromised people or during wildfire-smoke events. On placement, MERV filters live inside central HVAC ductwork for whole-home coverage, while HEPA filters live in standalone purifiers — most home HVAC systems can't handle HEPA's airflow resistance without straining the blower. And on cost, MERV is far cheaper ($15–$30 for a quality MERV 13) versus $40–$100-plus for HEPA purifier filters.

Head-to-Head Comparison

Feature MERV HEPA
Efficiency Varies by rating (MERV 1–16) 99.97% at ≥0.3 microns
Best application Whole-home HVAC Portable purifiers, critical spaces
Typical cost $5–$30 per filter $40–$100+ per filter
Airflow impact Low to moderate High — needs compatible system
Replacement Every 1–3 months Every 6–12 months
Best for General air quality, allergens Severe allergies, asthma, immunocompromised
DIY install Yes — standard slot Purifiers yes; whole-home no

REALITY: more is not always better. Jumping to the highest MERV you can find can backfire — if your system isn't rated for it, the added airflow resistance strains the blower, raises energy bills, shortens equipment life, and can actually worsen circulation. Always check your HVAC manufacturer's recommendation before upgrading.

Which Filter is Right for You?

Choose MERV if…

  • You're filtering through a standard residential or commercial HVAC system
  • You want better whole-home air quality without major cost or modifications
  • You have mild to moderate allergy concerns
  • You want a cost-effective, scalable solution

A MERV 13 filter is the sweet spot many HVAC pros and the EPA recommend — strong particle capture, broad compatibility.

Choose HEPA if…

  • Someone in your home has severe allergies, asthma, or a compromised immune system
  • You live with frequent wildfire smoke or heavy outdoor pollution
  • You want a room-level purifier to supplement HVAC filtration
  • Your system is specifically built to handle HEPA-level resistance

For most households, the best approach is both: a MERV 13 in the HVAC plus a portable HEPA purifier in the bedroom.

Your Car's Cabin Air Filter: the MERV That Touches You Daily

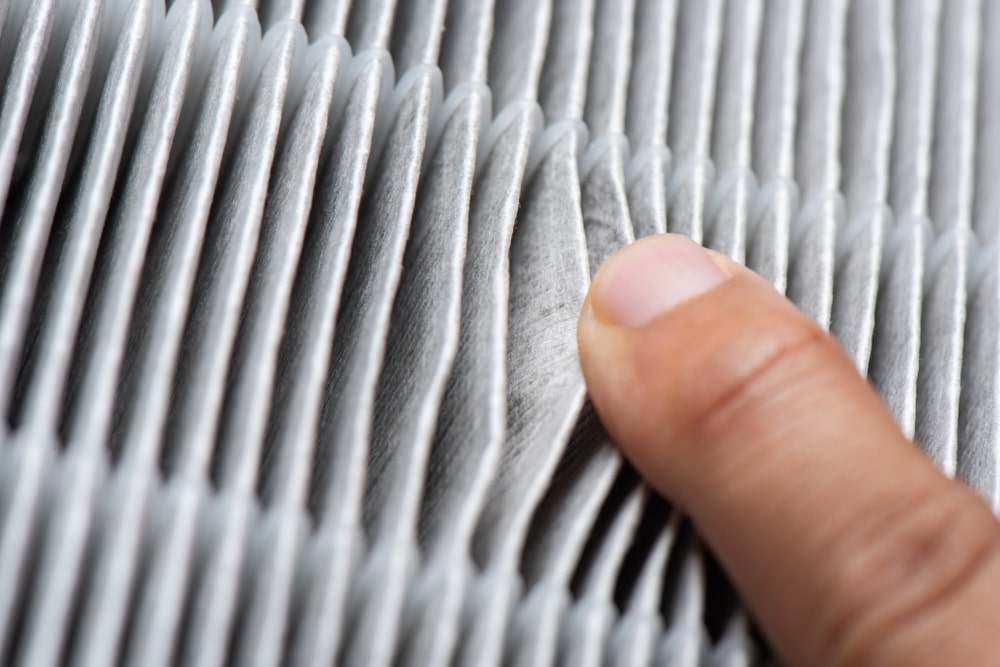
Here's the part most filter guides skip: your car has an air filter too. Tucked behind the glove box, the cabin air filter cleans the air your vents push onto you — and most factory cabin filters are basic, low-grade particulate media that let finer particles, including mold spores, slip right through.

The Filter You Breathe Through Every Commute

As part of every remediation, we replace the cabin air filter with a MERV 13-grade filter and disinfect the housing — because a high-rated filter is only as clean as the system it sits in.

That last point matters. A premium cabin filter does nothing if the ductwork behind it is already contaminated — the HVAC system is one of the most common mold reservoirs in a vehicle, which is why our full vehicle mold remediation pairs a fresh filter with a full ventilation-system purge. Filtration captures particles, but it can't fix a contamination source — that's the whole reason you can't filter or spray a moldy car clean, and why cabin air quality is worth taking seriously.

Pro Tips for Any Air Filter

  • Size matters. An ill-fitting filter lets unfiltered air bypass it entirely. Measure the slot precisely and match the exact dimensions.
  • Change on schedule. A clogged filter becomes a restriction, not a protector. Homes with pets or dusty conditions may need monthly changes.
  • Combine strategies. Filtration is one piece — pair it with source control: manage humidity, use exhaust fans, and minimize chemical off-gassing.
  • Match the contaminant. Particulate filters miss gases and odors; for mold smells or VOCs, add an activated-carbon filter alongside your MERV or HEPA media.

The Bottom Line

There's no single winner in MERV vs. HEPA — only the right answer for your situation. MERV offers versatility, affordability, and whole-home coverage; HEPA delivers elite capture for critical environments and serious respiratory needs. For most homes, a MERV 13 in the HVAC plus a HEPA purifier in the bedroom is the best of both worlds. And don't forget the smallest, most personal filter you own — the one in your car. Upgrading from a bargain-bin filter to a rated solution, at home and in the cabin, is one of the simplest things you can do for the air you breathe. Curious what a full vehicle treatment involves? Our car mold removal FAQ walks through it.

Musty Smell From Your Vents? A New Filter Won't Fix the Source.

As the country's only specialists dedicated entirely to vehicle mold remediation, we purge the ventilation system, remove the contamination, install a MERV 13-grade cabin filter, and verify the air you breathe — backed by a 90-day warranty and 100% mobile service across GA, SC, NC, TN, FL, and AL.

Get Your Free Assessment

Sources: ASHRAE · EPA Indoor Air Quality

Car Water Leaks the Problem with Faulty Windshields

Car Water Leaks the Problem with Faulty Windshields

Is Your Windshield Leaking Water Into Your Car?

Few things are more frustrating than discovering a soggy carpet or waterlogged dashboard — and for thousands of vehicle owners every year, the culprit is hiding in plain sight: a faulty or improperly installed windshield. A windshield leak can start as a minor annoyance and quietly escalate into a serious, expensive problem.

Here's exactly how windshields let water in, the warning signs to watch for, the real consequences of ignoring it, and how to fix or prevent a leaking windshield before it becomes a disaster. It's one of the trickier entries on the list of common vehicle water leaks — because the damage shows up far from the glass itself.

24–48
Hours before mold colonizes a wet interior
#1
Improper installation is the top cause of windshield leaks
MDAT
Minimum drive-away time a fresh seal must cure before driving

Why Windshields Are a Common Source of Water Leaks

Your windshield isn't just glass — it's a structural component, bonded to the frame with a specialized urethane adhesive that forms a watertight seal. When it's intact, rain and car-wash water stay outside where they belong. When it fails, water finds a way in. And unlike factory windshields installed under controlled conditions, replacement windshields are a far more common source of leaks — the Auto Glass Safety Council notes that improper installation is a leading cause, and not every glass shop follows the established standards. The usual reasons a seal fails:

Improper installation: The number-one cause. A rushed job, the wrong adhesive, too little urethane, or inadequate cure time leaves gaps between the glass and the pinch weld — invisible channels straight into the cabin.

Failed or aging adhesive: Even a perfect install degrades over time. UV, Georgia's intense heat, freeze-thaw cycles, and the constant flex of driving all break down the urethane.

Pinch-weld or frame damage: After a collision or bodywork, a warped, rusted, or poorly repaired frame makes a uniform seal nearly impossible — often overlapping with broken welds from accidents.

Chips and edge cracks: Damage near where the glass meets the seal compromises the bond, and water will exploit even the smallest pathway.

Warning Signs Your Windshield Is Leaking

Catching it early is critical — the longer water has access, the more damage accumulates. Watch for:

Damp carpet near the A-pillars

Wet floor under the dash or beside the windshield supports.

Stains down the A-pillar trim

Water streaks running down the trim or across the dash.

Windows that won't defog

Persistent condensation even after the defroster runs.

Musty, mildew odor

Often the first sign moisture has been present long enough for mold.

Drips at the windshield edges

Visible wet spots during heavy rain or after a car wash.

Bubbling headliner

Peeling or sagging material near the top of the windshield.

The Real Consequences of a Leaking Windshield

A leaking windshield sets off a chain reaction that can touch nearly every system in your vehicle.

INTERIOR & UPHOLSTERY DAMAGE

Water soaks carpet, seat foam, and headliner, then saturates the padding and insulation beneath — a persistently damp layer that's nearly impossible to fully dry without professional equipment.

⚠️ MOLD & MILDEW GROWTH

This is where a water leak becomes a health hazard. A warm, enclosed cabin full of fabric and foam is ideal for mold, which can take hold within 24–48 hours and produce the MVOCs behind that musty smell — and respiratory irritation, especially for those with allergies or asthma. Here's why it should be taken seriously.

ELECTRICAL SYSTEM MALFUNCTIONS

Wiring, sensors, and control modules sit behind the dash, right in a windshield leak's path. Shorts can affect everything from infotainment to airbag sensors and ABS — and some faults don't appear immediately, making them hard to trace back to the leak.

RUST & STRUCTURAL CORROSION

Water reaching the floor pan and frame eventually causes rust in the floorboards, rocker panels, and firewall — weakening structural integrity, creating potential safety issues, and tanking resale value.

REDUCED VISIBILITY & SAFETY

Excess interior moisture causes persistent fogging — a genuine road-safety risk, especially at night or in bad weather.

How to Fix a Leaking Windshield

The glass work here is a job for a certified auto glass technician — not a DIY reseal. Here's how the repair should go:

1
Identify the leak point. With someone inside, slowly run a hose along the windshield edges and watch for drips. A glass shop can pinpoint it precisely with leak-detection dye or an electronic moisture meter.
2
Choose the right approach. Minor edge gaps can be sealed with fresh urethane in place; widespread adhesive failure means removing the glass, stripping the pinch weld, and reinstalling correctly; a rusted pinch weld needs bodywork first; edge cracks usually mean replacement.
3
Allow proper cure time. Urethane has a minimum safe drive-away time (MDAT) — usually one to several hours. Confirm it with your installer and don't rush it.
4
Address the interior water damage. Fixing the glass stops new water — it does nothing for what's already inside. Soaked carpet padding and insulation need professional drying, and any mold needs remediation.

REALITY: driving before the urethane cures is one of the most common ways a fresh seal fails. The body flexes as you drive, and a not-yet-cured bond can break before it ever sets — putting you right back where you started. Respect the MDAT.

Where Car Mold Guys Comes In

REALITY: resealing the windshield turns off the faucet — it doesn't undo the water that already soaked in, or the mold that started growing. Those are two separate jobs, and skipping the second is why so many “fixed” cars still smell musty.

A windshield reseal is one of the few leaks we leave to the glass pros — but the water damage and mold it leaves behind is exactly our world. Real remediation means removing contaminated padding, chlorine-dioxide gas treatment (not ozone, which degrades your seals), a ventilation-system purge, and verification — all aligned to the ANSI/IICRC S520 standard. It's why you can't just spray the smell away. Car Mold Guys is 100% mobile across GA, SC, NC, TN, FL, and AL, backed by a 90-day warranty — and our FAQ covers the details.

Preventing Windshield Leaks Before They Start

  • Vet your installer. Choose an AGSC-certified shop that uses OEM or OEM-equivalent adhesive systems.
  • Inspect the edges seasonally. Look for lifting, separation, or discoloration of the seal — especially after harsh winters or brutal summers.
  • Act on chips and cracks immediately. A chip is a quick fix; left alone it becomes a crack, and a crack near the seal edge is a leak waiting to happen.
  • Re-check after collision repair. Confirm the windshield seal was inspected and resealed if the surrounding panels were worked on.
  • Stay ahead of other entry points. Scan for other common leak sources while you're at it — they often travel together.

The Bottom Line

A windshield leak is rarely just about the windshield — it's about everything the water touches after it gets in: your carpet, your padding, your wiring, your frame, and potentially your health. Caught early, it's very fixable. Caught late, it's costly and complicated. If you're dealing with musty odors, damp carpet, or visible mold from a leak, get the glass resealed by a pro and the interior properly remediated — act at the first sign of trouble.

Windshield Resealed, but the Car Still Smells Musty?

Once the glass is fixed, that's our cue. As the country's only specialists dedicated entirely to vehicle mold remediation, we dry the interior, remove the contamination, purge the ventilation system, and verify the air you breathe — backed by a 90-day warranty and 100% mobile service across GA, SC, NC, TN, FL, and AL.

Get Your Free Assessment

Sources: Auto Glass Safety Council · EPA Mold Cleanup Guide

Detecting Mold in a Car

Detecting Mold in a Car

How to Detect Mold in Your Car: Warning Signs, Health Risks & What to Do Next

That strange smell every time you climb in? It might not be old fast-food wrappers or a forgotten gym bag. If a musty, earthy odor lingers in your vehicle — especially after rain or humid weather — there's a real chance you're dealing with mold. And if you are, ignoring it isn't an option.

Car mold is more common than most drivers realize, and it can appear in any vehicle regardless of age. From a leaky door seal after a Georgia thunderstorm to a wet umbrella left on the floorboard, it doesn't take much for spores to take hold. Catching it early can save you thousands in remediation costs — and protect your health. Here's every warning sign, the real risks, and exactly what to do if you find it.

24–48
Hours before mold takes hold in a damp interior
5
Key warning signs every driver should know
MVOCs
The gases active mold releases — what that musty smell really is

Why Cars Are a Breeding Ground for Mold

The EPA notes that mold thrives wherever there's moisture, organic material, and limited airflow — and your car checks all three boxes. Interiors are lined with fabric, foam, and carpet that soak up water and hold it, while the sealed cabin traps humidity. Nearly every car mold problem traces back to a water leak; common entry points include:

Leaky door or window seals — one of the most frequent culprits.

Clogged sunroof or moonroof drains — water backs up and overflows inside.

Wet items left inside — umbrellas, gym bags, towels.

Flood or storm damage.

AC condensate drains that aren't draining properly.

Spilled drinks or food left untreated.

5 Key Warning Signs of Mold in Your Car

1
A persistent musty or earthy smell. Usually the first sign — often strongest when the AC kicks on. Don't write it off as "old car smell": that odor is microbial volatile organic compounds (MVOCs), gases released by active mold as it feeds. If you smell it, the mold is alive and spreading — which is exactly why you can't just spray it away.
2
Visible spots or discoloration. Green, black, or white spots on fabric and carpet; dark staining around seams and under mats; fuzzy growth on trim near vents. Mold's color hints at the type you're dealing with — and it hides, so check under seats, in the trunk, and along the door bases.
3
Evidence of water damage or dampness. Wet carpet when it hasn't rained, windows that won't defog, stiff or crunchy seat foam, rust or water-stain lines on floor panels. Any history of flooding or a leaky sunroof means you should dry it thoroughly and treat it as a mold risk until inspected.
4
Allergy-like symptoms inside the car. One of the most overlooked clues is how you feel: sneezing, itchy or watery eyes, skin irritation, headaches, or brain fog that ease once you get out. Your HVAC circulates spores through the whole cabin, so symptoms that spike during your commute are a red flag.
5
Respiratory issues or worsening asthma. Beyond allergies, prolonged exposure can bring wheezing, shortness of breath, chest tightness, or worsening asthma. The longer mold grows, the higher the spore concentration you breathe each drive — this is not something to wait out.

Where to Look First

High-risk hotspots to inspect

Carpet and floor mats (under seats and in the trunk); seat foam and fabric, especially in seams; the headliner, where mold often grows unseen before staining shows; the AC evaporator and air ducts behind that "AC mold smell"; dashboard vents; door panels and sill plates where water pools; and the spare-tire compartment, which is easy to forget and prone to trapping moisture.

How to Test for Mold in Your Car

If you suspect mold but can't see it, you have two options. Mail-in test kits (a petri dish you expose inside the car, then send to a lab) can confirm spores are present. A professional inspection goes further — locating hidden colonies in foam, ducts, and behind panels, and assessing the cabin air — which matters most when mold is suspected in the HVAC system or out of sight.

REALITY: a test kit tells you mold is present — not where it is or how much. When mold is already visible or you can smell it, testing rarely changes anything; what actually matters is finding the moisture source and removing the contamination. Much of the worst growth is the kind you can't see — trapped in the padding under the carpet.

What to Do If You Find Mold

⚠️ Don't make it worse

Don't bleach it, mask it with air fresheners, or just dry it out and hope. DIY approaches almost always miss hidden colonies — and scrubbing disturbs spores, spreading contamination further through the cabin.

Real car mold remediation treats the problem at the source, not the surface:

  • Find the moisture source. Hydro/leak testing to locate the intrusion — finding and repairing leaks is the specialty that stops mold from coming back.
  • Remove contaminated padding. Saturated foam can't be cleaned in place — it comes out.
  • Treat with chlorine dioxide. A penetrating gas treatment, not ozone (which degrades rubber seals).
  • Purge the ventilation system and replace the cabin air filter with a MERV 13-grade filter — since all your cabin air passes through it.
  • Verify the result, aligned to the ANSI/IICRC S520 standard.

Speed matters: the IICRC recommends remediation begin within 24–48 hours of discovering moisture. Want the short version of all of this? Our car mold removal FAQ covers the most common questions.

Smell It, See It, or Sneezing Every Commute?

As the country's only specialists dedicated entirely to vehicle mold remediation, we find the leak, remove the contamination, treat with chlorine dioxide, purge the ventilation, and verify the air you breathe — mobile to your door, backed by a 90-day warranty across GA, SC, NC, TN, FL, and AL.

Get Your Free Assessment

Sources: EPA Mold Course · IICRC

Stachybotrys – Black Mold

Stachybotrys – Black Mold

Black Mold in Your Car: Everything You Need to Know About Stachybotrys

If you've noticed a dark, slimy patch on your car's seats, carpet, or headliner — and a musty smell that won't quit — you may be dealing with one of the most notorious molds on the planet: Stachybotrys chartarum, better known as black mold. This isn't a problem you can spray with a bottle of air freshener and forget. Left untreated, toxic black mold in your car can put your health at real risk every time you turn the key.

Here's exactly what Stachybotrys is, why it thrives in vehicles, what it can do to your body, and what to do if you find it — without the hype, because the real picture is serious enough on its own.

24–48
Hours of moisture before mold can colonize a surface
TOXIC
The one black mold that genuinely earns the name
S520
The professional standard safe removal follows

What Is Stachybotrys Chartarum?

Stachybotrys is a genus of filamentous fungi — molds that grow in long, thread-like structures. Its most infamous member, Stachybotrys chartarum, earned the nickname "toxic black mold" for its dark greenish-black color and its ability to produce dangerous compounds called mycotoxins. It's commonly found in water-damaged buildings, and the same holds for vehicles — which can be worse environments than homes because they're so enclosed and poorly ventilated. Not every black-colored mold is this one, though; it's worth understanding whether the black mold you're seeing is actually toxic, since color alone doesn't determine danger.

REALITY: Stachybotrys is a slow grower — but when it takes hold, it digs in deep, into carpet fibers, the padding beneath your seats, even headliner foam. By the time you can see it, a significant colony is often already established below the surface.

Why Black Mold Loves Your Car

Your vehicle is close to a perfect environment for Stachybotrys. Four things stack the deck:

High cellulose content: Stachybotrys feeds on cellulose-rich materials, and your interior is full of them — the jute backing under the carpet, pressed-wood trim, fabric seats, and headliner.

Trapped moisture: A leaky sunroof seal, a cracked weatherstrip, a clogged AC drain, or one forgotten wet umbrella is enough to start growth.

Limited airflow: Parked for hours at a time, a sealed cabin lets humidity spike with nowhere to escape — especially in a climate like Georgia's.

Flood and water damage: Flash flooding, heavy rain, or a bad window seal at the car wash can soak interior materials that, left wet, grow mold within days.

Health Risks: What Toxic Black Mold Can Do

Stachybotrys produces trichothecene mycotoxins — among the most studied and potentially harmful compounds made by any mold. The National Institutes of Health has published extensive research on mycotoxin exposure. More common, milder symptoms include:

  • Nasal and sinus congestion, sneezing, runny nose
  • Persistent cough or throat irritation
  • Skin irritation or rash; watery, itchy, or red eyes
  • Headaches that worsen during or after driving; fatigue

⚠️ When exposure becomes serious

For people with weakened immune systems, asthma or other respiratory conditions, or prolonged daily exposure, effects can escalate:

Chronic respiratory issues (persistent bronchitis, wheezing, shortness of breath); neurological symptoms such as memory problems, difficulty concentrating, and mood changes; in rare, extreme cases pulmonary hemorrhage, a particular concern for infants; and liver and kidney stress linked to prolonged mycotoxin exposure in animal studies.

Risk varies a great deal by individual, the extent of colonization, and time spent in the vehicle — a delivery driver in an affected van eight hours a day faces a very different picture than a 20-minute commuter. But if you've had unexplained headaches, brain fog, or respiratory symptoms that ease when you're out of your car, don't ignore that pattern. It's worth taking seriously.

How to Identify Black Mold in Your Car

Dark patches

Green, black, or grayish growth on seats, carpet, trunk liner, and around seals — slimy when active, powdery when dormant.

A strong musty odor

An earthy smell that hits you the moment you open the door is one of the most reliable early signs.

Symptoms only while driving

Sinus flare-ups that appear specifically in the car make mold a top suspect.

A history of water intrusion

A past flood, leak, or undried spill means mold is possible even before you can see it.

For definitive identification, professional surface sampling or air-quality testing can confirm the species present.

Can You DIY Black Mold Removal?

The honest answer: not effectively, and not safely.

REALITY: bleach, vinegar, and store-bought sprays can't reach into carpet backing, seat foam, or headliner — exactly where Stachybotrys lives. They kill what you see and leave the root system and mycotoxins intact. Worse, scrubbing a colony without containment releases a concentrated burst of spores into the cabin air you'll breathe on your next drive. It's the core reason you can't just spray the smell away.

The IICRC S520 standard for professional mold remediation exists for good reason. Done properly, remediation involves:

  • Containment and air scrubbing — negative air and HEPA filtration to capture airborne spores before they spread.
  • Removing contaminated materials — saturated foam padding can't be salvaged in place.
  • Chlorine-dioxide gas treatment — it penetrates where sprays can't, and unlike ozone it won't degrade your rubber seals.
  • Purging the ventilation system and replacing the cabin filter with a MERV 13-grade filter.
  • Post-remediation verification to confirm clearance, aligned to ANSI/IICRC S520.

Keeping It From Coming Back

Once your vehicle is professionally remediated, prevention is mostly moisture management:

  • Fix leaks immediately. Inspect sunroof drains, door seals, and windshield gaskets at the first sign of water intrusion.
  • Keep the AC drain clear. A clogged evaporator drain is a leading cause of mold under the dash.
  • Use desiccant absorbers in the cabin during humid months, and air the car out on dry days.
  • Never leave wet items inside — towels, umbrellas, and gym bags create ideal conditions.
  • Act within 24–48 hours of any water event — dry it thoroughly, because that's all the head start mold needs.

The Bottom Line

Stachybotrys chartarum isn't a mold you can ignore or mask with an air freshener. It's a potentially serious health hazard that warrants professional assessment and remediation — especially in the confined space of a vehicle, where you and your family breathe the same recirculated air day after day. If you've spotted suspicious growth, noticed an unexplained musty odor, or had symptoms that clear up when you're out of the car, get it checked by a certified specialist. Our FAQ is a good place to start.

Think You've Found Black Mold in Your Car?

Don't disturb it — let the specialists at Car Mold Guys handle it safely. As the country's only company dedicated entirely to vehicle mold remediation, we contain it, remove the contamination, treat with chlorine dioxide, purge the ventilation, and verify clearance to S520 — mobile to your door, backed by a 90-day warranty across GA, SC, NC, TN, FL, and AL.

Get Your Free Assessment

Sources & further reading: EPA Mold Course · NIH Mycotoxin Research · IICRC S520 Standard

Is All Black Mold Toxic?

Is All Black Mold Toxic?

Is All Black Mold Toxic?

You spot a dark, fuzzy patch on your car's carpet, seat, or headliner. Your stomach drops. "Is that black mold?" You've heard the horror stories — health problems, expensive remediation, families displaced from homes. But before you panic, take a breath. The reality of black mold is more nuanced than the headlines, and knowing the difference between scary-looking and genuinely dangerous can save you time, money, and a lot of stress.

Here's the truth: not all black mold is toxic. But that doesn't mean you should ignore it — especially in the confined space of a vehicle.

1
Of many dark molds, only Stachybotrys truly earns "toxic"
TOXINS
Mycotoxins cause harm — the mold itself isn't "toxic"
24–48
Hours of moisture before any mold can take hold

What Is "Black Mold," Exactly?

"Black mold" isn't a single species — it's a general term for any mold that looks dark black or greenish-black. Thousands of mold species exist, and plenty happen to be dark. The one that usually earns the "toxic black mold" title is Stachybotrys chartarum, which thrives in persistently damp, cellulose-rich materials. The catch: you can't tell Stachybotrys apart from a dozen other dark molds just by looking — which is exactly why color alone doesn't tell you whether mold is dangerous.

Toxic vs. Non-Toxic: the Real Difference

The mold isn't toxic — what it can produce is

"Toxic mold" is a bit of a misnomer. Certain species produce chemical compounds called mycotoxins, and those cause the harm. Think of a bee versus bee venom: the bee itself isn't the danger; it's what it can produce under the right circumstances. And even species that produce no mycotoxins can still trigger allergies and respiratory irritation — so "non-toxic" never means "harmless."

Common Black Mold Species: a Closer Look

The dark-colored molds you're most likely to encounter — in a home or a car:

⚠️ STACHYBOTRYS CHARTARUM

Most Toxic

The one people mean by "toxic black mold." Slimy and dark greenish-black, it loves long-wet, cellulose-rich material — in a car, that's soaked carpet backing and padding from a chronic leak. It's relatively rare, but it's the real concern because it can produce trichothecene mycotoxins. Here's the full breakdown on Stachybotrys.

ASPERGILLUS NIGER

Common and black to dark brown, found on AC units, damp surfaces, and food left to rot in the car. Generally lower-risk than Stachybotrys, but it can cause aspergillosis — a lung infection — in people with weakened immune systems. The World Health Organization classifies certain Aspergillus species as opportunistic pathogens.

CLADOSPORIUM

One of the most common molds in the world, olive-green to black, and able to grow in warm or cold conditions — window seals, under trim, around vents. Non-toxic in the traditional sense, but a well-documented trigger for allergies and asthma, especially in children.

ALTERNARIA

Dark and velvety, one of the most prevalent outdoor molds that also thrives indoors and in damp car interiors. Like Cladosporium it's a major allergen that can worsen respiratory conditions — but it doesn't produce mycotoxins.

Who Is Most at Risk?

Exposure to black mold — whatever the species — can cause persistent coughing or wheezing, nasal congestion, itchy or watery eyes, skin irritation, headaches, and fatigue. Severity depends on the mold type, the spore or mycotoxin concentration, how long you're exposed, and your own health. Some people are considerably more vulnerable:

Higher-risk individuals: children and infants; elderly adults; people with asthma or chronic respiratory conditions; and anyone with a weakened immune system — for example, those undergoing chemotherapy, organ-transplant recipients, or people living with HIV/AIDS.

In rare cases of prolonged exposure to Stachybotrys at high mycotoxin levels, more serious neurological symptoms — memory issues, mood changes, trouble concentrating — have been reported, though the American Academy of Allergy, Asthma & Immunology notes that a direct causal link remains an area of ongoing research. Either way, it's worth taking seriously in a space you breathe in every day.

How to Identify Black Mold in Your Car

1
Look for visible growth. Check moisture-prone spots: carpet and floor mats (under seats and in the trunk), seat seams, the headliner, and around AC vents and door sills. Slimy or powdery dark patches warrant a closer look.
2
Trust your nose. A persistent musty, earthy odor — even with nothing visible — is a strong sign of hidden growth under the carpet or inside the HVAC.
3
Find the moisture source. Mold doesn't appear randomly. If you spot dark growth, look for what's feeding it — a leak at a sunroof drain, door seal, or AC drain, or past water damage.
4
Test, don't guess. Home test kits confirm that spores are present but usually can't identify the species. Only a professional inspection with lab analysis tells you whether it's Stachybotrys or something milder — more on detecting car mold here.

Prevention: Stop It Before It Starts

  • Fix leaks fast. The EPA recommends addressing water within 24–48 hours — the same window that decides whether mold colonizes your car.
  • Dry thoroughly after any water event. Don't just blot the surface; the padding underneath holds moisture — dry it right.
  • Keep the AC drain clear so condensation exits the car instead of pooling under the dash.
  • Never leave wet items inside — towels, umbrellas, and gym bags create ideal conditions.
  • Inspect leak-prone spots seasonally — sunroof drains, door seals, and window channels, especially before rainy months.

When to Call a Professional

For a home, the EPA suggests calling a pro once mold covers more than about 10 square feet. But a car isn't a house.

REALITY: in a vehicle that square-footage math flips. The cabin is tiny, you breathe recirculated air, and the worst growth hides in porous carpet padding and ductwork you can't clean by hand. Even a small patch in a car warrants professional assessment far sooner than the same patch on a basement wall.

When it's time for real remediation, the specialists at Car Mold Guys identify the source, contain the area, remove contaminated padding, treat with chlorine dioxide (not ozone, which degrades your seals), purge the ventilation system with a fresh MERV 13-grade cabin filter, and verify the result — all aligned to the ANSI/IICRC S520 standard.

Frequently Asked Questions

Can black mold harm you?
In most healthy adults it causes discomfort and illness but is rarely life-threatening. In immunocompromised people, severe exposure can lead to serious infections that need treatment.

How do I know if it's the toxic kind?
You can't tell by sight. A professional test with lab analysis is the only reliable way to confirm Stachybotrys versus a milder species.

Can I remove it myself?
A small patch on a non-porous surface (hard trim, a tile) can be cleaned with proper protective gear. But car carpet, foam, and headliner are porous — those call for removal and remediation, not surface cleaning.

Does bleach kill black mold?
Bleach handles surface mold on non-porous materials, but it doesn't penetrate porous carpet backing or foam where the roots grow. There, removal and replacement — not cleaning — is what actually works.

The Bottom Line

Not all black mold is toxic — but all mold deserves your attention. Whether it's a benign Cladosporium colony or a genuine Stachybotrys problem, the right response is the same: find the moisture source, assess how far it's spread, and act. In the tight, recirculated air of a vehicle, skip the guesswork — a professional inspection from Car Mold Guys gives you certainty, and that peace of mind is worth far more than a DIY kit that leaves you with more questions than answers. Our FAQ is a good next step.

Not Sure What's Growing in Your Car?

Don't guess — and don't disturb it. As the country's only company dedicated entirely to vehicle mold remediation, the specialists at Car Mold Guys identify what you're dealing with, remove it at the source, treat with chlorine dioxide, purge the ventilation, and verify the air you breathe — mobile to your door, backed by a 90-day warranty across GA, SC, NC, TN, FL, and AL.

Get Your Free Assessment

Sources: EPA Mold & Moisture Guide · WHO Dampness & Mould · AAAAI

Classic Car Mold Prevention

Classic Car Mold Prevention

Classic Car Mold Prevention: Protecting a Collector's Investment

A classic car is more than transportation — it's an investment, a restoration, and often a labor of love. Mold threatens all three. It stains original upholstery, rots foam and carpet, leaves a musty odor that's hard to shake, and quietly erodes the value you've worked to preserve. The good news: with the right habits, it's almost entirely preventable.

Classic cars face mold on two fronts that most owners only half-cover. They sit for long stretches — sealed up, with no airflow, where humidity collects. And after decades on the road, their seals, weatherstripping, and drain tubes harden and fail, letting water in. Guard against the first and miss the second, and mold still finds its way in.

<60%
Keep storage humidity below this to starve mold of moisture
LEAKS
The cause most classic-car owners overlook — even in dry storage
24–48 HRS
How fast mold can take hold once moisture is present

Why Classic Cars Are Especially Vulnerable

A daily driver gets aired out constantly — doors opening, windows down, fresh air cycling through. A garaged classic doesn't. It can sit sealed for weeks or months, and any moisture trapped inside has nowhere to go. Add the natural materials common in older interiors — wool carpet, leather, cotton and horsehair padding, even wood trim — and you have exactly the organic, damp environment mold loves.

The overlooked half: aging seals leak

Rubber doesn't age gracefully. Over decades, door and trunk weatherstripping hardens and cracks, sunroof drain tubes clog or disconnect, and cowl and window seals shrink away from the body. The result is slow water intrusion you may never see — and a climate-controlled garage won't stop a leak that's already inside the car.

Your Classic Car Mold-Prevention Playbook

Store it climate-controlled

A well-ventilated, climate-controlled garage or storage unit keeps temperature and humidity steady — the single biggest factor in mold risk.

Control the humidity

Keep relative humidity under 60% with a dehumidifier, track it with a hygrometer, and drop moisture absorbers (silica or DampRid) inside the cabin for long storage.

Choose a breathable cover

Use a moisture-wicking cover made for the purpose. Never a plastic tarp — it traps condensation against paint and interior, making mold worse.

Keep air moving

Crack the windows slightly and run a fan in the storage space. Dead, sealed air is what lets trapped moisture settle into fabric and padding.

Inspect on a schedule

Check for a musty smell, damp carpet, and hardening seals before they turn into a problem. Early detection saves originality.

Mind the materials

Original wool, leather, and natural padding are mold-prone and costly to replace. Keep them clean and dry, and address spills the moment they happen.

The 60% rule

Mold needs moisture to grow, so humidity is your first line of defense. Below 60% relative humidity, mold struggles to colonize; above it, the odds climb fast. A $15 hygrometer takes the guesswork out — pair it with a dehumidifier in the storage space and a moisture absorber in the cabin, and you've removed mold's most important ingredient. For the full picture, see our guide to mold and moisture.

Don't Overlook the Leaks

Humidity control matters, but in our experience nearly every serious car-mold case traces back to water getting in — and on an older vehicle, the usual suspects are all wearing out at once. These are the spots worth checking on any classic:

Sunroof drain tubes — clog with debris or pull loose with age, sending water into the headliner and carpet. (More on sunroof leaks.)

Door & trunk weatherstripping — decades-old rubber hardens, cracks, and shrinks away from the body. (Trunk leaks explained.)

Door vapor barriers — the plastic sheet behind the panel fails or gets disturbed, letting water reach the cabin. (Vapor barrier leaks.)

Cowl & window seals — blocked cowl drains and perished window gaskets are classic entry points on older builds.

Finding the exact source can be tricky — water travels far from where it enters. That's why Car Mold Guys uses hydro testing to pinpoint and repair the leak first, so prevention actually sticks. A list of the most common leak points is a good place to start your own inspection.

If You Already Spot Mold

⚠️ Go easy on the DIY chemicals

Bleach and harsh mold sprays can permanently stain or destroy original leather, wool, and wood — and they don't reach the roots growing down in the padding, so the mold returns. On a collector car, the wrong cleaner can cost far more than the mold itself.

Real remediation goes deeper than wiping a surface. The mold-contaminated foam padding has to come out and the substrate has to be dried completely, the affected surfaces treated with chlorine dioxide — not ozone, which degrades the very rubber seals a classic can't easily replace — the ventilation system purged, and the moisture source fixed for good. Car Mold Guys does all of it to the ANSI/IICRC S520 standard, and we come to you — 100% mobile, so a delicate classic never has to be driven or towed across town to get it done.

The Bottom Line

Protecting a classic from mold comes down to two habits: control the moisture, and respect the leaks. Keep humidity down, keep air moving, use the right cover, and inspect those aging seals before they let water in. Do that, and your prized possession stays the timeless treasure it should be. If mold has already appeared — or you'd rather have an expert confirm your storage setup is sound — the specialists at Car Mold Guys are here to help.

Keep Your Classic a Timeless Treasure

Whether you've found mold or just want peace of mind before long-term storage, the specialists at Car Mold Guys can find hidden leaks, remediate safely with chlorine dioxide, and protect your interior's originality — mobile to your garage, backed by a 90-day warranty across GA, SC, NC, TN, FL, and AL.

Get Your Free Assessment

Source: EPA — A Brief Guide to Mold, Moisture, and Your Home

Call Today!