Understanding and Fixing Trunk Vent Leaks
Understanding and Fixing Trunk Vent Leaks (Before Mold Takes Over)
If you've ever popped open your trunk after a rainstorm and felt that sinking feeling — literally — you're not alone. A trunk vent leak is one of the most common and most underestimated sources of water intrusion in vehicles. Left unchecked, that hidden moisture becomes a breeding ground for mold, mildew, and rust that can quietly destroy your interior and tank your resale value.
This guide covers everything you need to know: what trunk vents are, why they leak, how to track down the exact source, and what to do when the damage is already done. Whether you're a hands-on DIYer or just trying to understand what your mechanic is telling you, this breakdown is for you — and it's one of several common ways water sneaks into a vehicle.
What Are Trunk Vents — and Why Do They Matter?
Most drivers have no idea their car even has trunk vents. These small, one-way valves are typically tucked behind the trunk's interior side panels, and their job is surprisingly important: they let cabin air escape so pressure can equalize when you open and close your doors. Without them, doors feel stiff, interior seals wear faster, and you get strange whistles and pops.
Think of it as a check valve for your trunk
Each vent has a rubber flap or foam gasket designed to let air out while keeping water, dust, and debris from getting in. When it works, you never notice it. When the flap fails, that one-way air valve quietly becomes a one-way water hole — and that's when things get wet.
Signs You Have a Trunk Vent Leak
Because the vents hide behind panels, the leak itself is usually invisible — but the symptoms aren't, once you know what to look for:
|
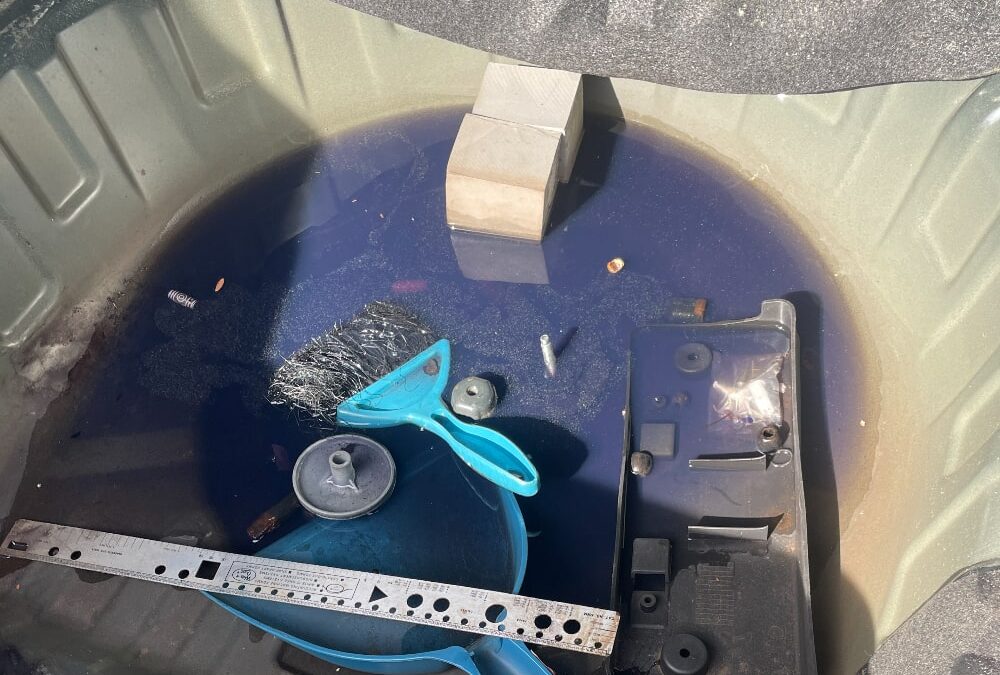
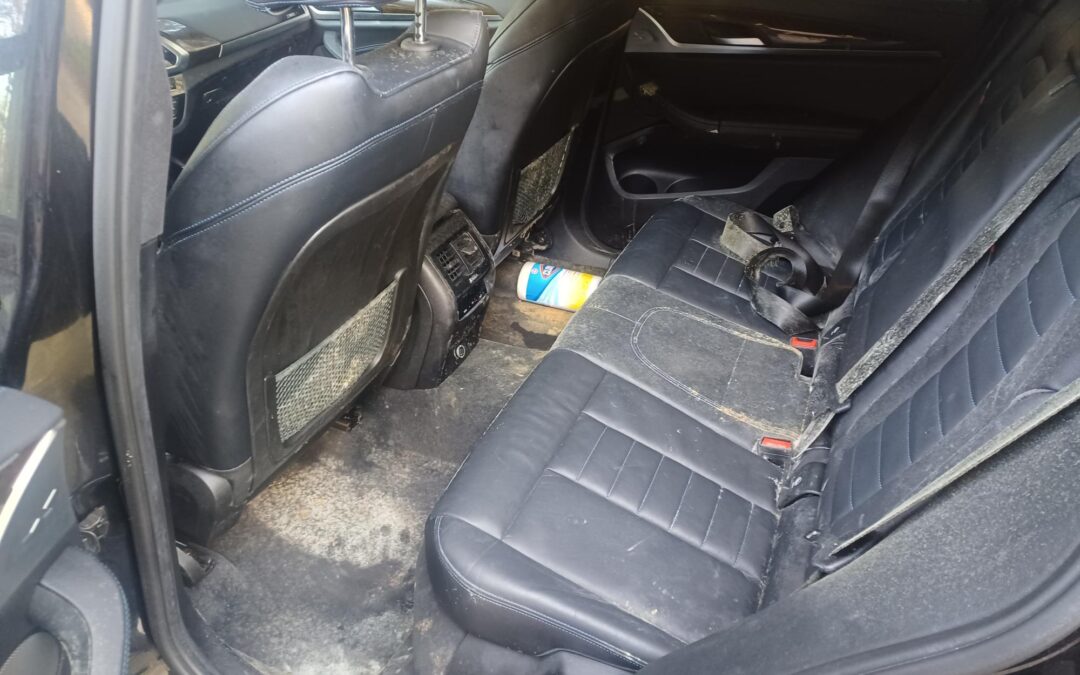
Water pooling in the trunk Standing water or damp carpet after rain or a wash is the most obvious red flag. |
Musty smell, trunk or cabin Often the first sign moisture has sat long enough to start growing mold. |
|
Rust on the trunk floor Corrosion means water has been sitting long enough to break down metal — a structural concern. |
Wet or moldy stored items A damp emergency kit, jumper cables, or spare-tire cover point straight to intrusion. |
⚠️ The smell doesn't stay in the trunk
Once mold takes hold back there, its odor and spores ride your HVAC system into the cabin, so a “trunk problem” quietly becomes the air you breathe up front. That's a real concern for anyone with allergies, asthma, or respiratory sensitivities — here's why car mold should be taken seriously.
Common Causes of Trunk Vent Leaks
Not all trunk vent leaks are the same, and finding the root cause saves time and money:
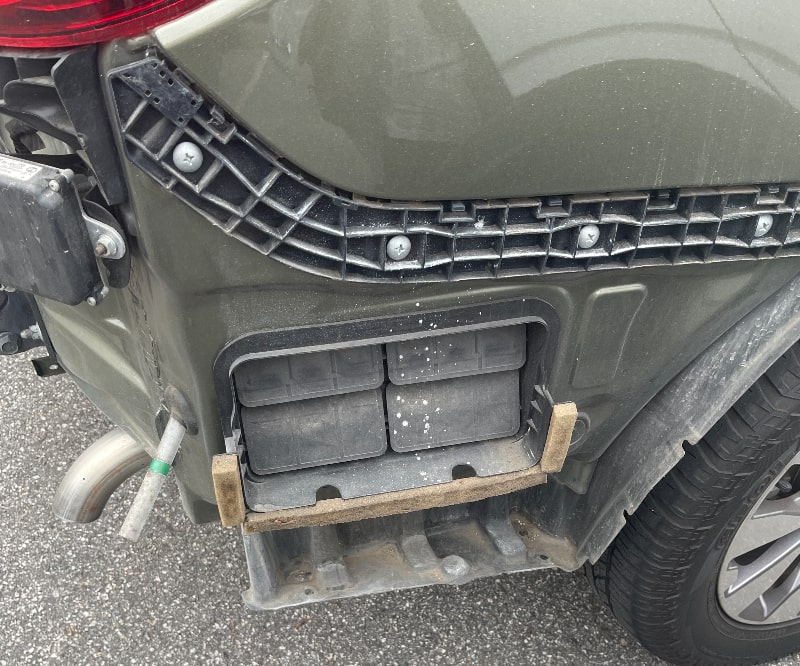
Aging or cracked rubber flaps: The most frequent culprit. Vent rubber degrades with heat and UV — Georgia summers are brutal on it — and once it stiffens, it can't seal.
Improper installation or factory defects: A vent that wasn't seated correctly at the factory, or after a repair, leaves edge gaps that channel water straight in.
Clogged drainage channels: When trunk drain holes pack with leaves and debris, water backs up and forces its way toward the path of least resistance — often the vent seals.
Collision damage: Even a minor rear-end impact can shift body panels a millimeter or two and break the seal. It often overlaps with broken welds from accidents, which body shops routinely miss.
How to Find and Fix a Trunk Vent Leak
When DIY Isn't Enough: Mold Has Already Set In
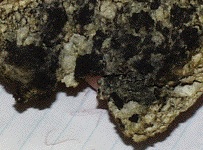
REALITY: finding and fixing the leak doesn't undo the damage already done. If water sat for more than a day or two — especially under carpet padding or in closed plastic channels — mold has almost certainly started, and household cleaners won't reach spores embedded in padding, foam, or trunk-liner seams.
Real auto mold remediation goes past surface cleaning: removing contaminated porous materials, HEPA work, and chlorine-dioxide gas treatment — which we use instead of ozone (ozone degrades rubber, and the last thing you want in a story about failed rubber seals is a treatment that attacks the good ones). In many cases the soaked padding has to be removed and replaced, since it holds mold even after the surface looks clean. It all follows the ANSI/IICRC S520 standard — and it's exactly why you can't just spray the smell away. If a musty odor lingers after drying, or you can see growth, that's the point where calling a professional isn't optional.
Preventing Trunk Vent Leaks Going Forward
Prevention is always cheaper than remediation. A few habits go a long way:
- Inspect vents during oil changes. You don't have to pull panels every time — just press gently near the vent location to feel for give or listen for rattling.
- Keep drainage channels clear. Leaf debris packs into drains fast, especially in fall. A quick compressed-air blow-out twice a year keeps them flowing.
- Avoid high-pressure washing near the vents. Pressure washers force water through seals that handle rain just fine — keep the wand moving and off the trunk corners and tail-light edges.
- Act fast at the first sign of moisture. Mold can establish in 24 to 48 hours, so the sooner you address a wet trunk, the lower the odds of turning a $20 sealant fix into a full remediation job.
Bottom Line
A trunk vent leak is easy to overlook but hard to fully undo once mold takes hold. The good news: most leaks are fixable with the right diagnosis and a few basic materials — as long as you catch them early. If you're already dealing with odor, visible mold, or water damage beyond surface dampness, don't wait. The longer moisture sits, the deeper the problem goes. Our car mold removal FAQ is a good next stop if you're weighing DIY against a pro.
Wet Trunk Already Smelling Musty? Let's Stop the Mold.
As the country's only specialists dedicated entirely to vehicle mold remediation, we trace the moisture, remove what can't be saved, purge the ventilation system, and verify the air you breathe — backed by a 90-day warranty and 100% mobile service across GA, SC, NC, TN, FL, and AL.
Source: EPA Mold Course, Chapter 1


