Types of Mold Found in Cars

Types of Mold Found in Cars

Types of Mold Found in Cars: What Every Driver Needs to Know

Six species. Six different risk profiles. One common thread — none of them belong in your cabin air.

6
Primary mold species commonly found in vehicle interiors — each with a distinct appearance, location, and health profile
24–48
Hours before mold colonization begins on wet interior surfaces, per EPA guidance
~100
Cubic feet of sealed cabin air — the confined space that concentrates mold spores directly into your breathing zone

If you've ever opened your car door and caught that unmistakable musty smell, you already know the sinking feeling that follows. Mold in a vehicle is more than an unpleasant inconvenience — it is a legitimate health hazard that spreads faster than most drivers realize. Whether your vehicle suffered water damage from a flood, a slow roof leak, a forgotten wet gym bag, or simply too many humid summers parked in the driveway, understanding the specific types of mold that colonize car interiors is the foundation for addressing the problem correctly.

In this guide we profile the six most common car interior mold species, explain the health risks associated with each, identify where each one tends to hide in a vehicle, and clarify what a proper response actually looks like.

Why Vehicle Interiors Are Especially Vulnerable to Mold

Mold requires three conditions: moisture, warmth, and an organic food source. A car interior checks every box. Carpeting, seat foam, headliner fabric, and door panel padding all absorb and retain moisture. A single spilled drink, a window left cracked in a rainstorm, or a slow leak around a windshield seal is enough to trigger colonization within 24 to 48 hours, per EPA guidance on mold growth timelines.

In humid climates like the Southeast, the problem is compounded by ambient outdoor humidity that keeps vehicle interiors from ever fully drying between uses. Mold spores are naturally present in outdoor air — they need only the right interior conditions to take hold. And once established, the vehicle's HVAC system recirculates spores throughout the cabin every time the heat or AC runs, turning a localized colony into a whole-cabin exposure event. The dangers of car mold are amplified by the confined space in ways that rarely get discussed.

The Six Most Common Types of Mold Found in Car Interiors

Each species below has a distinct appearance, preferred habitat inside a vehicle, and health risk profile. Knowing the differences helps you understand what you may be dealing with — and why the appropriate response is never a surface wipe-down.

1 · Cladosporium
Appearance Black or dark green patches with a powdery or suede-like texture
Common Locations Dashboard vents, seat fabric, carpet near water intrusion points
Risk Level Moderate — well-documented allergen, common trigger for respiratory symptoms

Cladosporium is one of the most frequently encountered molds in both indoor and outdoor environments and one of the species we see most often in vehicle interiors. Exposure is a well-documented trigger for sneezing, watery eyes, nasal congestion, and skin irritation. People with asthma or compromised immune systems may experience more pronounced respiratory symptoms. Because it appears readily on fabric surfaces and around air vents, it is often the first visible mold growth a vehicle owner notices — though its presence in the HVAC system may predate what is visible on surfaces.

2 · Aspergillus
Appearance Green, yellow, or white colonies with a velvety surface texture
Common Locations Under floor mats, trunk liners, inside door panels where water pools unseen
Risk Level Moderate to high — certain strains produce mycotoxins; serious risk for immunocompromised individuals

Aspergillus is a broad genus with over 180 species, several of which are a genuine concern in enclosed vehicle interiors. It tends to colonize areas that stay damp for extended periods — under floor mats, in trunk liners, and inside door panels where water enters and cannot escape. What makes certain Aspergillus strains particularly problematic is their production of mycotoxins — toxic compounds that cause respiratory inflammation, allergic reactions, and with prolonged exposure, more serious lung conditions.

Individuals with weakened immune systems are at greatest risk of developing aspergillosis, a fungal infection that in some cases becomes invasive. This is a species that warrants professional evaluation — not a spray treatment — when found in a vehicle.

3 · Penicillium
Appearance Blue or blue-green with a characteristically powdery texture
Common Locations Upholstery, headliners, inside the HVAC system and air ducts
Risk Level Moderate to high — spreads aggressively via HVAC; high spore volume accelerates cabin-wide contamination

The same genus that gave us penicillin antibiotics — but finding it in a vehicle interior is far from beneficial. Penicillium is particularly problematic in cars because it releases a high volume of airborne spores and spreads aggressively across porous surfaces. It colonizes upholstery and headliners readily, and once it reaches the vehicle's HVAC system, it is distributed throughout the cabin every time the heat or AC operates.

Even after visible surface growth is treated, contaminated air ducts can continue reintroducing spores into the breathing air — which is one of the clearest reasons why professional HVAC decontamination is not an optional step in vehicle mold remediation. Health effects include allergic reactions, sinus inflammation, and with chronic exposure, more serious pulmonary conditions.

4 · Stachybotrys — Toxic Black Mold
Most Toxic
Appearance Dark greenish-black; slimy or wet texture — unlike the powdery look of most other species
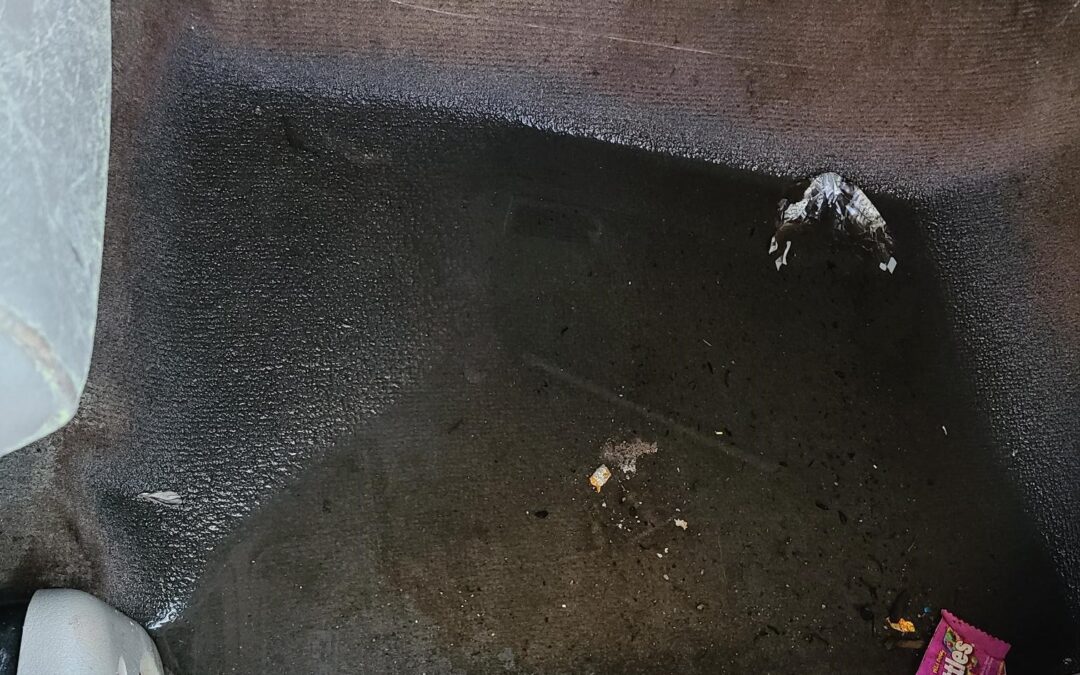
Common Locations Heavily water-damaged areas — beneath seats, under soaked carpet, in trunks after flooding
Risk Level High — requires sustained heavy moisture to establish; produces trichothecene mycotoxins

Stachybotrys chartarum is the species most people picture when they hear "toxic black mold" — and it earns that association. It is dark greenish-black, has a characteristically slimy or wet texture rather than the powdery appearance of most other species, and critically, it requires sustained heavy moisture to grow. Finding Stachybotrys in a vehicle is a reliable indicator of a significant, long-standing moisture problem — a slow leak that has been present for weeks or longer, flooding that was never properly dried, or persistent condensation with no outlet.

What makes Stachybotrys uniquely dangerous is its production of trichothecene mycotoxins, which are associated with chronic respiratory illness, neurological symptoms, immune suppression, and severe fatigue with prolonged exposure. These toxins do not break down when the mold is killed — they persist on surfaces and in the air until they are chemically neutralized with professional-grade oxidizing agents.

⚠ Not a DIY situation

If you see or suspect Stachybotrys in your vehicle, professional remediation with appropriate containment and protective equipment is required. This species cannot be safely addressed without proper training and professional-grade treatment protocols. Read more about mycotoxin health risks and how to neutralize them.

5 · Alternaria
Appearance Dark green or black colonies with a woolly or velvety surface texture
Common Locations Around sunroof drains, door seals, carpet edges, AC and heat vent systems
Risk Level Moderate to high — top trigger for allergic asthma; spores small enough to penetrate lower airways

Alternaria is among the most widespread mold species globally and a consistent presence wherever standing moisture or water damage occurs. In vehicles it appears frequently near leaky sunroofs, around deteriorating window seals, and in HVAC systems that pull in outdoor air. It is recognized as one of the top mold-related triggers for asthma attacks — its spores are small enough to penetrate deep into the lower respiratory tract, making lower airway symptoms more likely than with many other species. For anyone with allergic asthma, even brief exposures in a contaminated vehicle cabin can provoke a significant response.

6 · Fusarium
Appearance White or pink with a cottony, almost fluffy texture — sometimes mistaken for dust or debris
Common Locations Carpet, foam padding, water-damaged seat cushions
Risk Level Moderate — grows at lower temperatures than most species; produces mycotoxins; year-round risk

Fusarium is less commonly discussed in the context of vehicle mold but worth knowing about. Its white or pink, cottony appearance can be mistaken for dust or lint, making it easy to overlook on a seat cushion or carpet edge. Notably, Fusarium is capable of growing at lower temperatures than most other mold species — meaning it can establish itself in vehicles during cooler months when other species would slow down, making it a year-round concern. It produces mycotoxins and has been associated with respiratory tract infections, eye irritation, and skin reactions with prolonged exposure. Like Penicillium, it spreads readily through airborne spores and resists elimination without professional-grade treatment and moisture source resolution.

Health Risks — Why Mold in a Vehicle Is a Serious Matter

Across all six species, the same pattern recurs: the confined cabin of a vehicle amplifies exposure in ways that an open indoor environment does not. The same spore concentration that might be diluted to manageable levels in a large room becomes highly concentrated in 100 cubic feet of sealed, recirculated air. Mold is a common trigger for allergic asthma, and reactions can be immediate or delayed by hours. Symptoms of mold exposure in vehicles often include:

  • Persistent headaches that worsen while driving or during commutes
  • Sneezing, runny nose, or nasal congestion that improves away from the vehicle
  • Itchy or watery eyes, particularly after time in the car
  • Coughing, wheezing, or shortness of breath during or after drives
  • Unexplained fatigue or difficulty concentrating that improves on non-driving days
  • Skin irritation or rashes appearing without an obvious external cause

For individuals with asthma, existing respiratory conditions, or weakened immune systems — including children and elderly passengers — the threshold for serious effects is significantly lower. The pattern to watch for is symptoms that improve when you are away from the vehicle and return when you get back in. That pattern is the clearest signal that your car is the source. See our full guide to mold exposure symptoms for a comprehensive breakdown, or our guide to detecting mold in a car if you are not yet sure what you are dealing with.

What To Do If You Find Mold in Your Vehicle

Three steps — in this order
1
Do not mask it

Air fresheners, baking soda, and consumer sprays temporarily cover the odor while the colony continues growing beneath the surface. Spraying the smell away is not remediation — it is delay.

2
Identify the moisture source

Every mold colony has a water source. Common culprits include clogged sunroof drains, leaking door seals, clogged AC condensate drains, and flooding. Treating the mold without fixing the moisture source guarantees it returns — regardless of how thorough the treatment was.

3
Call a professional — not a detailer

Proper vehicle mold remediation requires HEPA vacuuming, chlorine dioxide gas treatment to neutralize mycotoxins, contaminated padding removal where necessary, full HVAC decontamination, a fresh MERV 13-grade cabin filter, and encapsulation as the final step once removal is complete. Detailing is not remediation — and the distinction matters for your health and your vehicle.

Those steps are not arbitrary. They follow the same sequence the EPA's remediation guidance establishes for buildings: fix the moisture, remove the contaminated material, then verify. A vehicle is a smaller box with worse ventilation, which makes the order more important rather than less.

The Bottom Line

Mold in a car is not a problem that resolves on its own. Every one of the six species covered here — Cladosporium, Aspergillus, Penicillium, Stachybotrys, Alternaria, and Fusarium — is capable of causing real harm when present in the confined, recirculated air of a vehicle cabin. And because dead mold spores remain harmful even after treatment, killing the mold is only the beginning — not the end — of a proper remediation scope.

If you have noticed a musty smell, visible growth of any kind, or unexplained symptoms that improve when you step out of your vehicle, do not wait. Car Mold Guys specializes exclusively in professional vehicle mold remediation — built on the same science and standards applied to mold in water-damaged structures, adapted specifically for the biology of what happens inside a vehicle. We are 100% mobile and come directly to your location, aligned to the ANSI/IICRC S520 professional remediation standard.

Not sure what species is in your vehicle? We'll find out.

Car Mold Guys provides complete professional vehicle mold remediation to the ANSI/IICRC S520 standard: moisture source identification and leak repair, contaminated padding removal, full drying, HEPA extraction, chlorine dioxide gas treatment, professional HVAC purge, a MERV 13 cabin filter, and final-step encapsulation once removal is verified complete. 100% mobile across Georgia, South Carolina, North Carolina, Tennessee, Florida, and Alabama, backed by a 90-day warranty.

Schedule a Professional Mold Assessment

Why Wet Moldy Car Carpet Padding Produces an Unbearable Odor

Why Wet Moldy Car Carpet Padding Produces an Unbearable Odor

Why Wet, Moldy Car Carpet Padding Produces an Unbearable Odor (And What To Do About It)

⚠️ Important

Wet, moldy car carpet padding cannot be safely remediated — it must be replaced. It produces what professionals call a "worm odor" that penetrates deeply into every surrounding surface, making it one of the hardest automotive odors to eliminate even after the contaminated padding has been removed.

REPLACE
Moldy padding cannot be cleaned and kept — it has to come out
PPT
Parts per trillion — the level at which your nose detects MVOCs
5
Common water sources that soak a vehicle's floor padding

The Smell That Stops You in Your Tracks

You reach for your car door, open it, and immediately take a step back. The odor that hits you isn't just musty — it's thick, heavy, and almost alive. If you've experienced this, you already know there's nothing quite like the smell of wet, moldy car carpet padding. It's not a smell you forget, and unfortunately, it's not one that goes away on its own.

As specialists in automotive mold remediation, we've seen this scenario hundreds of times. The good news is that once you understand what's causing it, you can take the right steps to eliminate it permanently — rather than spending money on air fresheners that only mask the problem for a few days.

What Is Car Carpet Padding and Why Does It Matter?

Most car owners don't think twice about what lives beneath their feet. Your vehicle's floor carpet sits on top of a layer of cushioning material — typically open-cell foam or compressed felt — called carpet padding. This layer serves important purposes: it reduces road noise, provides thermal insulation, and gives the floor a softer feel underfoot.

The problem? These same absorbent properties make carpet padding extraordinarily dangerous when moisture gets involved. Unlike hard surfaces that can be wiped dry, padding soaks up water and holds onto it long after the carpet above it appears dry to the touch. That trapped moisture becomes a biological time bomb.

Why the Smell Is So Uniquely Awful

Not all mold smells are created equal. The odor coming from wet car carpet padding has a specific, deeply unpleasant character that experienced remediators often describe as a "worm smell" — earthy, pungent, and almost sweet in a nauseating way. Here's the science behind why it's so bad:

Mold and Bacteria Release Microbial VOCs

As mold colonies and anaerobic bacteria break down the organic material in your padding, they release microbial volatile organic compounds (MVOCs). These are gaseous byproducts of biological activity, and some of them — like geosmin, 2-methylisoborneol, and various aldehydes — are detectable by the human nose at concentrations as low as a few parts per trillion. Your nose is genuinely one of the most sensitive MVOC detectors on the planet, which is exactly why this odor is so overwhelming.

The Confined Space Effect

A car's cabin is essentially a sealed box. Unlike a home with air circulation between rooms, your vehicle concentrates and recirculates that MVOC-laden air every time you run the climate control system. The HVAC system pulls air through the cabin and pushes it right back out — spreading mold spores and odor compounds to every surface in the process.

Stagnant Water Compounds the Problem

Any standing water trapped beneath the padding goes through its own decay cycle. Stagnant water develops its own microbial community of bacteria and algae, contributing sour, sulfur-like notes on top of the mold odor. Combine that with decomposing dust, skin cells, food particles, and road debris that have filtered down through the carpet over the years, and you have an extremely complex odor that simple cleaning products are not equipped to handle.

The Odor Penetrates Surrounding Surfaces

Here's what makes moldy car carpet padding particularly problematic from a professional standpoint: the MVOCs don't stay put. They off-gas continuously, and over time those odor compounds absorb into the vehicle's headliner, seat foam, door panels, and dashboard plastics. This is why removing the contaminated padding doesn't always solve the smell immediately — the odor has already colonized the surrounding materials. Proper remediation must address the entire interior, not just the source.

The Health Risks Are Real — Don't Ignore Them

The smell is warning you. According to the Centers for Disease Control and Prevention (CDC), exposure to mold — even in small amounts over time — can cause or worsen respiratory symptoms, allergic reactions, and immune responses. In a car, where you may sit just inches from a heavily contaminated surface with the windows up and recirculated air running, that exposure is concentrated and continuous.

Symptoms commonly linked to car mold exposure include:

Persistent coughing or wheezing
A cough that lingers or a wheeze that shows up on your commute and eases when you're out of the vehicle.
Eye, nose, and throat irritation
Itchy or watering eyes, congestion, or a scratchy throat that starts shortly after you get in the car.
Headaches during or after driving
Headaches that track your time behind the wheel are a common signal of concentrated MVOC exposure.
Worsening of asthma symptoms
Needing a rescue inhaler more often, or finding that breathing is harder in the vehicle.
Fatigue and brain fog
Feeling unusually drained or foggy after driving, with no other obvious explanation, is frequently reported with ongoing mold exposure.

Higher-risk passengers
Children, elderly passengers, and anyone with asthma, allergies, or a compromised immune system face elevated risk. If your vehicle smells like mold, it's not a cosmetic problem — it's an air quality problem.

Finding the Source: Where Is the Water Coming From?

Wet carpet padding doesn't happen by accident. Something allowed water into your vehicle's floor. Before any remediation work can be effective, you must locate and repair the moisture source — otherwise the padding will simply get wet again. Common culprits include:

Sunroof Drain Lines: Sunroofs have small drain tubes at each corner that route water away from the vehicle. When these clog with debris, water backs up and overflows directly into the headliner and floor. This is one of the most common causes of soaked floor padding we see.

Door and Window Seals: Aging or damaged weather stripping allows water to run down the door frame and pool on the floor. Inspect all four doors and both rear windows.

Cabin Air Filter Housing: A clogged or improperly seated cabin air filter can cause condensation from the HVAC evaporator to overflow into the floor rather than draining properly outside the vehicle. The National Institute for Automotive Service Excellence (ASE) recommends cabin filter inspection at every major service interval for this reason.

Windshield and Rear Window Seals: Failed urethane adhesive around your windshield or rear glass creates a highway for water to run directly onto the dashboard or rear shelf and down into the carpet.

A/C Evaporator Drain: The air conditioner removes humidity from cabin air by condensing it on the evaporator coil. That water is supposed to drain outside the car through a small rubber tube. If the tube clogs, water overflows into the floor under the dash.

Why Moldy Carpet Padding Cannot Be Remediated — Only Replaced

This is the most important thing we can tell you: if your carpet padding is wet and showing signs of mold growth, it cannot be cleaned and kept. Unlike hard surfaces, open-cell foam and compressed felt are porous at a microscopic level. Mold hyphae grow into and through the material, making it impossible to kill and remove all biological contamination without destroying the structural integrity of the padding itself.

Any professional or company that tells you they can clean and save contaminated padding is either uninformed or being dishonest with you. The padding must come out.

The good news: automotive carpet padding is among the least expensive materials in your vehicle's interior. Replacing it is far cheaper than the cost of repeated failed remediation attempts, and it eliminates the biological source permanently.

The Professional Remediation Process

A proper car mold remediation job for water-damaged carpet and padding involves more than pulling out the floor material. Here's what a thorough process looks like, aligned to the ANSI/IICRC S520 standard:

1

Moisture source identification and repair — No remediation is started until the leak is fixed.

2

Full carpet and padding removal — All contaminated material is bagged and disposed of properly.

3

Subfloor treatment and drying — The bare metal floorpan is treated with an EPA-registered antimicrobial solution and dried completely. The EPA maintains a registered pesticide database that remediators should reference for approved products.

4

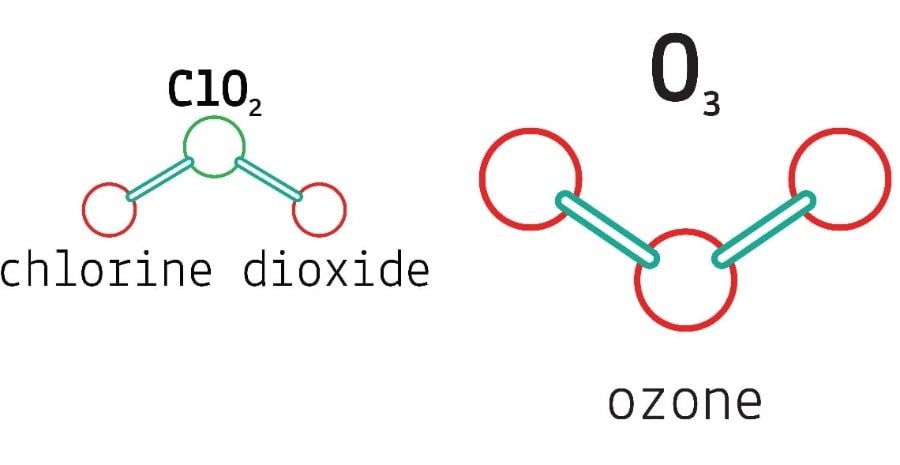
Chlorine dioxide gas treatment of the cabin — Because MVOCs have absorbed into surrounding surfaces, treating the source alone is not enough. Chlorine dioxide gas penetrates the headliner, seat foam, and door panels to neutralize the odor compounds at a molecular level — something ozone can't do without degrading your rubber seals along the way.

5

HVAC purge and MERV 13 cabin filter — The ventilation system that has been circulating spores is professionally purged, and the cabin air filter is replaced with a MERV 13-grade filter with the housing disinfected.

6

New padding installation and carpet re-installation — Fresh materials go back in only after the subfloor has passed a moisture reading test.

7

Encapsulation and verification — As the final step, a mold-inhibitor sealer is applied to the cleaned, treated surfaces to prevent regrowth — only after the contaminated material is gone, never as a substitute for removing it — followed by post-remediation air quality verification.

Preventing Car Carpet Mold in the Future

Once you've gone through remediation, protecting your investment is straightforward:

Inspect door and window seals annually and replace any cracking or compressed weather stripping immediately.

Clear sunroof drains every spring and fall with compressed air.

Address spills the same day — never let liquid sit in your carpet overnight. Our guide to drying out a wet car covers the full protocol.

Use moisture-absorbing products like silica gel packs or a quality car dehumidifier in humid climates. Georgia summers, in particular, create conditions where even ambient humidity can contribute to moisture buildup in vehicles that sit for extended periods.

Run your A/C on recirculate mode occasionally to pull humidity from the cabin air.

Final Thoughts: Don't Mask It — Fix It

Wet, moldy car carpet padding is one of those problems that refuses to be ignored — and for good reason. It's damaging your vehicle's interior, degrading your air quality, and potentially affecting your health every time you drive. Air fresheners, baking soda, and ozone treatments can reduce the odor temporarily, but they cannot eliminate the biological source — and ozone degrades your rubber door and trunk seals in the process.

If your car smells like mold and you've noticed it's coming from the floor, don't wait. The longer contaminated padding sits in your vehicle, the deeper those odor compounds penetrate into the surrounding materials — and the more expensive the remediation becomes. Not sure how far it has spread? Our guide to detecting mold in a car is a good place to start.

Don't Mask the Odor — Eliminate the Source.

Car Mold Guys specializes in mobile auto mold remediation. We come to you, we find the source, and we fix it properly — leak repair, contaminated padding removal and replacement, chlorine dioxide treatment, HVAC purge, MERV 13 cabin filter, and final-step encapsulation — so you can get back to driving a car that smells the way it should. 100% mobile across Georgia, South Carolina, North Carolina, Tennessee, Florida, and Alabama, backed by a 90-day warranty.

Schedule Your Inspection

Why air quality is often worse inside of a car than outside of a car

Why air quality is often worse inside of a car than outside of a car

How to Remove Mold from Your Car's Vents and AC System

That musty smell the moment you flip on the A/C isn't just unpleasant — it's a warning. If your car smells like a damp basement every time the fan kicks on, there's a very good chance mold has established itself inside your vehicle's ventilation system. Left alone, it doesn't stay put: it multiplies, and every fan cycle blows it straight into the air you and your passengers breathe.

Here's the honest picture — what causes it, how to recognize it, what you can realistically do yourself, and where the DIY approach hits a hard wall.

24–48 HRS
All mold needs to colonize a damp surface
THE COIL
Where the problem actually lives — and where sprays can't reach
MERV 13
The cabin filter grade that belongs in your car

Why Mold Grows in Car Vents

Your HVAC system pulls in outside air, passes it through a cabin filter, conditions it across an evaporator coil, and pushes it through a network of ducts into the cabin. Moisture is built into that process: condensation forms on the coil every time you run the A/C, and more arrives from rain, humidity, wet clothing, and spilled drinks. According to the EPA, mold needs only moisture and an organic food source to take hold — and your ductwork supplies both, in the dark, over and over.

Once it establishes in the evaporator housing or duct lining, it spreads. And because the system's whole job is to move air into your face, the exposure is continuous.

The Warning Signs

A musty smell when the fan starts

Strongest in the first seconds after you turn on the A/C or heat.

It worsens on recirculation

Recirc pulls cabin air back across the contaminated coil and ducts.

Dark spots near the vent slats

Visible discoloration at the openings usually means far more behind them.

Symptoms only in the car

Sneezing, congestion, itchy eyes, or headaches that ease once you get out.

Condensation on the dash or floor

Often a sign of a clogged condensate drain backing up under the dash.

The smell comes back

Gone for a week or two after cleaning, then returns — the classic tell.

⚠️ This is a health matter, not just an odor

In a sealed cabin you're breathing recirculated air at close range for long stretches. The EPA links mold exposure to respiratory irritation, allergic reactions, eye irritation, and worsened asthma — and elderly passengers, children, pregnant women, and anyone immunocompromised face elevated risk.

What You Can Realistically Do Yourself

If you've caught a faint odor early and there's no visible growth, a careful DIY pass is worth trying. Three things genuinely help:

  • Dry the car out completely first. Remediation in a wet car is wasted effort. Park in sun with the windows down, pull out wet mats and cargo, and check under the seats and in the trunk for standing water.
  • Replace the cabin air filter — before anything else. It's often the most contaminated single component, and running the fan with a moldy filter defeats the whole exercise. Bag the old one immediately as you pull it.
  • Wipe the vent surfaces you can actually reach. A detail brush and a damp microfiber on the vent slats, plus a HEPA vacuum as far into the opening as the hose reaches.

And do it safely: an N95 respirator (not a cloth mask), nitrile gloves, and goggles if you're working upward into vent openings. Cleaning mold disturbs it — see our protective gear guide.

Where DIY hits a wall

Every popular DIY method — spraying disinfectant into the cowl intake, running a "bomb" canister, fogging from a can — shares one fatal limitation: it can't reach the evaporator coil. The coil sits deep in the plenum behind your dashboard, it's permanently damp, and it is where the colony actually lives. Treat the ducts and leave the coil, and the system simply re-seeds itself. That's why the smell always comes back a few weeks later.

REALITY: A lot of advice tells you to "upgrade to a HEPA cabin air filter." Don't. A HEPA-rated filter restricts airflow far too drastically for an automotive HVAC system — you'd choke the very system you're trying to clear. The right answer is a MERV 13 electrostatically charged filter: a genuine step up in particle capture, with airflow your blower can actually push.

What a Professional Purge Actually Involves

Once mold is visible in the vents, the odor keeps returning, or passengers are having symptoms, the system needs to be treated at the source. Here's what Car Mold Guys does — and why each step exists:

1

Find the moisture source. A clogged condensate drain, a failing seal, a water leak — if the water keeps coming, so does the mold. Diagnosis comes first, every time.

2

Purge the ducting. We fill the vents and ductwork with a mold-killing foam and blow it out with compressed air, then agitate the vent louvers by hand — mechanical removal, not just a chemical mist. Here's the full purge process.

3

Treat with chlorine dioxide gas. A gas reaches the evaporator coil and plenum that no spray can touch, and it neutralizes mold and mycotoxins rather than masking odor. We don't use ozone — it's a surface deodorizer, and it degrades your rubber door and trunk seals.

4

Replace the filter and disinfect the housing. A new MERV 13 filter goes into a clean compartment — not into a housing still packed with compacted debris and growth.

5

Verify the air. We test air quality at completion. If it isn't verified, it isn't finished — that's the line between remediation and a good cleaning.

All of it aligned to the ANSI/IICRC S520 professional remediation standard. And if mold reached the carpet or seats, the contaminated padding comes out too — a vent purge alone won't fix a saturated floor.

Keeping It from Coming Back

  • Run fresh-air mode for the last few minutes of every drive — it dries the evaporator core before you park.
  • Use the defrost setting periodically — it runs the A/C compressor and helps pull moisture out of the system.
  • Change the cabin filter on schedule — annually at minimum, sooner in a humid climate.
  • Never leave wet items in a closed car — umbrellas, towels, and gym bags off-gas moisture for hours.
  • Get any water intrusion inspected — a roof, window, or door seal leak will out-run every prevention habit on this list.

If the Smell Keeps Coming Back, the Coil Is Still Dirty

A spray can't reach where the mold lives. The specialists at Car Mold Guys purge the entire ventilation system, treat the evaporator coil with chlorine dioxide, install a MERV 13 filter, and verify the air before we leave — mobile to your door, backed by a 90-day warranty across GA, SC, NC, TN, FL, and AL.

Get Your Free Assessment

Sources: EPA — Learn About Mold · ANSI/IICRC S520

How Mold Affects the Respiratory System

How Mold Affects the Respiratory System

How Mold Affects the Respiratory System

Mold grows on bathroom grout, inside car interiors after a flood, and silently behind walls after a slow plumbing leak. Most people assume a little mold is no big deal — but if you've been sneezing more than usual, waking up congested, or noticing your asthma worsen at home or in your vehicle, mold exposure could be the reason.

Understanding how mold actually affects the respiratory system is the first step toward protecting yourself and your family. Here's the science in plain language, who's most at risk, and what you can do about it.

50–60%
Indoor humidity above this lets mold colonize almost anything
BLACK MOLD
Stachybotrys — linked to the most severe symptoms
SEALED CABIN
Concentrations in a car can exceed a moldy room

Why Mold Spreads So Easily

Mold is a naturally occurring fungus that reproduces by releasing microscopic spores into the air. Those spores are invisible to the naked eye and light enough to float for hours before settling on a new surface — or inside your lungs. When indoor humidity climbs above 50–60%, mold finds ideal conditions to colonize almost any organic surface: wood, fabric, leather, carpet, even the foam padding inside car seats. A few species turn up most often indoors:

Aspergillus — found in HVAC systems and on walls; can cause serious lung infections in immunocompromised people.

Cladosporium — common in fabrics and carpets; a frequent trigger for mold-allergy symptoms.

Penicillium — grows rapidly on water-damaged materials and produces a distinctive musty smell.

Stachybotrys chartarum — "black mold," associated with the most severe symptoms and usually requiring extensive remediation.

The EPA notes that mold can grow on virtually any surface once moisture is present — which makes water intrusion, whether from a leaky roof, a flooded car, or a cracked window seal, the number-one risk factor.

Short-Term Symptoms

When spores are inhaled, the immune system responds right away. For many people it looks like a cold or seasonal allergies, which is why mold exposure is so often misread.

Coughing and sneezing

Your airways' first defense — especially a cough that eases when you leave a certain place.

Congestion and runny nose

Irritated nasal membranes that can feel like a permanent, never-ending cold.

Sore throat and hoarseness

Irritation or voice changes — worth attention if hoarseness lasts beyond two weeks.

Wheezing and breathlessness

For anyone with asthma, elevated spore counts can trigger airway tightening.

Long-Term Exposure: When It Goes Deeper

Short-term symptoms are uncomfortable; prolonged exposure can be genuinely dangerous, sometimes causing conditions that persist after the source is gone.

Chronic bronchitis — repeated exposure inflames the bronchial tubes; over time this damages airways, reduces lung capacity, and produces a persistent cough.

Asthma development and flaresNIH-published research suggests early-childhood exposure may contribute to the development of asthma in susceptible children, not just worsen existing asthma.

Allergic fungal sinusitis — when mold colonizes the sinuses: thick discharge, facial pressure, and recurring infections that are often misdiagnosed.

Hypersensitivity pneumonitis — an immune-mediated lung inflammation that mimics pneumonia; without removing the source and getting treatment, it can cause permanent scarring.

Mycotoxin effects — species like black mold produce mycotoxins that can affect the body beyond the lungs. The EPA acknowledges that while research continues, mycotoxin exposure in enclosed spaces is a legitimate concern.

Who Is Most at Risk

Children

Developing airways, more time indoors, and closer to settled spores — more vulnerable.

Older adults

Declining immune function plus conditions like COPD compound the effects.

Asthma, COPD, or allergies

The AAFA notes mold allergies are a leading trigger for serious asthma attacks.

Immunocompromised

In this group, Aspergillus can cause invasive aspergillosis — a serious infection needing urgent care.

Vehicles Are a Hidden Source

Most conversations about mold and lungs focus on homes and workplaces — but your car can be just as much of a problem, precisely because people don't think of it that way. Even a little moisture — a forgotten wet towel, a cracked seal in a storm, a flood — can turn an interior into a high-concentration mold environment. And because a cabin is small and enclosed with limited airflow, spore concentrations inside a car can actually exceed those in a moldy room. Daily commuters accumulate significant exposure without ever connecting it to their persistent respiratory symptoms. If a musty smell doesn't resolve after cleaning, or your symptoms ease on days you don't drive, professional auto mold remediation is worth considering.

⚠️ When to see a doctor

Don't wait out persistent respiratory symptoms. See a physician for a cough or wheeze lasting more than three weeks, shortness of breath that worsens in a specific place, recurring sinus infections that antibiotics don't fully clear, or fever and chills with severe fatigue after possible exposure. A doctor can run allergy testing, pulmonary function tests, and imaging — this article is general information, not medical advice.

How to Protect Your Respiratory Health

Controlling mold means controlling moisture. Drawing on EPA guidance:

1

Keep humidity below 50%. Use dehumidifiers and properly sized A/C, and ventilate moisture-prone areas.

2

Fix water intrusion immediately. Every hour a wet surface sits untreated widens the colonization window — at home and in the car.

3

Inspect your vehicle. Watch for water intrusion, musty odors, or visible growth on seat fabric, carpet, or the headliner. Never paint or spray over mold — it keeps growing underneath.

4

Call a pro for the hard cases. When mold covers a large area, or sits inside HVAC systems or a vehicle interior, professional remediation — removal, chlorine dioxide, HVAC purge, MERV 13 filter, encapsulation, and verification — beats DIY cleaning.

Mold isn't a faint musty smell to ignore. It's an indoor air-quality hazard with measurable effects on your lungs — and the car you drive every day is part of the picture.

The Bottom Line

Mold isn't just an aesthetic problem — it's a legitimate air-quality hazard with documented effects on the respiratory system, from short-term irritation to chronic, potentially irreversible lung damage. Whether you're dealing with a water-damaged room or a car that smells musty after a storm, taking it seriously is one of the best things you can do for your long-term respiratory health — and when the source is your vehicle, Car Mold Guys can remove it properly.

If Your Lungs Feel Better Out of the Car, Listen

Persistent cough, congestion, or wheezing that eases away from your vehicle is worth acting on. Car Mold Guys removes the source — leak repair, contaminated-padding removal, chlorine dioxide, HVAC purge, and verified air quality before you drive again. Mobile to your door, backed by a 90-day warranty across GA, SC, NC, TN, FL, and AL.

Get Your Free Assessment

This article is general information, not medical advice; consult a healthcare provider about persistent respiratory symptoms. Sources: EPA · NIH · AAFA

How does mold grow on inorganic surfaces

How does mold grow on inorganic surfaces

Can Mold Really Grow on Glass, Metal, and Plastic?

The counterintuitive science of mold on inorganic surfaces — and what it means for your vehicle

4
Things mold needs to colonize any surface — including glass, metal, and plastic that it cannot actually eat

24–48
Hours before mold begins colonizing a wet surface — the window to act before inorganic surfaces become a growth site

60°F+
The lower temperature bound for most active mold growth — a range that almost perfectly overlaps with typical vehicle interior conditions

If you have ever noticed dark spots on a bathroom tile, a fuzzy coating on a window sill, or a musty smell from your car's air vents the moment the AC kicks on, you have witnessed something that genuinely defies common sense: mold growing on a surface it technically cannot eat.

Most people assume mold only attacks wood, drywall, or fabric. Mold is far more opportunistic than that. It will colonize glass, metal, plastic, concrete, and ceramic tile — surfaces widely considered safe from biological growth — when the conditions are even slightly in its favor. Understanding exactly how and why this happens is the foundation for stopping it, and it has direct implications for how vehicle mold is understood and treated.

THE CORE CONCEPT: MOLD DOESN'T EAT THE SURFACE — IT EATS WHAT'S ON THE SURFACE

According to the EPA's mold guidelines, mold requires four things to thrive: spores (present in virtually every environment already), a food source of organic material, moisture, and the right temperature. Glass, metal, and plastic cannot themselves be consumed — mold lacks the enzymes to break down truly inorganic compounds. So the question becomes: where does the food come from?

It comes from the thin, often invisible layer of organic residue that coats every surface in every environment. Dust. Skin cells. Pollen. Soap film. Fingerprint grease. Condensation residue carrying dissolved organics. That microscopically thin film is all mold needs to establish a foothold on a surface that, in theory, offers it nothing. A glass shower door does not feed mold. The soap scum clinging to it absolutely does.

REALITY: There is no such thing as a mold-proof surface in a real-world environment. Any surface that accumulates organic residue and is exposed to moisture can support mold growth — regardless of what it is made of.

Six Conditions That Allow Mold to Colonize Inorganic Surfaces

Understanding these conditions explains why inorganic surfaces that appear clean and non-porous can still develop mold — and why vehicle interiors are particularly vulnerable even on their hard surfaces.

1. Organic Matter Accumulation — The Non-Negotiable Factor

No matter how clean a surface appears, organic residue builds up continuously. In a home, common sources include dust and dirt carrying dead skin cells and pollen, cooking grease on kitchen surfaces, soap scum and body oils in bathrooms, and condensation residue that deposits dissolved organic compounds as it evaporates.

In a vehicle interior specifically, the combination of humidity, dust, skin oils from hands and occupants, food particles, and environmental grime makes nominally hard surfaces — dashboards, plastic trim, door panels, and glass — surprisingly hospitable to mold when moisture is present. This is something Car Mold Guys encounters regularly: active mold growth on hard vehicle surfaces that would appear at first glance to offer mold nothing at all.

2. Moisture — The Single Most Controllable Factor

Even a thin film of water on a surface is sufficient for mold spores to germinate. Moisture reaches inorganic surfaces through three primary pathways:

  • Condensation — When warm, humid air contacts a cooler surface, water droplets form. This is common on windows, metal pipes, HVAC evaporator coils, and any cold surface in a humid environment.
  • Direct water intrusion — Plumbing failures, roof leaks, sunroof drain failures, and window seal failures introduce water to surfaces that would otherwise stay dry.
  • Ambient humidity — Environments above 60% relative humidity put virtually every surface at some level of risk, because moisture absorption and condensation become continuous rather than event-driven.
ALERT: Moisture is the only mold prerequisite you can reliably control. Spores are everywhere. Organic residue accumulates on every surface. Temperature in a vehicle is always suitable. Moisture is the lever — which is why every professional remediation begins with finding and fixing the water source before anything else.

3. Temperature — A Range That Matches Your Vehicle Almost Perfectly

Mold is most active between 60°F and 80°F — a range that overlaps almost precisely with typical indoor and vehicle interior temperatures for the majority of the year, particularly in the Southeast. Some species can grow in conditions as cool as 40°F, meaning even climate-controlled or seasonally cooled spaces are not immune. Vehicles stored during cooler months are not protected from mold growth by temperature alone.

4. Poor Ventilation — Why Enclosed Spaces Accelerate the Problem

Stagnant air allows moisture to linger and organic particles to settle undisturbed on whatever surface they land. Well-ventilated spaces dry faster and circulate fewer concentrated spores. This is why closed-up rooms, vehicles left sitting with windows sealed, and poorly maintained HVAC systems are consistently among the most common sites for mold problems — including on their hard, nominally inorganic surfaces.

In a vehicle, the sealed cabin amplifies this dynamic. With no natural airflow when parked, any moisture that enters the cabin has nowhere to go. It remains in the air, settles as condensation on glass and plastic surfaces, and persists until something mechanically removes it.

5. Surface Texture — Not All Inorganic Surfaces Are Equally Resistant

There is a meaningful practical difference between smooth non-porous surfaces and rough or porous inorganic surfaces, even within the same general material category.

Smooth, Non-Porous Surfaces
Glass, stainless steel, glazed ceramic tile

Harder for mold to grip. Organic residue sits on the surface rather than embedding into it. Easier to clean thoroughly. Less likely to support persistent colonies — though not immune when conditions are favorable.

Rough or Porous Inorganic Surfaces
Unglazed concrete, brick, grout, certain plastics

Trap moisture and organic particles in microscopic surface crevices. Much more hospitable to mold establishment and significantly harder to fully clean once colonized. Grout lines in tile bathrooms are the textbook example — the tile itself resists mold; the grout between tiles almost always doesn't.

6. Time — The Factor People Most Underestimate

Mold does not colonize instantaneously. It requires time for spores to germinate, mycelium to establish, and a visible colony to form. Surfaces that remain wet and carry organic residue for extended periods face exponentially greater risk than surfaces cleaned and dried regularly. This is especially relevant for vehicles that sit unused for weeks or months — conditions that allow continuous moisture accumulation and organic deposit buildup with no intervention. The mold growth timeline in wet cars follows a predictable and rapid progression once conditions are met.

Where Mold Shows Up on Inorganic Surfaces — and Why

INORGANIC SURFACE REFERENCE GUIDE
Bathroom tile and grout
Soap scum provides the food source; persistent moisture and porous grout joints do the rest. The tile resists; the grout almost never does.

Window glass and frames
Condensation deposits moisture continuously. Dust accumulation on the glass and organic residue in the frame joints supply the food source.

Metal pipes and HVAC ducts
Condensation on cool metal surfaces plus dust accumulation in low-light, low-flow areas creates persistent mold-friendly conditions. This is the primary mechanism behind musty AC smells in vehicles.

Car dashboards and trim
Trapped cabin humidity following water intrusion, combined with dust and skin oil from occupants, creates the organic film that supports colonization on otherwise mold-resistant plastic surfaces.

Concrete basement walls
Moisture infiltration through porous concrete plus surface dust accumulation. Rough concrete texture traps both organic particles and moisture in surface irregularities.

Plastic storage containers
Enclosed, humid environments with poor airflow. Dust and organic residue from stored items settle on interior surfaces, providing the food source in a persistently damp microclimate.

Refrigerator door seals
Temperature differential creates continuous condensation. Food residue provides the organic food source. The rubber gasket material, while not organic itself, traps both moisture and food particles in its folds.

Mold on Inorganic Surfaces in Vehicles — A Special Case

Vehicles present a uniquely complex mold environment. Car interiors combine hard plastic, glass, and metal with porous soft materials like carpet, seat foam, and headliner fabric — creating a mix of surfaces that respond very differently to moisture intrusion, but that all contribute to the overall contamination when conditions are met.

⚠️ THE HVAC SYSTEM — THE MOST CRITICAL INORGANIC MOLD SITE IN ANY VEHICLE

What many vehicle owners do not realize is that even the nominally hard surfaces — windshield, dashboard plastic, door panels — can support mold growth following a water intrusion event. Moisture from a leaking sunroof drain, a failed door seal, or a clogged AC condensate drain saturates the cabin air, coats every surface with humidity, and provides the moisture needed for spores to germinate on whatever organic film is present — on plastic, glass, and metal just as readily as on fabric.

The HVAC system is the most critical inorganic mold site. Evaporator coils inside the AC unit condense moisture as part of normal operation. Dust entering through the vents settles on those wet coils and duct walls. Over time this produces mold colonies on metal and plastic surfaces inside the ductwork — which then distribute spores into the cabin every time the fan operates. If you notice a musty smell the moment the AC turns on, that is mold on inorganic surfaces inside your vehicle's ventilation system. Car Mold Guys uses proprietary tooling to purge and treat duct interiors — the step that eliminates this source entirely.

How to Prevent Mold on Inorganic Surfaces

Prevention costs a fraction of remediation in time, money, and health impact. Because the conditions enabling inorganic surface mold are well understood, they can be systematically addressed.

PREVENTION PRIORITIES — HIGHEST LEVERAGE FIRST
  • Control moisture above all else. Fix water intrusion within 24 to 48 hours before mold establishes itself. In vehicles, this means addressing any suspected leak immediately — not waiting until the smell confirms the problem. See the most common car water leak sources to know what to look for.
  • Clean regularly and thoroughly. Remove the organic film that feeds mold before moisture can activate it. In vehicles, this means vacuuming and wiping down all interior surfaces — including hard trim panels, glass, and door surfaces — not only the obviously soiled areas.
  • Improve air circulation. In homes, run exhaust fans and open windows. In vehicles, run the AC periodically on fresh air mode to dry out the evaporator coil and prevent condensate accumulation in the ductwork.
  • Dry surfaces promptly. Do not let water sit on any surface — porous or not. In a vehicle, address any moisture intrusion immediately with absorbent towels and defroster use. After 24 to 48 hours, the colonization window opens.
  • Use appropriate sealants on porous inorganic surfaces. Grout sealers in bathrooms, concrete sealants in basements, and treated surfaces in high-moisture areas all reduce the organic particle trapping that enables mold on rough inorganic materials.

When Mold on Inorganic Surfaces Is a Symptom, Not the Whole Problem

Mold on a hard, non-porous surface — glass, tile, metal — is often easier to clean than mold that has penetrated a porous substrate, because the mycelium cannot embed into a truly smooth surface. However, visible mold on inorganic surfaces almost always signals that mold has already spread to nearby porous materials that are out of sight. The visible growth is the indicator, not the full extent of the contamination.

In a vehicle, what appears on the dashboard or windshield frame is rarely the primary site of colonization. Mold in a vehicle most seriously affects the HVAC system, carpet padding, seat foam, and headliner — all of which require professional-level treatment to eliminate completely. The hard surfaces are cleaned as part of that process — but they are never the full story.

REALITY: Wiping visible mold off a car's dashboard or door panel and considering the problem resolved is a diagnostic error. The mold visible on hard surfaces is the signal that the real contamination — in the HVAC system, under the carpet, inside the seat foam — has already been established and is actively spreading. Treat the source, not the symptom.

The Bottom Line

Mold does not need to eat a surface to grow on it. It only needs moisture, warmth, organic residue, and time — four conditions that are almost always simultaneously present in any vehicle interior that has experienced water intrusion. Inorganic surfaces like glass, metal, and plastic provide no nutrition on their own, but the thin layer of everyday organic residue coating those surfaces is more than sufficient to support a mold colony when moisture is present.

Smooth non-porous surfaces respond well to proper cleaning and moisture control — they are the most forgiving category when addressed promptly. But in a vehicle, by the time mold is visible on hard surfaces, the contamination has already penetrated the porous materials beneath and around them. That requires professional remediation aligned to the ANSI/IICRC S520 professional standard — not a wipe-down of the visible surface.

MOLD ON YOUR DASHBOARD OR VENTS? IT'S TELLING YOU SOMETHING DEEPER IS WRONG.

Car Mold Guys provides complete professional vehicle mold remediation — moisture source identification and repair, HEPA extraction, chlorine dioxide treatment, contaminated material removal, and full HVAC decontamination. 100% mobile. We serve Georgia, the Atlanta metro area, and the surrounding Southeast region.

Schedule a Professional Assessment

Green Mold Types

Green Mold Types

Green Mold Types: What They Are, Where They Hide, and What Actually Removes Them

Five species wear the same color. Only a lab can tell them apart — but you don't need one to know it has to go.

5
Distinct fungal species commonly responsible for what people call "green mold"
24–48
Hours after water intrusion before colonization begins on a wet interior surface
30–50%
Relative humidity range that keeps mold from establishing in the first place

What Is Green Mold?

Green mold is a broad, informal term used to describe several different species of fungi that share a greenish appearance. The color itself comes from the pigment in the mold's spores — but color alone is not a reliable identifier. A mold that appears green today might shift to blue, yellow, or black depending on its age, moisture level, and the surface it's growing on.

According to the CDC, molds are fungi that grow in the form of multicellular filaments called hyphae. They reproduce by releasing tiny spores into the air — spores that are invisible to the naked eye and travel easily through a building's ventilation system or a vehicle's cabin air intake.

Green mold thrives anywhere moisture is present, and it doesn't need much. A spilled drink in a car seat, a slow sunroof leak, or simply high ambient humidity is enough to start a colony. Once established, it spreads quickly and penetrates porous materials — carpet, seat foam, headliner fabric, and door panel padding are all fair game.

Why Vehicles Are a Special Case

A room has volume, air exchange, and somewhere for humidity to go. A parked car has roughly 100 cubic feet of sealed air and no ventilation at all until you turn the key. That means a colony the size of a coaster produces a spore concentration in a cabin that would be barely detectable in a bedroom — and the HVAC system then distributes it directly into your breathing zone. The species below behave the same way in a house and a vehicle. The exposure does not.

The Five Species Behind Green Mold

Only lab testing can definitively identify a species, but five account for the overwhelming majority of green mold growth. Three of them — Aspergillus, Penicillium, and Cladosporium — are also among the most common molds found in car interiors generally.

1 · Aspergillus

Aspergillus is one of the most widespread molds on the planet and one of the most frequently found indoors. It typically appears in shades of green, yellow, or white and turns up on damp fabrics, HVAC systems, and anywhere water has pooled unseen — under floor mats and inside door panels being the vehicle equivalents. While most healthy people tolerate mild exposure, Aspergillus is a serious concern for individuals with weakened immune systems.

Certain species produce aflatoxins, among the most potent naturally occurring carcinogens known. Worth being precise about the risk, though: the established aflatoxin danger is dietary — contaminated grain and nuts — not inhalation from a moldy surface. The reason Aspergillus matters in a car is respiratory and, in vulnerable people, infectious. Aspergillus also produces other mycotoxins that persist on surfaces after the colony itself is dead.

2 · Penicillium

Famous as the mold from which penicillin was derived, Penicillium is far less friendly growing in your upholstery. It appears blue-green with a powdery, velvety texture, spreads rapidly, and colonizes water-damaged textiles and carpeting readily. It is a well-documented allergen and can trigger respiratory issues, sinus inflammation, and asthma flare-ups. In a vehicle its defining problem is volume: it releases a great many airborne spores, and once it reaches the ventilation system it is redistributed cabin-wide every time the fan runs — which is why HVAC decontamination is not optional.

3 · Cladosporium

Cladosporium leans olive-green to dark brown or black, which makes it easy to confuse with black mold — and a frequent source of unnecessary alarm. It is one of the most common outdoor molds but colonizes indoor surfaces readily, particularly textiles and ductwork. It is a top trigger for mold allergies worldwide and can cause skin irritation, eye redness, and upper respiratory symptoms even in otherwise healthy people. The EPA notes it is among the most frequently detected molds in air sampling studies.

4 · Trichoderma

Trichoderma is a fast-growing, greenish-white mold found on water-damaged wood, paper products, and behind panels following a flood or slow leak. It breaks down cellulose — the component of wood, paper, and the jute backing under automotive carpet — at a surprisingly rapid rate, making it destructive to materials as well as a health concern. Some species produce mycotoxins harmful to both people and pets. A musty odor combined with softening or crumbling material near a known water intrusion point puts Trichoderma high on the suspect list.

5 · Fusarium

Fusarium is usually described as pink to reddish-orange, but it commonly reads as greenish in early growth — which is exactly why it belongs in this list and why color-based identification fails so often. It thrives on water-damaged carpet and seat foam padding, and unusually, grows at lower temperatures than most species — making it a year-round risk rather than a summer one. It can cause eye infections, skin infections, and respiratory complications. The Asthma and Allergy Foundation of America provides a useful overview of mold-related health impacts.

Is Green Mold Dangerous?

The short answer is yes — but the degree of risk depends on the species, the extent of the growth, your level of exposure, and your individual health. Common symptoms of green mold exposure include:

  • Respiratory issues — coughing, wheezing, shortness of breath, worsening asthma
  • Allergic reactions — sneezing, runny nose, itchy eyes, skin rashes
  • Sinus and nasal congestion
  • Headaches and fatigue after prolonged exposure
  • Eye and throat irritation

Higher-risk groups include young children, the elderly, pregnant women, and anyone with asthma, allergies, or a compromised immune system. For these groups, relatively small amounts of green mold can trigger significant symptoms. Our guide to mold exposure symptoms covers the full picture — and the tell to watch for is symptoms that ease when you are away from the vehicle and return when you get back in.

Green Mold vs. Black Mold: What's the Difference?

The most common question people ask is whether green mold is as dangerous as black mold. The honest answer is that color is a poor predictor of danger. Stachybotrys chartarum gets the attention, but many green molds are equally capable of causing health problems depending on species and exposure. Conversely, not all black mold is Stachybotrys. The same logic applies across the spectrum — see also red mold types and white mold types. This is exactly why identification matters more than color.

Where Green Mold Hides in a Vehicle

In a car, green mold rarely announces itself on an open surface. It concentrates where moisture collects and airflow doesn't reach:

  • Under floor mats and in the carpet padding beneath
  • Inside seat foam, particularly after a spill that was blotted but not dried
  • Along the headliner near sunroof drain channels
  • In the trunk, especially around the spare wheel well where water pools
  • Inside door panels below a failed rubber seal
  • Around the HVAC evaporator, fed by a clogged condensate drain

If you can see green mold, there is almost certainly more you cannot. Visible surface growth usually signals that colonies have already penetrated the material beneath. A musty, earthy odor with no visible source is the other strong indicator — our guides to hidden mold hotspots and detecting mold in a car cover where to look.

Getting Rid of Green Mold: What Works and What Doesn't

For a small patch on a hard, non-porous surface — a plastic trim panel, a door sill, a glass surface — cleaning with detergent and water while wearing gloves and an N95 respirator is reasonable, and consistent with EPA cleanup guidance. Bleach solutions work on non-porous surfaces but do not penetrate porous materials, and should never be mixed with ammonia-based cleaners — the fumes are toxic.

The limitation is porosity, and a car is almost entirely porous. Carpet backing, seat foam, headliner batting, and door padding all absorb moisture and host growth below the surface, where no consumer product reaches. Cleaning what you can see on those materials removes the evidence, not the colony.

⚠ What to be skeptical of

Several treatments are marketed heavily for vehicle mold and do not hold up. Ozone generators mask odor rather than removing contamination, and ozone degrades rubber seals, wiring insulation, and soft plastics with repeated exposure — we cover why chlorine dioxide works where ozone doesn't in detail. Hydroxyl generators have the same core problem: odor treatment is not remediation.

Encapsulants used as a substitute for removal are the most misleading of the three. Sealing a surface over live growth traps the colony rather than eliminating it. Encapsulation is a legitimate and valuable step — but only as the final step, after contaminated material has been removed and the surface verified clean. Applied first, it is the same mistake as spraying the smell away.

Professional vehicle remediation aligned to the ANSI/IICRC S520 standard follows a different sequence entirely: identify and repair the moisture source, remove contaminated padding and materials, dry the structure fully, HEPA extract, treat with chlorine dioxide gas to neutralize mycotoxins, purge the HVAC system, fit a fresh MERV 13-grade cabin filter, and encapsulate as the closing step. If you are weighing your options, the distinction between a remediator and a detailer is the one that matters most.

Preventing Green Mold From Coming Back

Removal without prevention is half the job. Green mold returns if the moisture problem isn't fixed.

  • Fix leaks promptly. Any water intrusion — sunroof, door seal, windshield, or condensate drain — should be addressed within 24–48 hours.
  • Control humidity. The EPA recommends keeping relative humidity between 30 and 50%.
  • Dry the evaporator before parking. Running the fan with the compressor off for the last few minutes of a drive prevents a wet coil sitting overnight.
  • Never leave wet items in the cabin — towels, umbrellas, gym bags, floor mats after a wash.
  • Act fast on spills. Blot and dry thoroughly the same day, not the same week.
  • Replace the cabin filter on schedule — a contaminated filter reseeds the cabin every time the fan runs.

Final Thoughts: Don't Ignore Green Mold

Green mold is more than an eyesore. Whether it's Aspergillus in a trunk well or Penicillium spreading through a water-damaged car interior, unchecked growth poses real risks to your health and your vehicle's value. The good news is that with prompt action and the right approach, it is entirely manageable.

If you are unsure what you are dealing with, or the growth extends beyond a small patch on a hard surface, don't guess. Accurate identification leads to effective treatment — and effective treatment starts with knowing exactly what you are up against.

Green patch in your car? Let's find out what it actually is.

Car Mold Guys provides complete professional vehicle mold remediation to the ANSI/IICRC S520 standard: moisture source identification and leak repair, contaminated padding removal, full drying, HEPA extraction, chlorine dioxide gas treatment, professional HVAC purge, a MERV 13 cabin filter, and final-step encapsulation once removal is verified complete. 100% mobile across Georgia, South Carolina, North Carolina, Tennessee, Florida, and Alabama, backed by a 90-day warranty.

Schedule a Professional Mold Assessment

This article is intended for informational purposes only and does not constitute medical or professional remediation advice. Always consult a certified mold remediation specialist for extensive growth or health concerns.

How to Detect and Fix Car Tail Light Leaks

How to Detect and Fix Car Tail Light Leaks

How to Detect and Fix a Car Tail Light Leak (Before It Costs You)

You notice it after a rainstorm — a faint fog trapped behind the red plastic of your tail light, or worse, a visible pool of water sloshing around inside the housing. It looks minor, so you tell yourself it can wait. But a tail light leak is one of those problems that quietly snowballs: what starts as moisture in the housing can end in burned-out bulbs, corroded wiring, a failed safety inspection — and, once that water reaches the trunk carpet, mold.

The good news is that many tail light leaks are catchable early and fixable with basic tools. This guide walks through how to detect, diagnose, and repair a leaking tail light — how to keep it from happening again — and when it's time to bring in a specialist like Car Mold Guys, especially once moisture has already made it into the vehicle.

4
warning signs your tail light is leaking water
60–90 SEC
the hose test that confirms your reseal held
$100s
the electrical repair an ignored leak leads to

Why a Tail Light Leak Is a Bigger Deal Than It Looks

Modern tail lights are sealed assemblies, and that seal exists because your car's electrical system doesn't mix well with water. When moisture in the housing sits against the bulb socket, it accelerates corrosion. Over time that corrosion spreads to the wiring harness, and at that point you're no longer looking at a cheap tube of silicone — you're looking at an electrical repair that can run into the hundreds.

Beyond the electrical risk, standing water inside the lens and behind the housing creates an ideal environment for mold, which brings odors and can migrate into the trunk or cabin. Once water reaches the cargo-area carpet and the padding beneath it, a small seal problem becomes a mold and odor problem that's far more involved to resolve — the same way other common water leaks quietly lead to interior mold.

⚠️ Don't let standing water sit

Water pooled in a tail light housing is working against two things at once — the electrical connections it's corroding and the trunk materials it's soaking. The longer it sits, the more it costs to put right on both fronts.

Signs You Have a Tail Light Water Leak

Catching this early saves money and headaches. Here's what to watch for — and fogged lights aren't just cosmetic, since the National Highway Traffic Safety Administration counts rear-lighting failures among real rear-visibility safety concerns.

Condensation or fogging in the lens
A cloudy film or droplets inside the lens that don't clear within a few hours of driving means the seal is letting moisture in.
Flickering or dead lights
Dimming or dead tail lights not explained by a blown fuse often trace to moisture at the socket or connector. Check for water before replacing bulbs.
Rust around the housing
Rust bleeding from behind the lens or around the mounting points means water has been intruding for a while — and can eventually weaken the tail panel.
A loose or misaligned assembly
If the light rocks or shifts when you press on it, the gasket isn't seating properly and water is finding the gap.

What Causes Tail Light Leaks?

Degraded rubber seals or foam gaskets. These break down from UV exposure and temperature cycling. On vehicles five years and older, this is the most common culprit.

Hairline cracks in the lens or housing. Impact, gravel strikes, or long UV exposure can crack the plastic. Even a barely visible crack lets water in under pressure.

Improper installation. A recently replaced or aftermarket unit that doesn't fit precisely can leave gaps at the seal. For critical sealing parts, an OEM assembly from your dealer or a reputable supplier is worth the premium.

Failed adhesive or butyl tape. Many sealed-beam tail lights use butyl tape — a pliable, putty-like adhesive — instead of a gasket. It gets brittle with age and loses its grip.

How to Fix a Tail Light Water Leak, Step by Step

What you'll need

A socket wrench set, flathead and Phillips screwdrivers, clean microfiber cloths, isopropyl alcohol (90%+), clear automotive-grade silicone sealant or automotive butyl tape, a replacement gasket matched to your year/make/model if needed, and a plastic-safe trim adhesive.

1

Remove the assembly. Open the trunk and find the access panels or bolts on the interior side of the tail section — usually three or four bolts (8mm or 10mm), sometimes plastic clips (use a trim tool so they don't crack). Wiggle the assembly free and disconnect the wiring harness by pressing the release tab on the connector.

2

Inspect everything. In good light, run a finger around the housing perimeter (cracks are often felt before they're seen), check that the gasket is pliable and makes even contact all the way around, and look at the mounting surface on the body for rust, pitting, or old sealant residue.

3

Dry it out completely. Never reinstall with moisture inside. Absorb standing water with a microfiber cloth, then let the assembly air-dry in the sun or use a hair dryer on low. A silica gel packet placed inside a sealed lens before reinstall can help pull residual humidity over time.

4

Repair or replace. For small lens cracks, run a bead of clear automotive-grade RTV silicone along the crack and smooth it, letting it cure fully. For a shattered housing, replace the assembly with an OEM-equivalent unit from your dealer or a reputable supplier. For a worn gasket, fit a vehicle-specific replacement, cleaning the mating surfaces with isopropyl alcohol first.

5

Reinstall and test. Reconnect the harness, seat the assembly against the body, and hand-tighten before torquing evenly — don't overtighten or you'll crack the housing. Then soak the area with a garden hose (not a pressure washer) for 60 to 90 seconds, open the trunk, and check for any moisture inside. Dry means you nailed it.

How to Prevent Tail Light Leaks Going Forward

Prevention that pays off

Skip high-pressure washing near the lights. Pressure washers can force water past even a healthy seal — keep the wand moving and off the housing gaps.

Inspect the seals once a year. During spring or fall cleanup, press gently around the perimeter; any give or sponginess is your cue to reseal before winter moisture arrives.

Use dielectric grease on the sockets. A little on the bulb sockets during any bulb change creates a moisture barrier that slows corrosion.

Park smart. Regular shelter from driving rain and temperature swings reduces wear on every exterior seal, not just the tail lights.

When to Call a Professional

If you've resealed the light and water still gets in, the leak may be a hairline crack or a body-panel gap that's tough to spot by eye. This is where Car Mold Guys comes in: we pinpoint stubborn leaks with pressure testing and moisture meters, repair the tail light seal, and — critically — handle the part most DIY guides skip: the mold and odor left behind once water has soaked the trunk carpet and padding.

That remediation side is not a DIY job. If moisture has been sitting long enough to smell musty, the fix follows the ANSI/IICRC S520 standard — removing contaminated carpet padding, drying the substrate, treating with chlorine dioxide gas, purging the HVAC system, fitting a MERV 13 cabin filter, and finishing with encapsulation as the final step. (Deep wiring corrosion is separate again — that's an auto electrician's territory.) If you're not sure how far the water has spread, our guide to detecting mold in a car is a good next read.

REALITY: A tail light leak is an early warning for three pricier problems — electrical failure, rust, and mold. Catching and sealing it early is a modest job; waiting turns it into several. If water has already reached the trunk, treat the mold as seriously as the seal.

Frequently Asked Questions

Can I really fix a tail light leak myself?

Often, yes — a worn gasket or a small lens crack is within reach of a patient DIYer with basic tools, and the materials usually cost under $30. What's not a DIY job is the mold remediation if water has already soaked the trunk carpet, or deep wiring corrosion. If the leak keeps returning after a reseal, or you smell must, bring in a professional.

How do I know if the leak has caused mold?

A musty smell from the trunk or cargo area — especially one that's worse in heat — is the classic sign, along with damp or stained carpet in the spare-tire well. Because water travels and hides under trim, a professional moisture inspection is the reliable way to confirm how far it has spread. Other trunk-area leaks and third brake light leaks produce the same symptoms.

The carpet in my trunk got wet — what should I do now?

Dry it fast. Extract standing water, ventilate in dry conditions, and run fans — but if the padding beneath the carpet soaked through, it usually has to come out to dry properly. Our post on drying out a wet car walks through it, and the sooner you act, the better your odds of avoiding mold.

Leak Already Let Mold In? We'll Handle Both.

Car Mold Guys finds and repairs the tail light leak, then remediates any mold and odor it caused — one professional, 100% mobile service across Georgia, South Carolina, North Carolina, Tennessee, Florida, and Alabama. Thermal imaging, chlorine dioxide treatment, and a full HVAC purge, all backed by a 90-day warranty.

Schedule Your Leak & Mold Inspection

How to Identify and Fix Car Door Rubber Seal Leaks

How to Identify and Fix Car Door Rubber Seal Leaks

How to Identify and Fix a Car Door Rubber Seal Leak

That damp smell in your car isn't just an annoyance — it's a warning sign. A failing door rubber seal, also called weatherstripping, is one of the most common causes of water intrusion in vehicles, and left unchecked it doesn't just soak your carpet. It creates the sustained moisture that mold needs to take hold, typically within 24 to 48 hours of the first wetting.

The good news is that most owners can identify and repair a door seal leak themselves — as long as it's caught before water has been getting in long enough to damage the materials behind the panels and beneath the carpet. This guide covers the whole process: spotting the signs, understanding the causes, choosing between repair and full replacement, and recognizing when the problem has already moved past the weatherstrip to the interior beneath it — the point where a specialist like Car Mold Guys should step in.

24–48 HRS
before mold colonizes wet carpet and padding
8–12 YRS
typical lifespan of factory weatherstripping
$20–$80
for a DIY seal vs. hundreds at a shop per door

Why a Leaking Door Seal Is More Serious Than It Looks

Rubber door seals do several jobs at once: they block water, cut wind and road noise, insulate the cabin, and form the continuous barrier that keeps your interior stable. When a seal fails, water doesn't just sit on the surface — it seeps into foam padding, carpet backing, and the inside of the door panel, creating conditions where mold can establish within 24 to 48 hours.

In a sealed cabin in a humid climate like the Southeast, that timeline can be even shorter. Catching a door seal leak early isn't just about comfort — it's about heading off a biological contamination problem that's far more expensive to correct than the seal repair itself. It's one of the most common of the water leaks that lead to car mold.

Six Warning Signs of a Failing Door Seal

You don't need a mechanic to spot weatherstripping failure. Check all four door frames, not just the driver's side.

Wet carpet or damp door panels
Wet carpet, damp mats, or stains on the lower door panels after rain are the clearest sign — water often pools at the front floor where padding soaks it up with no surface clue.
New wind or road noise
A whistle at speed, or road noise louder than it used to be, often points to a gap in the weatherstrip — most pronounced at highway speeds.
Visible damage to the seal
Cracks, tears, flattened spots, or sections pulled away from the channel are all breaks in your water protection — even a small gap adds up over time.
Brittle or crumbling texture
Healthy rubber is soft and springs back. If it feels hard or crumbles when handled, it's aged past the point of sealing — UV and heat accelerate this in the Southeast.
Poor cabin heating or cooling
If the AC or heat works harder than it should, outside air may be leaking in through a compromised seal — hurting efficiency and raising interior humidity.
Musty smell after rain
A damp, musty odor that shows up or worsens after wet weather is an early flag that water is getting in and materials underneath are staying wet.

A quick check: the dollar-bill test
Close a dollar bill in the door so it's trapped against the seal, then pull. If it slides out with no resistance, the seal isn't compressing at that spot. Repeat at several points around each door — compression failure is usually localized, not uniform.

What Causes Door Seals to Fail

Age and UV exposure. Rubber loses elasticity and dries out over time, and sun dramatically speeds it up — a real concern in the Southeast. Most factory weatherstripping lasts 8 to 12 years under normal conditions.

Dirt and grime buildup. Debris packed into the channel keeps the rubber from making full contact, opening micro-gaps. This is one of the most preventable causes — routine cleaning extends seal life considerably.

Physical damage. Door dings, rough handling, or aggressive washing can nick or tear the seal at any age, and even minor damage becomes a steady entry point with every rain.

Poor prior installation. A seal that was replaced but not seated properly — rushed, wrong adhesive, or a dimensional mismatch — has gaps from day one that worsen as it ages.

Temperature cycling. Repeated expansion and contraction from hot summers and cool winters fatigues the rubber, so it cracks and loses the memory to spring back after compression.

Minor Damage: DIY Repair Steps

If the damage is limited to a small tear, a section that's pulled loose, or early stiffness without widespread cracking, a targeted repair can extend the seal's life without a full replacement.

What you'll need

Mild soap or all-purpose cleaner, microfiber cloths, a quality rubber conditioner or protectant, and a good weatherstrip adhesive.

1

Clean the seal thoroughly. Wash the entire seal with mild soap and a microfiber cloth, removing dirt, grime, and old adhesive residue, then dry it completely — adhesive won't bond to a wet or dirty surface, and a repair on a dirty seal fails early.

2

Condition the rubber. A quality UV-blocking rubber conditioner restores flexibility to weatherstripping that's begun to harden. Apply generously, let it absorb, and enjoy the bonus of UV protection that slows future degradation.

3

Repair tears or pulled sections. Apply weatherstrip adhesive to torn edges, press firmly, and hold until the bond sets. For a section pulled from the channel, run a thin even bead of adhesive in the body channel, press the seal back in, and hold consistent pressure along its full length for several minutes. Don't rush it.

4

Check door alignment. Sometimes a misaligned door is the real cause — it isn't closing squarely against the seal regardless of condition. If the door sags or the latch catches awkwardly, an alignment adjustment is needed before any seal repair will hold.

5

Test the repair. Once the adhesive has fully cured, run a garden hose (not a pressure washer) around the door frame and check inside for intrusion, then repeat the dollar-bill test around the perimeter. Both have to pass before the repair counts as done.

Major Damage: Full Seal Replacement

When the weatherstrip is extensively cracked, brittle throughout, or missing sections, targeted repair isn't worth it. Full replacement is the right call — and it's still a straightforward DIY job with the right materials.

What you'll need

Replacement weatherstripping matched to your year/make/model, plastic trim removal tools, adhesive remover, a plastic scraper, microfiber cloths, and weatherstrip adhesive (if the replacement isn't self-adhesive). Match the seal to your specific vehicle — generic aftermarket seals often have dimensional variations that stop them seating correctly, so dealer or OEM-matched parts are worth it.

1

Remove the old seal. Pull it from the channel by hand. For clips, release them with plastic trim tools so you don't scratch the paint; for adhesive, apply remover and work carefully with a plastic scraper. Never use metal tools — they damage the surface the new seal must bond to.

2

Clean the channel completely. This step makes or breaks the job. Remove every trace of old adhesive with remover and clean cloths — a spotless, dry, grease-free surface is essential. Rushing this is the top reason replacements fail within the first season.

3

Install the new seal. Start at a bottom corner and work around the full perimeter. Snap each clip fully home, or lay a thin consistent bead of adhesive before pressing the seal in. Don't stretch it around corners — stretching pulls it back later and opens gaps. Let it settle naturally into the channel profile.

4

Let it cure before closing the door. Closing on uncured adhesive is the number-one cause of DIY seal failure — the seal compresses before the bond sets and loses its grip. Most adhesives need one to four hours; check the spec, then run the dollar-bill and hose tests before calling it done.

When the Seal Has Been Leaking a While: Mold in the Door and Floor

⚠️ Fixing the seal does not remove mold that's already established

A seal that's been letting water in for weeks or months has been quietly saturating materials you can't easily see — carpet padding under the mats, the foam backing inside the door panel, and the cavity between the door skin and trim. Mold can establish in those materials within 24 to 48 hours and keeps growing as long as moisture is present.

Repairing the seal stops the moisture going forward. It does not eliminate mold that has already taken hold in those materials. If the interior smells musty, the carpet is stained, or the mat feels damp days after a rain, the mold is already there — the seal repair is necessary but not sufficient. Symptoms of mold exposure that track your driving — congestion, headaches, or fatigue that ease when you're away from the car — are further confirmation.

REALITY: A musty odor that lingers after you reseal the door isn't a repair-quality issue — it's mold still living in the materials where the water went. That calls for professional remediation, not a second pass at the weatherstrip.

That's where Car Mold Guys comes in. Working to the ANSI/IICRC S520 standard, we remove the contaminated carpet padding, dry the substrate, treat the vehicle with chlorine dioxide gas, decontaminate the door panels, purge the HVAC system, fit a MERV 13 cabin filter, and finish with encapsulation — a mold-inhibitor sealer applied as the final step, after removal and never as a substitute for it — then verify the interior is clear.

Preventing Seal Failure: Maintenance That Costs Almost Nothing

Simple habits that extend weatherstrip life

Clean the seals every three to six months. Wipe debris from the channel and seal surface during washes — grit packed against the rubber is the most preventable accelerant of wear.

Apply a rubber protectant twice a year. A UV-blocking conditioner in spring and fall restores flexibility and prevents cracking — especially important in the Southeast's high UV.

Inspect at seasonal changes. Catching a small tear before it becomes a gap saves a full replacement — run the dollar-bill test around all four doors every six months.

Never leave wet items in the vehicle. Wet towels, gym bags, and damp mats raise interior humidity continuously, which degrades rubber as much as UV does.

Address interior dampness within 24 hours. If water gets in, extract it and dry the interior with the doors open before closing up. Our guide to drying out a wet car lays out a systematic approach.

Frequently Asked Questions

How much does door weatherstripping replacement cost?

DIY replacement seals typically run $20 to $80 depending on the vehicle. Professional installation at a body shop or dealership can range from $150 to $400 per door, depending on labor rates and seal complexity.

Can I drive with a leaking door seal?

Technically yes — but every drive in the rain means more moisture inside. The longer you wait, the greater the risk of mold in the padding and door panels, and the more involved the eventual remediation. Address it at the first sign of failure.

How long does weatherstripping last?

Most factory weatherstripping lasts 8 to 12 years under normal conditions. Heat, UV, infrequent cleaning, and temperature cycling all shorten that — which is why vehicles in the Southeast often see seals fail earlier than national averages suggest.

My car smells musty but I can't find visible mold — could a door seal be the source?

Absolutely. Moisture from a door seal soaks into carpet padding, door-panel foam, and floor insulation — materials you can't easily see. A musty odor is a reliable early indicator that mold is present even when the surface looks clean. See our guides to mold you can't see in a car and hidden mold hotspots for where it's likely hiding.

The Bottom Line

A failing door seal is one of the most common — and most preventable — causes of vehicle water intrusion, and one of the clearest paths to interior mold. Caught early, it's a simple, inexpensive repair. Left through multiple rain events, it becomes a layered problem: damaged weatherstrip, wet padding, and mold in the door panels and floor, each needing its own response. Fix the seal, dry the interior immediately if water got in, and if the musty smell persists afterward, know that the seal repair was necessary but not sufficient — the mold that established during the leak still needs to be professionally eliminated.

Resealed the Door but the Musty Smell Won't Leave?

If a door seal leak has been feeding mold in your floor and panels, Car Mold Guys eliminates it at the source — carpet padding removal, chlorine dioxide treatment, door-panel decontamination, HVAC purge, MERV 13 filter, and encapsulation, all verified. 100% mobile across Georgia, South Carolina, North Carolina, Tennessee, Florida, and Alabama, backed by a 90-day warranty.

Schedule a Professional Mold Assessment

What Causes Cowl Water Leaks?

What Causes Cowl Water Leaks?

Cowl Water Leaks: Causes, Signs, and How to Fix Them

One of the sneakiest water intrusion problems a vehicle owner faces — and one of the most reliable pathways to a mold-infested interior

#1
Most common cowl leak cause — clogged drain channels that are entirely preventable with twice-yearly cleaning
24–48
Hours before mold begins colonizing wet carpet padding once cowl leak water reaches the cabin floor
10+
Years of vehicle age at which cowl seals and gaskets routinely begin failing from heat cycling and UV exposure

A slow drip you ignore today can turn into a mold-infested interior tomorrow. Cowl water leaks are among the sneakiest and most damaging water intrusion problems a vehicle owner can face. They start silently, hide under carpet padding and behind kick panels, and by the time you smell something musty or notice wet floor mats after a rainstorm, the damage is already weeks or months in the making.

This guide covers everything you need to know: what the cowl is, what causes it to leak, how to recognize the warning signs early, how to fix it yourself or with a professional, and — critically — why fixing the leak alone is not always enough if water has already been reaching your interior.

What Is the Cowl — and Why Does It Leak?

The cowl is the panel at the base of your windshield, between the hood and the bottom of the glass. It is designed to channel rainwater away from your engine bay and cabin through a series of drain channels that route water safely out and down to the ground beneath the vehicle. It is an elegantly simple system — when it works.

When it fails, cowl water has nowhere to go except inward — through HVAC vents, along firewall seams, or through floor pan gaps — directly onto the carpet and padding that covers your vehicle's floor. Because the cowl sits in a location drivers rarely inspect, the leak often operates undetected for months before any interior sign appears. By then, mold has already been growing in the saturated materials below.

Four Causes of Cowl Water Leaks

Understanding the root cause is what determines the correct repair. These four culprits cover the vast majority of cowl leak cases — and each requires a different fix.

1 · Clogged Drain Channels

The most common cause — and the most preventable. Leaves, pine needles, seed pods, and general debris accumulate in the cowl tray over time, eventually blocking the drain outlets. When those drains are blocked, rainwater has nowhere to exit. It pools, backs up, and finds the path of least resistance into your cabin — typically through HVAC vents, firewall seams, or floor pan gaps. Vehicles parked near trees or in areas with heavy seasonal leaf fall are especially vulnerable.

2 · Deteriorated Seals and Gaskets

The cowl area is lined with rubber seals and foam gaskets that keep water out of the seams between panels. Heat cycling, UV exposure, and age cause these seals to crack, harden, and shrink — losing the ability to maintain a watertight barrier. This failure mode is particularly common in vehicles more than ten years old or those parked outdoors year-round without shade. Once a seal fails, water migrates along the body seams into the interior continuously with every rain event.

3 · Damaged or Misaligned Cowl Panel

A cowl panel cracked by a minor collision, warped by heat, or improperly reinstalled after body work becomes a direct water intrusion point. Even a small gap or misalignment — a panel sitting a few millimeters proud of its designed position — creates a channel that funnels significant water inward. If your vehicle has had any front-end body work, the cowl panel should be the first place you inspect when investigating a water leak.

4 · Faulty Windshield Sealing

The windshield and cowl work as a system. If the windshield was recently replaced and not properly sealed, or if the original urethane adhesive has aged and cracked, water bypasses the cowl entirely and runs directly into the cabin along the base of the glass. The Auto Glass Safety Council provides guidance on proper installation standards — worth understanding before trusting a low-bid replacement shop.

Five Warning Signs of a Cowl Water Leak

Cowl leaks are slow and subtle in their early stages. These are the indicators that should send you directly to an inspection rather than a wait-and-see approach.

Wet Carpets or Floor Mats
Water pooling on the driver's or passenger's side floor — especially after rain — is the clearest indicator of a cowl leak reaching the cabin. Do not simply dry it and move on. The carpet surface drying does not mean the padding beneath has dried, and wet padding produces one of the most persistent mold odors in automotive remediation.
Persistent Window Fogging
Excess moisture trapped inside the cabin raises humidity levels, causing persistent window fogging that no amount of defrost or AC seems to resolve for long. If your windows fog immediately after starting the vehicle even without occupant breath condensation, elevated cabin humidity from a water source is the likely cause.
Musty or Mildew Smell
A musty odor in the cabin is almost always mold or mildew growing in wet carpet padding, under seats, or inside the headliner. By the time this smell is noticeable, mold colonies have already established and are actively releasing spores into the air you breathe on every drive.
Water Stains on Interior Panels
Rust-colored tide marks or water stains on the lower A-pillar trim, kick panels, or carpet edges near the firewall indicate ongoing water intrusion that has been present long enough to leave a trace. These stains often reveal mold staining in the materials below the surface as well.
Electrical Gremlins
Water and automotive wiring are genuinely incompatible. Cowl leaks that go unaddressed can cause intermittent electrical faults — flickering dash lights, blown fuses, malfunctioning sensors — particularly in vehicles where wiring harnesses run through the firewall near the cowl drainage area. Unexplained electrical issues in an older vehicle should always include a water intrusion check.

How to Fix a Cowl Water Leak — Step by Step

1

Clear the Cowl Drain Channels

Remove any plastic covers or windshield wiper arms to access the cowl tray. Clear all debris by hand, then flush the drain outlets with a garden hose. Water should drain freely and visibly exit from underneath the vehicle. If it backs up or pools, use a flexible plumber's snake or short burst of compressed air to clear the blockage. This step alone resolves the majority of cowl leak cases — and takes less than 30 minutes.

2

Inspect and Replace Deteriorated Seals

With the cowl tray exposed, press on the foam and rubber seals along all seams and edges. They should feel soft and pliable with even contact along the entire run. Any seal that crumbles, cracks, shows obvious gaps, or feels hard and brittle needs replacement. Self-adhesive foam weatherstripping from any auto parts store works well for minor repairs. For seam sealing, an automotive-grade polyurethane sealant applied carefully along the seam perimeter provides a durable, waterproof bond.

3

Check the Cowl Panel for Damage or Misalignment

Inspect the panel itself for cracks, warping, or misalignment. If it was previously removed for body work, confirm it is seated correctly and all retaining clips are fully engaged. A panel sitting even a few millimeters out of position creates a water channel. Minor cracks can be sealed with automotive polyurethane; a panel that is warped or significantly damaged should be replaced.

4

Run a Water Test Before Closing Up

Before reassembling anything, simulate rainfall with a garden hose and have someone observe the interior — particularly the floor, kick panels, and firewall area — for any signs of water entry. This step pinpoints any remaining leak paths while everything is still accessible. Do not skip this step and assume the repair held — confirming it with a test costs five minutes and prevents returning to the same job twice.

5

Address the Windshield Seal if Needed

Run a fingertip along the base of the windshield seal. Any gap, crack, or separation from the glass or pinch weld is a water entry point that needs resealing. Minor gaps can sometimes be addressed with windshield urethane sealant. A seal that has failed along a significant run, or a windshield that was improperly installed during a prior replacement, will likely require a professional auto glass technician to reseat properly.

6

Call a Professional If the Leak Persists

Some cowl leaks are straightforward drain clearances. Others require smoke testing or UV dye to trace a leak path that defies visual inspection. If you have cleared the drains, replaced the seals, confirmed the panel, and the interior is still getting wet — stop guessing and bring in a qualified mechanic or auto body shop for a definitive diagnosis. Car Mold Guys also provides expert vehicle water leak diagnosis as part of every remediation engagement, finding and repairing the source before any mold treatment begins.

The Hidden Danger — Fixing the Leak Is Only Half the Battle

⚠️ What Most Cowl Leak Repair Guides Don't Tell You

Fixing the leak stops the moisture source. It does not address what happened to the interior materials during the time the leak was active. Carpet backing, foam padding, and door panel insulation absorb water and hold it long after the surface feels dry to the touch. Mold can establish within 24 to 48 hours of initial wetting — meaning a cowl leak active through just one or two rain events may have already seeded a mold colony in your floor materials.

Those mold spores circulate through your HVAC system into the air you breathe every time you drive. For anyone with respiratory sensitivities, allergies, or asthma, that recirculated air is not merely unpleasant — it is a genuine health exposure. Mold exposure symptoms that worsen during or after commutes and improve when you are away from the vehicle are the key diagnostic pattern to watch for.

Once mold is established in a vehicle's interior, surface cleaning does not solve the problem. Effective car mold remediation follows the ANSI/IICRC S520 standard: removing contaminated materials — padding that has been colonized must come out entirely — drying the substrate, neutralizing mycotoxins with chlorine dioxide gas, decontaminating the HVAC system that has been distributing spores throughout the cabin, fitting a MERV 13 cabin air filter, and finishing with encapsulation — a mold-inhibitor sealer applied as the final step, only after the contaminated material is gone and never as a substitute for removing it.

How to Prevent Cowl Water Leaks

Prevention costs a fraction of repair — in time, money, and the health consequences of mold exposure. These habits address every cowl leak cause before it develops.

Cowl Leak Prevention Habits

Clean your cowl tray at least twice a year — spring and fall are the critical windows, especially if you park near trees. A five-minute debris clear prevents the most common cowl leak cause entirely.

Inspect cowl and windshield seals annually, particularly before the rainy season. Press the seals along their full run — any brittleness, cracking, or gaps warrant replacement before the first heavy rain.

After any front-end body work, confirm the cowl panel was properly reinstalled and sealed before accepting the vehicle. A panel misaligned at the shop will leak at home.

Park in covered or sheltered areas when possible to reduce cumulative UV and weather exposure on seals and gaskets. Garage parking extends weatherstrip and seal life significantly in Georgia's climate.

Address any musty smell immediately — do not wait to see if it resolves on its own. It will not. A musty odor means mold is already present. See our guide to detecting mold in a car to assess what you are dealing with before deciding next steps.

If water enters the cabin, dry it within 24 hours. Use towels to extract standing water and run the defroster with doors open. Our guide to drying out a wet car covers the full protocol to stay ahead of the mold colonization window.

The Bottom Line

A cowl water leak starts small and silent. But water is patient — and given enough time and sustained dampness, it degrades carpet, rusts floor pans, corrodes wiring, and cultivates a mold problem that is far more expensive and health-impacting to correct than the original leak ever was. The cowl is one of the most common vehicle water leak sources we diagnose — and one of the most reliably preventable with basic maintenance habits.

Catch it early. Fix it correctly. And if the interior has already taken on water — if the carpet is stained, the floor feels damp, or the musty smell has arrived — know that the cowl repair and the mold remediation are two separate problems that both need addressing. Car Mold Guys handles both: water leak diagnosis and repair plus complete professional mold remediation, as a single integrated mobile service. Make sure the person you call is a genuine remediator, not a detailing mold pretender.

Cowl Leak Fixed but the Musty Smell Is Still There? The Mold Didn't Leave With the Water.

Car Mold Guys provides complete professional vehicle mold remediation — including water leak source identification and repair, contaminated padding removal, chlorine dioxide treatment, full HVAC decontamination, a MERV 13 cabin filter, and final-step encapsulation. 100% mobile. We serve Georgia, South Carolina, North Carolina, Tennessee, Florida, and Alabama, backed by a 90-day warranty.

Schedule a Professional Assessment

Does the Color of Mold Determine If It’s Dangerous?

Does the Color of Mold Determine If It’s Dangerous?

Does the Color of Mold Determine If It's Dangerous?

Short answer: no. Longer answer: color is a clue worth reading — as long as you know what it can and can't tell you.

5
Color families that account for nearly all mold growth people encounter
0
Species that can be reliably identified by color alone — identification requires a microscope
24–48
Hours after water intrusion before any of them can begin colonizing

You spot a dark patch growing on your car seat, in the trunk well, or under a floor mat. Your first instinct? That looks black — it must be toxic.

It's a completely natural reaction. For years the term "toxic black mold" has appeared in headlines and home renovation shows until it became shorthand for danger. But here's what most people — and plenty of well-meaning DIYers — get wrong: mold color is one of the least reliable ways to assess how dangerous a mold problem actually is.

This guide covers what each color tends to indicate, where that inference breaks down, and — more usefully — what actually does determine whether a mold problem is dangerous. Because something does. It just isn't pigment.

Why Mold Color Is Misleading

Mold is a fungus, and like all living organisms it responds to its environment. The color you see isn't a fixed property of the species — it's the product of several shifting variables.

Substrate

What the mold is growing on changes how it looks. A species feeding on leather upholstery can appear entirely different from the same species on carpet backing or headliner fabric.

Moisture Level

Wet, actively growing mold and dried, dormant mold of the same species can present in completely different colors. A patch that looks harmless and chalky may simply be thirsty.

Colony Age

A patch that starts white or gray commonly darkens to green or black as it matures and begins producing spores. Color tells you something about timing, not identity.

Mixed Colonies

Several species growing side by side in one patch is the norm rather than the exception, producing a mottled appearance that belongs to no single species at all.

Light exposure adds a fifth variable — both UV and darkness affect pigmentation. The practical upshot: you cannot reliably identify a mold species, or its danger, by color alone. That requires laboratory analysis, including microscopic examination of spore structure and growth morphology.

A Color-by-Color Guide — and What Each One Might Mean

Color isn't diagnostic, but it is a starting point. Here's what you're most likely looking at in each case.

Green

Green is the most common mold color and covers a wide range of species. The three most frequently identified are Aspergillus, found nearly everywhere including in the air we breathe daily; Penicillium, famous for penicillin but a serious allergen indoors and common in water-damaged vehicles; and Cladosporium, among the most widespread molds worldwide and a frequent asthma trigger.

The takeaway: green mold is almost never "the harmless one." It tells you there is a moisture problem, and several green species produce mycotoxins every bit as concerning as any black mold. Our guide to green mold types breaks down all five.

Black

The most misunderstood color on the list. Not all black mold is Stachybotrys chartarum — dozens of species produce black or very dark coloration, including Cladosporium and Alternaria, which are considerably less dangerous in most circumstances. Our article on whether all black mold is toxic covers the confusion in depth.

Stachybotrys is the species that earns the "toxic" label. It produces mycotoxins associated with neurological symptoms, respiratory problems, and chronic fatigue. But it has specific requirements: high cellulose content and sustained moisture over time. It grows slowly, and typically appears as a slimy, greenish-black coating rather than a powdery one.

The important point stands: you cannot distinguish Stachybotrys from other dark molds by looking at it. Only laboratory testing confirms it — see the EPA's overview of mold and health.

White

White mold gets overlooked more than any other color because it reads as dust, lint, or mineral deposit. Common white-forming molds include Aspergillus, Penicillium, and Sclerotinia. It should never be dismissed — white growth is frequently early-stage, and will darken and spread without intervention. Catching it at this point is the best outcome available, not the least concerning one. See white mold types and identification.

Yellow and Orange

Yellow and orange molds turn up on wood, food, and damp organic material. Serpula lacrymans, the dry rot fungus, displays yellow to rust-orange coloration and causes significant structural damage alongside its health risks. In a vehicle, yellow growth most often appears on trim, wood-veneer panels, or organic debris left in a footwell — and signals that moisture has been present long enough for something specialized to establish.

Pink and Red

Often not mold at all. Pink or red growth in consistently wet areas is frequently Serratia marcescens — a bacterium rather than a fungus — though certain Fusarium species also present this way. Either poses a risk to people with weakened immune systems, and the distinction matters because bacterial growth responds differently to treatment. More on red mold types.

The Better Question: What Does Any Mold Mean for Your Health?

Regardless of color, mold in an enclosed space you occupy daily is a signal worth taking seriously. The World Health Organization's guidelines on dampness and mould concluded that damp, moldy environments increase the prevalence of respiratory symptoms, allergies, and asthma in otherwise healthy people — independent of which species is present. That finding is the strongest argument against color-based triage: the risk attaches to the dampness, not the pigment.

Common symptoms, whatever the color
  • Sneezing, runny nose, and nasal congestion
  • Coughing and wheezing
  • Red or irritated eyes
  • Skin rashes
  • Headaches and fatigue
  • Worsening asthma or allergy symptoms

Where heavy mycotoxin producers are involved, symptoms can be more severe and longer lasting. Children, elderly passengers, pregnant women, and anyone immunocompromised carry the greatest risk. Our guide to mold exposure symptoms covers the full picture.

What Actually Determines How Dangerous Mold Is

If color doesn't tell you, something has to. Four factors do the real work — and none of them are visible from across the room. The EPA's mold FAQ is a useful reference on several of them.

The four factors that matter
1
Species and strain

Some molds produce mycotoxins, others don't, and some do so only under particular conditions. Two colonies that look identical can behave completely differently — which is the single clearest reason color fails as a proxy.

2
Fragmentation

Dead or dried mold keeps releasing spore fragments, cell wall particles, and β-glucans — all of which can provoke an inflammatory response long after the colony itself has been killed. This is precisely why dead spores are still harmful, and why killing mold is not the same as removing it.

3
Exposure pathway

Inhalation is both the most common route and the most harmful. Skin contact matters less but is real, and cross-contamination through ventilation systems and fabrics is how a contained problem stops being contained.

4
Environment

Air volume, material porosity, heat cycling, and recirculation determine how much of the above actually reaches you. This is where vehicles diverge sharply from buildings — and why the next section exists.

Notice what isn't on that list. Not color, and not, on its own, species identification either. Even a laboratory species ID doesn't measure your actual risk — health effects depend on the load you're exposed to, how long you're exposed, and your individual sensitivity. A confirmed Stachybotrys result on a patch the size of a stamp in a garage is a different proposition from a Cladosporium colony throughout a car you drive two hours a day.

Which is why professional remediation doesn't organize itself around identifying the culprit. It organizes around the moisture source, the extent of material contamination, particle control during the work, and physical removal — not merely killing what's there.

Why Color Matters Even Less in a Vehicle

A car is a sealed moisture trap. A wet umbrella left on a seat, a forgotten water bottle, or a small leak around a window seal can trigger colonization within 24 to 48 hours under the right conditions. Growth establishes in seat foam, carpet backing, headliner batting, and inside the HVAC system — which means every time you run the fan, spores are distributed through the cabin.

The same species that colonize buildings colonize vehicles. What changes is the exposure: roughly 100 cubic feet of recirculated air, breathed at close range, often for hours a day. A patch too small to worry about on a basement wall is a materially different proposition on a driver's seat. A musty smell and visible spotting of any color warrants investigation — start with detecting mold in a car and the hotspots worth checking first.

When to Stop Guessing and Call a Professional

If you can see mold or smell a persistent musty odor, you have a mold problem — the color question is already secondary. EPA guidance puts the DIY threshold at roughly 10 square feet of growth on hard surfaces, and a vehicle interior is almost entirely porous material where that threshold doesn't translate cleanly.

⚠ Call a professional straight away if
  • The growth extends beyond a small patch on a hard surface
  • You or a passenger has unexplained symptoms that ease away from the vehicle
  • The mold is in the HVAC system — you cannot reach it
  • It returned after cleaning, which means the moisture source is still active
  • You suspect water intrusion beneath carpet or behind panels

Proper vehicle remediation to the ANSI/IICRC S520 standard means finding and repairing the moisture source, removing contaminated padding, HEPA extraction, chlorine dioxide gas treatment to neutralize mycotoxins, a full HVAC purge, a fresh MERV 13-grade cabin filter, and encapsulation as the final step. It also matters that dead spores remain harmful — killing a colony is not the same as removing it, whatever color it was.

The Bottom Line

Black ≠ most dangerous
White ≠ safe
Dead mold ≠ harmless

Mold color is a clue, not a conclusion. Black mold isn't automatically toxic, and green or white mold isn't automatically safe. What determines risk is the species, the extent of growth, the moisture source driving it, and the health of the people breathing it. If you're dealing with mold in a vehicle — a space where you spend real hours in sealed air — a professional assessment is the only way to know what you're actually facing.

Whatever color it is, we'll tell you what it actually is.

Car Mold Guys provides complete professional vehicle mold remediation to the ANSI/IICRC S520 standard: moisture source identification and leak repair, contaminated padding removal, full drying, HEPA extraction, chlorine dioxide gas treatment, professional HVAC purge, a MERV 13 cabin filter, and final-step encapsulation once removal is verified complete. 100% mobile across Georgia, South Carolina, North Carolina, Tennessee, Florida, and Alabama, backed by a 90-day warranty.

Schedule a Professional Mold Assessment

Call Today!