Ways to Improve the Interior Air Quality of Your Vehicle

Ways to Improve the Interior Air Quality of Your Vehicle

Ways to Improve the Interior Air Quality of Your Vehicle

The air inside your car can be more polluted than the air outside — here's how to fix that, one system at a time.

90%
Share of our time most of us spend indoors, cabin air included, breathing whatever accumulates
1
Root cause behind most cabin air problems, and it is almost always moisture
0.3 µM
Particle size a true HEPA filter captures, small enough to trap mold spores

If you've ever climbed into your car on a hot Georgia morning and been hit with a wall of stale, musty air, you already know that vehicle interior air quality isn't something to ignore. What you may not realize is that the air inside your car can be more polluted than the air outside — sometimes by a significant margin. Dust, allergens, bacteria, mold spores, and volatile organic compounds (VOCs) all build up over time in your cabin, affecting your health, your comfort, and even your ability to focus behind the wheel.

The good news is that most of these issues are both preventable and fixable. Whether you're dealing with a persistent musty smell, allergy flare-ups during your commute, or something more serious like visible mold growth, this guide covers what you need to know to improve the air quality in your vehicle and breathe easier every time you drive.

1. Start With a Deep Clean — the Foundation of Good Air Quality

You can't air-filter your way out of a dirty interior. Before anything else, a thorough cleaning is essential.

  • Vacuum every surface regularly. Dust mites, pet dander, pollen, and mold spores hide in carpet fibers, seat cushions, and floor mats. Use a vacuum with crevice and upholstery attachments to reach under seats, around seat rails, and deep into door pockets. The EPA recommends regular vacuuming, ideally with a HEPA-filtered vacuum, as a frontline defense against airborne particulates — and that applies to your car as much as your home.
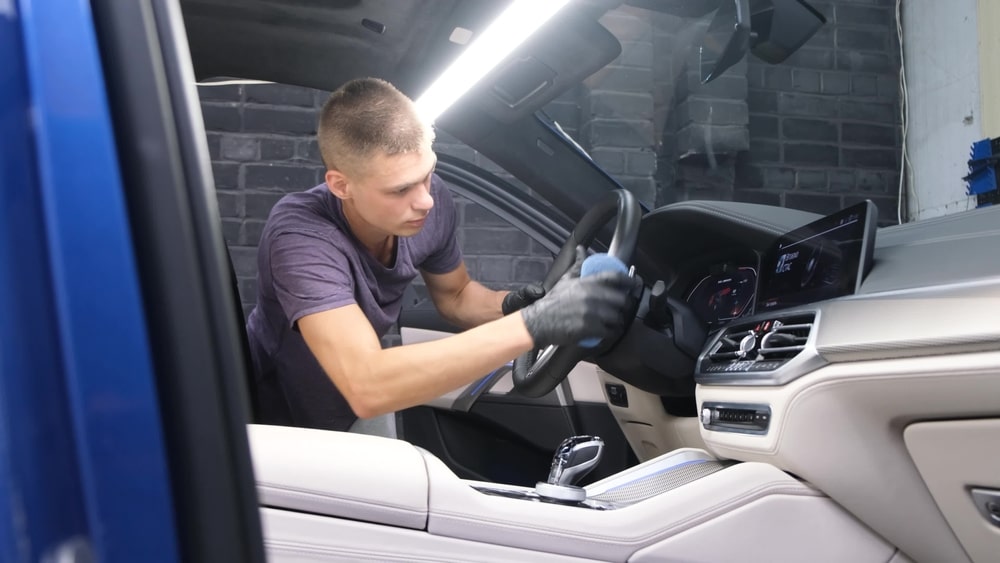
  • Clean and disinfect high-contact surfaces. Steering wheels, gear shifters, door handles, and center console touchpoints are where bacteria accumulate fast. Wipe them down weekly, especially during allergy or cold and flu season.
  • Don't forget the trunk. Wet sporting equipment, forgotten groceries, and damp gym bags create moisture reservoirs that promote mold growth, which then circulates through your vehicle's air system.

2. Replace Your Cabin Air Filter

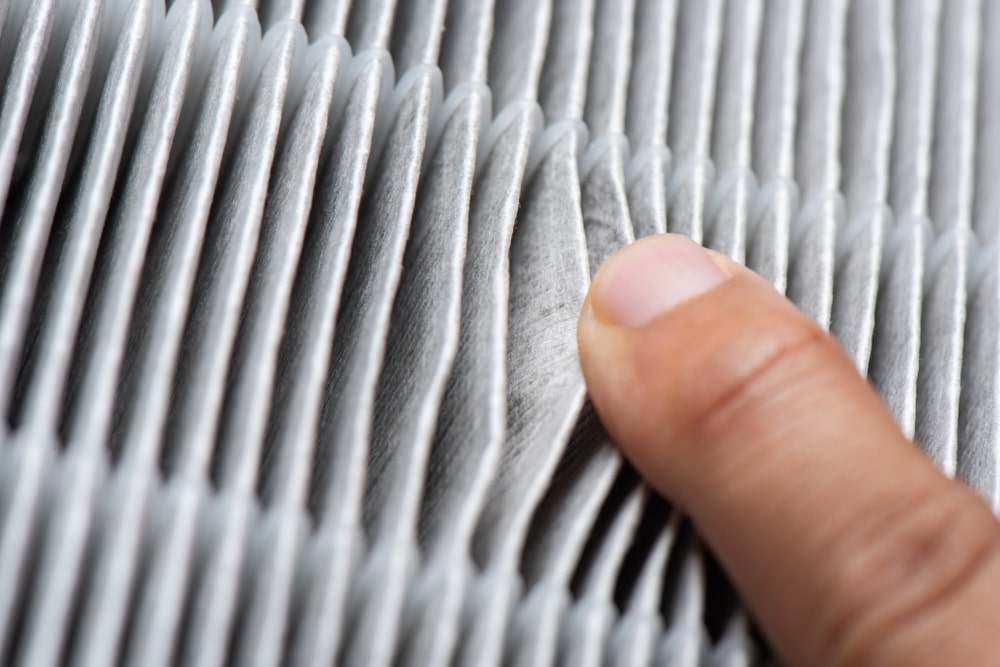
Your cabin air filter is the single most impactful mechanical component for interior air quality — and one of the most commonly neglected maintenance items on the entire car. It traps dust, pollen, smog particles, bacteria, and mold spores before they enter your cabin through the HVAC system. When it clogs, it stops doing its job and can become a breeding ground for the very contaminants it was meant to block.

Replacing it is typically a straightforward DIY job that takes under 15 minutes. Check your owner's manual for the location and the recommended replacement interval, or ask your mechanic at your next oil change. For drivers with allergies or asthma, upgrading to a MERV 13-grade cabin filter gives significantly better filtration of fine particles and allergens than a standard economy element.

3. Address Mold and Musty Odors — This One's Bigger Than You Think

That musty, earthy smell coming from your air vents isn't just unpleasant — it's a sign that mold or mildew is actively growing somewhere in your vehicle's interior. This is one of the most serious car interior air quality issues you can face, and it's more common in the Southeast than most people realize. Georgia's heat and humidity create ideal conditions for mold to thrive in vehicles, especially inside HVAC evaporator cores, under seats, and beneath carpeting where moisture collects.

Common sources of car mold
  • Water intrusion from a faulty door seal or sunroof drain
  • Flooding or water damage
  • Damp floor mats left in place over time
  • Leaking AC systems that drip condensation into the cabin
  • Wet items left in the car repeatedly

Mold exposure in an enclosed space like a car can cause headaches, fatigue, sinus congestion, eye irritation, and respiratory issues — particularly for people with mold sensitivities or compromised immune systems. The American Lung Association notes that mold exposure can trigger allergic reactions and asthma symptoms, and that indoor dampness alone — even without visible mold — is linked to asthma attacks and other respiratory problems. According to the CDC, mold affects people differently, but prolonged exposure in a confined environment is a legitimate health concern.

⚠️ When surface cleaning won't be enough

If you're dealing with visible mold growth, a strong musty odor that returns after cleaning, or health symptoms that improve when you exit the vehicle, professional auto mold remediation is the right call. Surface wiping doesn't reach mold embedded in carpet padding, foam, or HVAC components. Car Mold Guys identifies the source, eliminates active mold colonies, treats with chlorine dioxide gas, and addresses the underlying moisture issue so it doesn't come back.

4. Use a Car Air Purifier With a True HEPA Filter

Portable car air purifiers have come a long way and are now a genuinely effective tool for improving cabin air quality — especially for allergy sufferers, asthma patients, or anyone commuting in high-traffic areas. Look for units that feature:

  • True HEPA filtration (not just "HEPA-type") — captures 99.97% of particles 0.3 microns or larger, including mold spores, pollen, and bacteria.
  • An activated carbon layer — neutralizes chemical odors, VOCs, and smoke.
  • A compact design — fits in a cup holder or clips to a vent.
⚠️ A caution on ionizers

Some purifiers are ionizers, which charge airborne particles so they stick to surfaces rather than staying airborne. The tradeoff is that many produce trace ozone, a lung irritant. The California Air Resources Board advises against running ozone-generating devices in spaces occupied by people or pets, and notes that its certification confirms only that a device stays under an ozone limit — not that it is safe or effective. For a vehicle cabin, a mechanical true-HEPA unit that generates no ozone at all is the safer choice.

5. Maintain Your Vehicle's HVAC System

Your heating, ventilation, and air conditioning system does far more than keep you comfortable — it controls air circulation throughout the entire cabin. When the system is dirty or malfunctioning, it becomes a direct pathway for contaminants to reach you.

  • Run the AC on fresh air (not recirculation) periodically to flush stale air out of the system.
  • Have the evaporator core inspected if you notice a musty smell that appears immediately when you turn on the AC — the clearest sign of mold inside the HVAC unit itself.
  • Disinfect the air intake with a purpose-built HVAC cleaner spray annually.
  • Run the fan with the AC off for the last two to three minutes of your drive — this dries the evaporator and reduces the moisture mold needs.

6. Ventilate Smarter — Fresh Air Is Free

One of the simplest and most underused tools for improving air quality in your vehicle is also completely free: fresh air. Running on recirculation for extended periods traps carbon dioxide, odors, and airborne particles inside the cabin. Recirculation has its place — keeping out diesel exhaust in heavy traffic, for instance — but it should be used strategically, not as your default.

Make a habit of switching to fresh air mode on the highway, cracking the windows slightly when parked in a safe area to let moisture escape, and giving the cabin a full air flush when you first start driving. The EPA notes that inadequate ventilation raises indoor pollutant levels by failing to dilute and carry out emissions from interior sources — a dynamic a sealed cabin makes worse.

7. Eliminate Odors at the Source — Not Just the Surface

Air fresheners and deodorizing sprays are the automotive equivalent of putting a scented candle in a room that has a leak. They cover symptoms; they don't fix problems. If your car has a persistent odor, track it to its source before reaching for a spray:

Musty or earthy smell → mold or mildew (see section 3).

Sour or rotten smell → food waste or spills soaked into carpet or foam.

Chemical or sweet smell → a potential coolant leak into the HVAC — have a mechanic check it immediately.

Dirty-sock smell from the AC vents → evaporator mold, very common in humid climates.

For genuine odor neutralization, activated charcoal bags are effective, non-toxic, and reusable. Baking soda applied to carpets and vacuumed after 30 minutes works well for mild food odors. For mold-sourced odors, the odor is a symptom of colonization that has to be remediated at the source — the professional chlorine dioxide gas treatment that reaches into porous materials is what fully clears it.

Avoid overloading your cabin with synthetic air fresheners. Many common products contain phthalates and VOCs that are themselves indoor air pollutants. If you want a pleasant scent, opt for a natural essential-oil diffuser designed for automotive use.

8. Control Moisture — the Root Cause of Most Air Quality Problems

Almost every serious car interior air quality problem — mold growth, musty odors, allergen buildup, and HVAC contamination — traces back to one thing: moisture.

  • Dry wet items immediately; don't leave damp towels, umbrellas, or gym gear sitting in the car.
  • Inspect door seals, sunroof drains, and weather stripping regularly for signs of water intrusion.
  • If your carpets feel damp or your windows fog up excessively from the inside, investigate immediately — water is likely getting in somewhere.
  • After having your car detailed or washed, leave the windows cracked in a safe location to let residual moisture escape.

Moisture control is the single best preventive measure you can take to protect your vehicle's interior air quality long term. Review the most common water leak sources in vehicles so you know what to watch for.

9. Park Smart and Reduce Pollutant Entry

  • Avoid idling in garages or enclosed spaces. Carbon monoxide accumulates quickly in confined areas.
  • Keep windows up in high-traffic or industrial areas. Exhaust particulates and ground-level ozone are highest near busy intersections and highways.
  • Park in shade when possible. Heat accelerates the off-gassing of VOCs from interior plastics, adhesives, and upholstery — that "new car smell" is actually a mix of chemical compounds.

When to Call the Professionals

Routine maintenance, good habits, and quality filtration will handle the vast majority of vehicle air quality concerns. But some situations call for professional intervention — and waiting makes them worse. It's time to call a specialist if you're experiencing any of the following:

  • Visible black, green, or white mold growth anywhere in the interior.
  • A musty odor that persists after cleaning and filter replacement.
  • Physical symptoms — sneezing, itchy eyes, fatigue, or headaches — that consistently improve once you leave the car.
  • Water damage, flooding, or a known roof or seal leak.

The Bottom Line

The air you breathe inside your car matters. Between daily commutes, weekend road trips, and carpool pickups, most of us spend a significant portion of our time in our vehicles — and that air quality has a real impact on how we feel, how we focus, and how healthy we stay. By staying on top of cabin filter replacements, keeping moisture under control, cleaning regularly, and knowing when to call in the pros for something like mold, you can maintain a genuinely healthy driving environment year-round.

A mold or odor problem that won't go away? Let's solve it at the source.

Car Mold Guys provides complete professional vehicle mold remediation to the ANSI/IICRC S520 standard: moisture source identification and leak repair, contaminated material removal, HEPA extraction, chlorine dioxide gas treatment, professional HVAC purge, a MERV 13 cabin filter, and final-step encapsulation once removal is verified complete. 100% mobile across Georgia, South Carolina, North Carolina, Tennessee, Florida, and Alabama, backed by a 90-day warranty.

Schedule a Professional Assessment

How to Remove Mold From Your Car’s Vents and AC System

How to Remove Mold From Your Car’s Vents and AC System

How to Remove Mold From Your Car's Vents and AC System

That musty smell the moment you flip on the A/C isn't just unpleasant — it's a warning.

24–48
Hours is all mold needs to colonize a damp surface inside your ventilation system
THE COIL
Where the problem actually lives, and the one place DIY sprays cannot reach
MERV 13
The cabin filter grade that belongs in your car, not a restrictive HEPA element

That musty smell the moment you flip on the A/C isn't just unpleasant — it's a warning. If your car smells like a damp basement every time the fan kicks on, there's a very good chance mold has established itself inside your vehicle's ventilation system. Left alone, it doesn't stay put: it multiplies, and every fan cycle blows it straight into the air you and your passengers breathe.

Here's the honest picture — what causes it, how to recognize it, what you can realistically do yourself, and where the DIY approach hits a hard wall.

Why Mold Grows in Car Vents

Your HVAC system pulls in outside air, passes it through a cabin filter, conditions it across an evaporator coil, and pushes it through a network of ducts into the cabin. Moisture is built into that process: condensation forms on the coil every time you run the A/C, and more arrives from rain, humidity, wet clothing, and spilled drinks. According to the EPA, mold needs only moisture and an organic food source to take hold — and your ductwork supplies both, in the dark, over and over.

Once it establishes in the evaporator housing or duct lining, it spreads. And because the system's whole job is to move air into your face, the exposure is continuous.

The Warning Signs

Mold in the ventilation system announces itself in a handful of consistent ways. Any one of these is worth acting on; several together mean the colony is well established.

A musty smell when the fan starts

Strongest in the first seconds after you turn on the A/C or heat — the clearest single sign of mold in the system.

It worsens on recirculation

Recirc pulls cabin air back across the contaminated coil and ducts, concentrating the odor rather than clearing it.

Dark spots near the vent slats

Visible discoloration at the openings usually means far more growth behind them, deeper in the ductwork.

Symptoms only in the car

Sneezing, congestion, itchy eyes, or headaches that ease once you get out point to something in the cabin air.

Condensation on the dash or floor

Often a sign of a clogged condensate drain backing up under the dash.

The smell comes back

Gone for a week or two after cleaning, then returns — the classic tell that the source was never reached.

⚠️ This is a health matter, not just an odor

In a sealed cabin you're breathing recirculated air at close range for long stretches. The EPA links mold exposure to respiratory irritation, allergic reactions, eye irritation, and worsened asthma — and elderly passengers, children, pregnant women, and anyone immunocompromised face elevated risk.

What You Can Realistically Do Yourself

If you've caught a faint odor early and there's no visible growth, a careful DIY pass is worth trying. Three things genuinely help:

  • Dry the car out completely first. Remediation in a wet car is wasted effort. Park in sun with the windows down, pull out wet mats and cargo, and check under the seats and in the trunk for standing water.
  • Replace the cabin air filter — before anything else. It's often the most contaminated single component, and running the fan with a moldy filter defeats the whole exercise. Bag the old one immediately as you pull it out.
  • Wipe the vent surfaces you can actually reach. A detail brush and a damp microfiber on the vent slats, plus a HEPA vacuum as far into the opening as the hose reaches.

And do it safely: an N95 respirator (not a cloth mask), nitrile gloves, and goggles if you're working upward into vent openings. Cleaning mold disturbs it — see our protective gear guide.

⚠️ Where DIY hits a wall

Every popular DIY method — spraying disinfectant into the cowl intake, running a "bomb" canister, fogging from a can — shares one fatal limitation: it can't reach the evaporator coil. The coil sits deep in the plenum behind your dashboard, it's permanently damp, and it is where the colony actually lives. Treat the ducts and leave the coil, and the system simply re-seeds itself. That's why the smell always comes back a few weeks later.

REALITY: A lot of advice tells you to "upgrade to a HEPA cabin air filter." Don't. A HEPA-rated filter restricts airflow far too drastically for an automotive HVAC system — you'd choke the very system you're trying to clear. The right answer is a MERV 13 electrostatically charged filter: a genuine step up in particle capture, with airflow your blower can actually push.

What a Professional Purge Actually Involves

Once mold is visible in the vents, the odor keeps returning, or passengers are having symptoms, the system needs to be treated at the source. Here's what Car Mold Guys does — and why each step exists:

1
Find the moisture source

A clogged condensate drain, a failing seal, a water leak — if the water keeps coming, so does the mold. Diagnosis comes first, every time.

2
Purge the ducting

We fill the vents and ductwork with a mold-killing foam and blow it out with compressed air, then agitate the vent louvers by hand — mechanical removal, not just a chemical mist. Here's the full purge process.

3
Treat with chlorine dioxide gas

A gas reaches the evaporator coil and plenum that no spray can touch, and it neutralizes mold and mycotoxins rather than masking odor. We don't use ozone — it's a surface deodorizer, and it degrades your rubber door and trunk seals.

4
Replace the filter and disinfect the housing

A new MERV 13 filter goes into a clean compartment — not into a housing still packed with compacted debris and growth.

5
Verify the air

We test air quality at completion. If it isn't verified, it isn't finished — that's the line between remediation and a good cleaning.

All of it aligned to the ANSI/IICRC S520 professional remediation standard. And if mold reached the carpet or seats, the contaminated padding comes out too — a vent purge alone won't fix a saturated floor.

Keeping It From Coming Back

  • Run fresh-air mode for the last few minutes of every drive — it dries the evaporator core before you park.
  • Use the defrost setting periodically — it runs the A/C compressor and helps pull moisture out of the system.
  • Change the cabin filter on schedule — annually at minimum, sooner in a humid climate.
  • Never leave wet items in a closed car — umbrellas, towels, and gym bags off-gas moisture for hours.
  • Get any water intrusion inspected — a roof, window, or door seal leak will out-run every prevention habit on this list.

If the smell keeps coming back, the coil is still dirty.

A spray can't reach where the mold lives. Car Mold Guys purges the entire ventilation system, treats the evaporator coil with chlorine dioxide gas, installs a MERV 13 filter, and verifies the air before we leave — all aligned to the ANSI/IICRC S520 standard. 100% mobile to your door and backed by a 90-day warranty, across Georgia, South Carolina, North Carolina, Tennessee, Florida, and Alabama.

Get Your Free Assessment

How Mold Spreads in a Car

How Mold Spreads in a Car

How Mold Spreads in a Car — and How to Stop It

Mold doesn't stay where it starts. Understanding how it moves through a vehicle interior is the foundation for stopping it completely.

4
Distinct pathways mold uses to move through a vehicle, each needing its own interruption
24–48
Hours from the moisture event to active colonization, before spreading begins
FAST
How a sealed cabin spreads it, with HVAC recirculation doing the distributing

If you have ever climbed into your car and been immediately greeted by a musty, earthy odor — one that does not go away regardless of what cleaning product you use or air freshener you hang — you may already be past the beginning of a mold problem. The challenging reality of vehicle mold is that by the time most drivers notice it, the colony has already spread significantly from its original location.

Mold in a car does not stay where it starts. It spreads actively and continuously through four specific pathways — and understanding each of them is what makes the difference between a surface treatment that fails within weeks and a professional remediation that holds. This article covers how mold moves through a vehicle, what creates the conditions for that spread, how to recognize it early, and what stopping it completely actually requires.

What makes a car interior ideal for mold spread

Mold is a fungus that reproduces by releasing microscopic spores. Those spores are present in virtually every environment — on clothing, in outdoor air, in soil, and on most surfaces people touch. Under ordinary conditions this is managed without issue. The problem starts when spores reach a warm, dark, moist environment with an organic food source: conditions that a vehicle interior provides almost continuously.

Cars grow mold so readily because they combine moisture from leaks and condensation, organic material from upholstery and carpet, warmth, and the near-total absence of airflow in the locations where mold most commonly establishes. Once a colony forms and begins releasing spores, the vehicle's own HVAC system becomes the primary distribution mechanism — turning a localized problem into a cabin-wide one within days. The EPA's mold guidance identifies HVAC systems specifically as one of the primary pathways for mold cross-contamination in enclosed spaces.

The Four Pathways Through Which Mold Spreads in a Vehicle

Each of these pathways operates independently — and in an active contamination, they often operate simultaneously. This is the core reason why surface-only cleaning so reliably fails to eliminate car mold: it addresses none of these spread pathways at their source.

Pathway 1 · The HVAC system, the most efficient spread mechanism

This is the most consequential mold spread pathway in any vehicle — and the one most commonly missed by detailers and consumer products alike. Your car's heating, ventilation, and air conditioning system pulls cabin air across the evaporator coil and pushes it back through the ductwork and out through the vents. Every airborne spore present in the cabin at the time the fan runs is picked up and redistributed to every vent opening simultaneously.

If mold has established on the evaporator coil — a very common location, since the coil is continuously wet from condensation — spores are deposited on every interior surface the airflow reaches. Dashboard, headliner, seats, carpet, door panels: all become secondary deposition sites with every fan cycle. The musty smell that appears immediately when the AC or heat turns on is the clearest symptom of this pathway in operation.

Car Mold Guys uses proprietary tooling to purge and treat duct interiors directly — reaching evaporator coil surfaces and duct walls that no intake spray product can access. Without this step, mold remediation of the visible cabin surfaces will fail within weeks as the HVAC system reseeds them.

ALERT: Spraying an antimicrobial product into the cabin vents or cowl intake is not HVAC decontamination. It treats the surfaces the spray can reach — a fraction of the total duct and coil surface area. The evaporator coil where the densest mold accumulates cannot be meaningfully treated this way.

Pathway 2 · Surface-to-surface contact spread

Mold colonies spread by growing outward across connected porous surfaces — not just by releasing airborne spores. Once a colony establishes in one location, the mycelium network extends in all directions through any adjacent porous material that offers both moisture and organic food. Fabric upholstery connects to foam padding. Carpet fibers connect to carpet backing, which connects to the padding beneath. The headliner fabric connects to the foam and adhesive layer behind it.

This is why visible surface mold is consistently an underrepresentation of the total contamination. The part you can see has grown out to the visible layer — but the mycelium network extends inward through the material to whatever depth moisture allowed it to reach. Surface cleaning removes the visible portion. The network beneath remains intact, re-establishes the surface colony, and the cycle continues. This is the primary failure mechanism of every surface-only treatment. See our article on why mold stains car interiors for a deeper explanation of this mechanism.

Pathway 3 · Airborne spore drift

Mature mold colonies release spores continuously. In the open air those spores disperse broadly and settle at low concentrations. In a sealed vehicle cabin of roughly 100 cubic feet, they concentrate rapidly and settle densely on every interior surface. Physical agitation accelerates this process: sitting down, closing a door, adjusting a seat, or turning on the blower motor all disturb settled spores and send them airborne again to drift and settle elsewhere — the Asthma and Allergy Foundation of America notes that disturbing a mold source is exactly what puts its spores into the air you breathe.

Any settled spore that lands on a surface with adequate moisture and organic material can germinate a new colony — meaning a single established mold source in a vehicle will progressively seed secondary colonies across the entire cabin interior over time. The hidden mold that develops in locations you never inspect is often the result of airborne spore deposition from a primary colony somewhere else in the vehicle.

Pathway 4 · Contaminated items introduced into the cabin

Not all mold in a vehicle originates from within the vehicle. Gym bags left in a hot trunk over a weekend, sports equipment that has been stored in a damp garage, wet towels or umbrellas placed on seats, and even contaminated soil tracked in on shoes can introduce mold spores — and in some cases established surface mold — that was never previously in the car.

Once introduced, these external spores follow the same three pathways described above — airborne drift to new surfaces, surface-to-surface mycelium growth, and HVAC recirculation to the full cabin. The external source adds volume to whatever spore load was already present. This is one of the reasons that vehicles carrying pets or athletic gear frequently develop mold faster than vehicles in otherwise identical conditions: more spore introduction events, more moisture introduction events, and more organic material accumulation.

Warning Signs Mold Is Already Spreading in Your Vehicle

The earlier the spread is caught, the more contained and less expensive the remediation. These indicators suggest mold has already established and is actively moving through the cabin.

Musty odor that intensifies with the AC or heat

A smell that arrives or sharpens when the blower turns on is the clearest indicator that mold is established in the HVAC system and actively being distributed by Pathway 1.

Visible spots in multiple locations

Mold appearing in more than one area — seat fabric and carpet, or headliner and door panels — indicates airborne spore drift or surface-to-surface spread is already underway. Check all known hotspots.

Symptoms that improve when you exit the vehicle

Sneezing, eye irritation, headaches, or fatigue that correlate with time spent driving and improve when you are away from the car indicate the cabin air is already carrying a significant spore load — a pattern the American Academy of Allergy, Asthma & Immunology associates with mold exposure. See the full mold exposure symptom guide.

Persistent window fogging

Condensation on interior glass that is excessive for ambient temperature indicates elevated cabin humidity from a sustained moisture source — one of the primary preconditions for continued mold spread.

Odor returns after cleaning

A musty smell that comes back within days of any cleaning effort is the clearest signal that surface treatment is not reaching the actual colony. The mycelium network beneath the surface continues producing odor and spores despite surface cleaning above it.

How to Prevent Mold From Spreading

Spread prevention, pathway by pathway
  • Fix moisture sources immediately. Every mold spread event begins with moisture. Address leaking sunroof drains, door seals, and AC condensate drains within 24 to 48 hours of discovery — the window the EPA identifies for drying wet material before mold takes hold. Review the most common car water leak sources so you know what to watch for.
  • Replace your cabin air filter on schedule. A contaminated cabin filter is both a spore reservoir and a ventilation restrictor — it actively contributes to Pathway 1 spread every time the fan runs. Inspect it at every oil change, and fit a MERV 13-grade filter rather than a standard economy element.
  • Run the AC on fresh air mode for the last few minutes of every drive. This dries the evaporator coil before the vehicle sits closed and warm, removing the moisture that enables Pathway 1 and Pathway 2 spread from the HVAC system.
  • Extract spills immediately. Surface wiping removes visible liquid; wet/dry vacuum extraction removes what has already penetrated toward the padding. Act within the first hour of any significant spill to stay ahead of the 24-to-48-hour colonization window.
  • Never leave wet items in a closed vehicle. Every wet item left in a sealed cabin contributes moisture to Pathway 4 introduction and Pathway 3 airborne drift simultaneously. Remove them every time.
  • Use desiccants during storage. Silica gel canisters or activated charcoal packs placed under seats maintain low cabin humidity in stored vehicles, preventing the passive moisture accumulation that initiates all four spread pathways. See our guide to mold growth in stored vehicles.

When Mold Is Already Spreading — What Actually Stops It

⚠ Why surface cleaning does not interrupt mold spread

Surface mold on hard, non-porous trim — plastic, glass, vinyl — can sometimes be addressed effectively with a proper mold-killing solution. But mold in carpet, seat foam, headliner, and HVAC components cannot be resolved at the surface. The mycelium network beneath the visible growth remains intact. The spore load in the HVAC system continues to redistribute. The moisture source — if not repaired — continues to feed the colony. Surface cleaning interrupts none of the four spread pathways at their source.

Additionally — and critically — scrubbing mold colonies without containment fragments them, sending spores airborne to accelerate Pathway 3 spread to surfaces the original colony had not yet reached. The EPA cautions that disturbing a moldy area can spread mold well beyond where it started. DIY mold cleaning without HEPA equipment and proper process can make the total contamination worse rather than better. Understand why dead mold spores are still harmful — killing surface mold is only the beginning of a correct remediation, not the end.

Stopping mold spread in a vehicle requires addressing all four pathways simultaneously:

1
Repair the moisture source

Every spread pathway depends on moisture remaining available. Eliminating the water source stops new colonization while treatment addresses existing contamination. Car Mold Guys diagnoses and repairs vehicle water leaks as part of every remediation engagement.

2
Remove contaminated materials

Carpet padding colonized by mold must come out entirely — the mycelium network embedded in porous foam cannot be killed in place and remain safe. Physical removal eliminates Pathway 2 spread at its primary substrate.

3
HEPA vacuuming and chlorine dioxide treatment

HEPA vacuuming captures airborne and settled spores rather than redistributing them — directly interrupting Pathway 3. Chlorine dioxide gas treatment penetrates deep into porous materials, neutralizing both live mold and the mycotoxins that persist even after the organism is killed.

4
HVAC decontamination

The cabin air filter is replaced with a MERV 13-grade filter, the housing is disinfected, and the evaporator coil and duct interior are treated directly — eliminating Pathway 1 spread at its source. Car Mold Guys uses proprietary tooling to purge duct interiors. Without this step, Pathway 1 will re-seed the treated cabin surfaces within days of any other remediation work.

Only once all four pathways have been interrupted does encapsulation come into play — a mold-inhibitor sealer applied as the final step to prevent regrowth. It is the close of a completed remediation, never a substitute for removing contaminated material in the first place.

The Bottom Line

Mold in a car does not stay where it starts. It spreads through four simultaneous pathways — HVAC recirculation, surface-to-surface mycelium growth, airborne spore drift, and external introduction — and it does so faster than most drivers expect, particularly in warm and humid environments. The good news is that each pathway has a specific intervention that stops it: moisture source repair, material removal, HEPA extraction and chemical treatment, and HVAC decontamination.

The bad news for surface cleaning is that it addresses none of these pathways. A spray and a wipe removes what is visible, disperses what was settled, and leaves all four spread mechanisms fully operational. That is why mold always comes back after surface treatment — not because the treatment was applied incorrectly, but because it was the wrong response for the biology of the problem. The difference between a professional remediator and a detailing mold pretender comes down to exactly this distinction.

Mold spreads four ways at once: we stop it dead in its tracks.

Car Mold Guys provides complete professional vehicle mold remediation to the ANSI/IICRC S520 standard: moisture source identification and leak repair, contaminated padding removal, full drying, HEPA extraction, chlorine dioxide gas treatment, professional HVAC purge, a MERV 13 cabin filter, and final-step encapsulation once removal is verified complete. 100% mobile across Georgia, South Carolina, North Carolina, Tennessee, Florida, and Alabama, backed by a 90-day warranty.

Schedule a Professional Assessment

MERV vs. HEPA: How Air Filters Work

MERV vs. HEPA: How Air Filters Work

MERV vs. HEPA: How Air Filters Actually Work

When it comes to air filters, the difference between MERV and HEPA trips up a lot of people — and choosing wrong can mean either wasted money or an underperforming system. Both trap airborne particles like dust, pollen, and mold spores, but they're rated differently, used differently, and suited to different situations. Here's a clear breakdown of how each works, when to use which, and — since clean air matters just as much inside your vehicle — what it all means for the cabin filter you breathe through every drive.

99.97%
Airborne particles a true HEPA filter captures at 0.3 microns or larger
1–16
The MERV scale, running from basic filtration up to near-HEPA capture
MERV 13
The filter rating EPA recommends as a baseline for home HVAC systems

What Is a MERV Rating?

MERV stands for Minimum Efficiency Reporting Value, a standardized rating developed by ASHRAE. The scale runs from 1 to 16 and measures how effectively a filter captures particles from 0.3 to 10 microns. Think of it like SPF for sunscreen — the higher the number, the more protection:

MERV 1–4: Entry-level. Catches lint, dust mites, and pollen — window AC units and basic furnace filters.

MERV 5–8: Mid-range. Captures mold spores, pet dander, and finer dust — a solid choice for most homes.

MERV 9–12: Higher efficiency. Blocks lead dust, auto emissions, and fine particulates — good for mild allergy sufferers.

MERV 13–16: Near-HEPA. Traps bacteria, smoke, and some viruses — hospitals, commercial buildings, high-demand homes.

For most homes, a MERV 8 to MERV 13 filter strikes the right balance between air quality and HVAC compatibility. The EPA recommends selecting a filter rated at least MERV 13, or as high as your system will accommodate — a strong baseline that improves indoor air without overburdening most residential systems.

What Is a HEPA Filter?

HEPA stands for High-Efficiency Particulate Air. Unlike MERV, which is a rating scale, HEPA is a strict performance standard: to qualify, a filter must capture at least 99.97% of all airborne particles 0.3 microns or larger — pollen, mold spores, dust-mite debris, pet dander, bacteria, and even some viruses. Originally developed during the Manhattan Project to contain radioactive particles, HEPA is now the gold standard for critical filtration, found in hospital operating rooms, pharmaceutical cleanrooms, high-end air purifiers, allergy vacuums, and aircraft cabin systems.

MERV vs. HEPA: The Core Differences

These aren't competing products you swap into the same slot — they work in different contexts. On efficiency, a MERV 16 filter captures roughly 95% of particles in the 0.3–1.0 micron range; true HEPA captures 99.97%. That gap matters most for immunocompromised people or during wildfire-smoke events. On placement, MERV filters live inside central HVAC ductwork for whole-home coverage, while HEPA filters live in standalone purifiers — most home HVAC systems can't handle HEPA's airflow resistance without straining the blower. And on cost, MERV is far cheaper ($15–$30 for a quality MERV 13) versus $40–$100-plus for HEPA purifier filters.

Head-to-Head Comparison

Feature MERV HEPA
Efficiency Varies by rating (MERV 1–16) 99.97% at ≥0.3 microns
Best application Whole-home HVAC Portable purifiers, critical spaces
Typical cost $5–$30 per filter $40–$100+ per filter
Airflow impact Low to moderate High — needs compatible system
Replacement Every 1–3 months Every 6–12 months
Best for General air quality, allergens Severe allergies, asthma, immunocompromised
DIY install Yes — standard slot Purifiers yes; whole-home no

REALITY: more is not always better. Jumping to the highest MERV you can find can backfire — if your system isn't rated for it, the added airflow resistance strains the blower, raises energy bills, shortens equipment life, and can actually worsen circulation. Always check your HVAC manufacturer's recommendation before upgrading.

Which Filter is Right for You?

Choose MERV if…
  • You're filtering through a standard residential or commercial HVAC system
  • You want better whole-home air quality without major cost or modifications
  • You have mild to moderate allergy concerns
  • You want a cost-effective, scalable solution

A MERV 13 filter is the sweet spot many HVAC pros and the EPA recommend — strong particle capture, broad compatibility.

Choose HEPA if…
  • Someone in your home has severe allergies, asthma, or a compromised immune system
  • You live with frequent wildfire smoke or heavy outdoor pollution
  • You want a room-level purifier to supplement HVAC filtration
  • Your system is specifically built to handle HEPA-level resistance

For most households, the best approach is both: a MERV 13 in the HVAC plus a portable HEPA purifier in the bedroom.

Your Car's Cabin Air Filter: the MERV That Touches You Daily

Here's the part most filter guides skip: your car has an air filter too. Tucked behind the glove box, the cabin air filter cleans the air your vents push onto you — and most factory cabin filters are basic, low-grade particulate media that let finer particles, including mold spores, slip right through.

The Filter You Breathe Through Every Commute

As part of every remediation, Car Mold Guys replaces the cabin air filter with a MERV 13-grade filter and disinfects the housing — because a high-rated filter is only as clean as the system it sits in.

That last point matters. A premium cabin filter does nothing if the ductwork behind it is already contaminated — the HVAC system is one of the most common mold reservoirs in a vehicle, which is why our full vehicle mold remediation pairs a fresh filter with a full ventilation-system purge. The EPA reaches the same conclusion for homes: air cleaners and HVAC filters don't address the cause of mold or musty odors, because the cause is a moisture problem. Filtration captures particles, but it can't fix a contamination source — that's the whole reason you can't filter or spray a moldy car clean, and why cabin air quality is worth taking seriously.

Pro Tips for Any Air Filter

  • Size matters. An ill-fitting filter lets unfiltered air bypass it entirely. Measure the slot precisely and match the exact dimensions.
  • Change on schedule. A clogged filter becomes a restriction, not a protector. Homes with pets or dusty conditions may need monthly changes.
  • Combine strategies. Filtration is one piece — pair it with source control: manage humidity, use exhaust fans, and minimize chemical off-gassing.
  • Match the contaminant. Particulate filters miss gases and odors; for mold smells or VOCs, add an activated-carbon filter alongside your MERV or HEPA media.

The Bottom Line

There's no single winner in MERV vs. HEPA — only the right answer for your situation. MERV offers versatility, affordability, and whole-home coverage; HEPA delivers elite capture for critical environments and serious respiratory needs. For most homes, a MERV 13 in the HVAC plus a HEPA purifier in the bedroom is the best of both worlds. And don't forget the smallest, most personal filter you own — the one in your car. Upgrading from a bargain-bin filter to a rated solution, at home and in the cabin, is one of the simplest things you can do for the air you breathe. Curious what a full vehicle treatment involves? Our car mold removal FAQ walks through it.

Musty smell from your vents? A new filter won't fix the source.

As the country's only specialists dedicated entirely to vehicle mold remediation, Car Mold Guys purges the ventilation system, removes the contamination, installs a MERV 13-grade cabin filter, and verifies the air you breathe — backed by a 90-day warranty and 100% mobile service across Georgia, South Carolina, North Carolina, Tennessee, Florida and Alabama.

Get Your Free Assessment

Call Today!