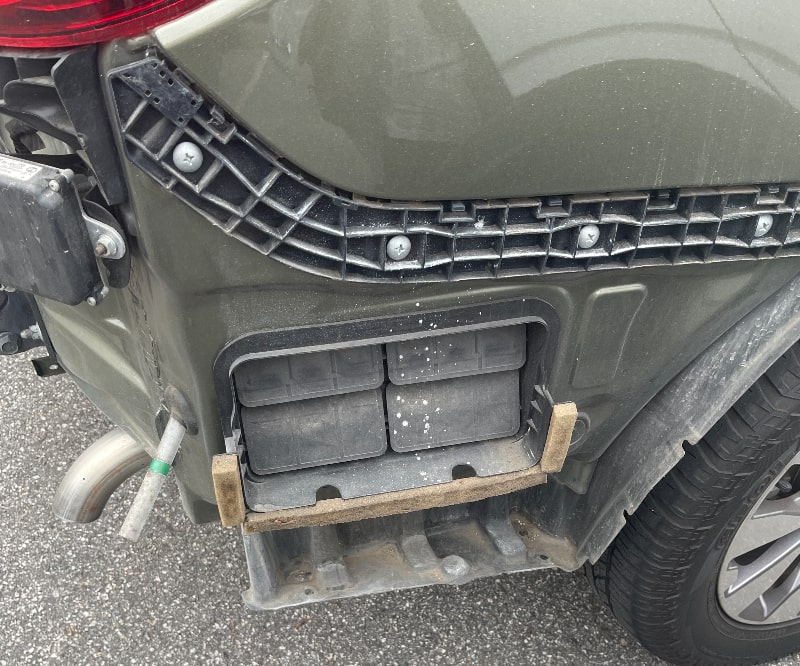
Understanding and Fixing Trunk Vent Leaks
Trunk vent leaks are a common yet often overlooked issue that can cause significant problems for vehicle owners. These leaks can lead to water pooling in your trunk, foul odors, and even damage to your car’s electrical systems and interior. In this article, we’ll explore the causes of trunk vent leaks, how to identify them, and the steps you can take to fix and prevent them.
What Are Trunk Vents?
Trunk vents are designed to allow air pressure to equalize when you open or close your car doors. They’re typically located behind the trunk’s side panels and include rubber flaps that prevent water or debris from entering the vehicle. However, if these vents become damaged or improperly sealed, they can allow water to seep into the trunk area.
Signs of a Trunk Vent Leak
- Water in the Trunk: Pools of water or dampness in your trunk after rain or car washes are the most obvious signs.
- Mold or Mildew Odors: Persistent musty smells in the trunk or cabin may indicate prolonged moisture exposure.
- Rust or Corrosion: Rust on the trunk floor or nearby components could be caused by trapped water.
- Damaged Cargo: Items stored in the trunk becoming wet or moldy is a clear sign of a leak.
Common Causes of Trunk Vent Leaks
- Aging or Damaged Vents: Over time, the rubber flaps on trunk vents can degrade or tear, compromising their ability to block water.
- Improper Installation: If the vents weren’t installed correctly during manufacturing or repairs, gaps may allow leaks.
- Clogged Drains: Blocked drainage channels around the trunk can redirect water toward the vents.
- Collision Damage: Impacts or accidents can dislodge the vents or create gaps in their seals.
How to Fix a Trunk Vent Leak
- Locate the Source of the Leak:
- Remove the interior panels in the trunk to access the vents.
- Use a flashlight to inspect the vents for visible damage or misalignment.
- Test for Leaks:
- Spray water around the vent area and check for any signs of seepage inside the trunk.
- Repair or Replace the Vent:
- If the vent is loose, tighten it or apply waterproof adhesive to secure it in place.
- Replace the vent if it’s cracked or the rubber flaps are worn out. Ensure the replacement part is compatible with your vehicle model.
- Seal Gaps:
- Apply a silicone-based sealant around the edges of the vent to prevent water from entering.
- Check and Clear Drains:
- Ensure that the trunk’s drainage channels are free of debris to allow water to flow away from the vent area.
- Reinstall Interior Panels:
- Once the repair is complete, securely replace the trunk panels and test for leaks again.
Preventative Maintenance
- Inspect Vents Regularly: Check the condition of your trunk vents during routine car maintenance.
- Keep Drains Clear: Regularly clean the drainage channels around your trunk to prevent water accumulation.
- Avoid High-Pressure Washing: Excessive water pressure can force water into areas that are typically protected.
- Address Issues Promptly: If you notice any signs of a leak, act quickly to prevent further damage.
When to Seek Professional Help
If the leak persists despite your repairs or if the trunk vent is located in a hard-to-access area, it may be time to consult a professional mechanic or auto body shop. They can accurately diagnose the issue and provide long-term solutions.
By understanding and addressing trunk vent leaks, you can protect your vehicle from water damage, maintain its value, and ensure a cleaner and drier driving experience.

